Articles > BTC University > 8 Smart Blonding Tips We Learned This Year
Last updated: December 15, 2021

8 Smart Blonding Tips We Learned This Year

close formula

Hair Color Education: 8 Courses to Take Your Blonding Game to the Next Level 

Placement strategies, gray coverage tips and slipping foil hacks—these are only some of the hair color techniques BTC University blessed us with in 2021. If you’re ready to up your blonding game in 2022, keep scrolling and take notes from BTC University’s top educators.


Spoiler alert: ALL of these classes are included in the BTC-U Member Subscription—become a Member today to start binging ASAP! Sign up now to gain unlimited access to over 150 courses for the latest techniques in color, cutting and styling!


Tip #1: For teasylights, keep sections flat to avoid an uneven tease 


Watch: Weave + Tease Foil Technique


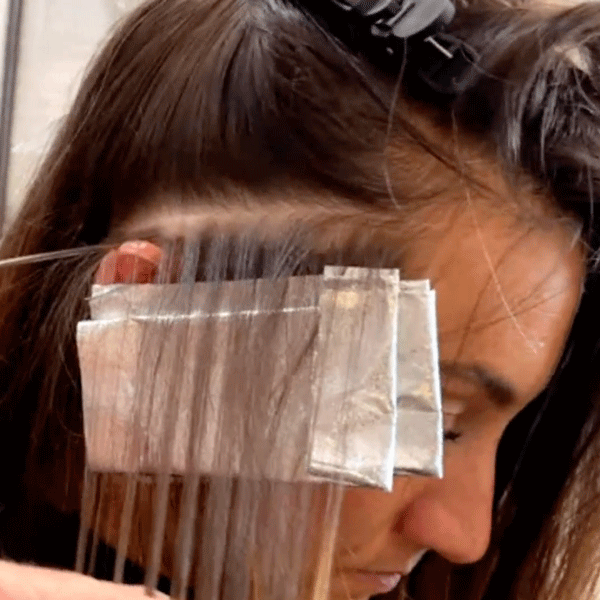
Avoid over-teasing and an uneven backcomb by holding sections flat with your index and middle finger instead of pinching. “Pinching the section really makes it difficult to achieve a seamless backcomb in one stroke,” 2021 #ONESHOT Color Video Winner Jessica Scott Santo (@jessicascotthair) explains. “It can also create a struggle when trying to brush that backcomb out, so holding the section flat will help keep everything even.” 


Pro Tip: For clients with finer hair, Jessica sprays a light texture spray onto the section before backcombing to help hold the backcomb in place while applying lightener.


Related: 3 foil tips for creating high-contrast dimension


Become a BTC-U Member to learn Jessica’s entire technique and receive unlimited access to her class!


Tip #2: Use strategic placement for minimum foiling   

To avoid over-foiling, BTC Team Member Linson Jamison (@linsonhair) uses a three-by-three placement to create bright pops of blonde but still keep dimension. Check out his placement below:  


Watch: Dimensional Balayage Refresh


  • Pivot Partings For A Contoured Money Piece: “My partings follow her hairline but they aren’t all parallel. Instead, for the other two foils, I pivot towards the client’s part. That allows me to create a money piece that is skinnier at the top but becomes wider towards the face-frame,” he explains. 


Pro Tip: Leave ends out of the foils to ensure the integrity of the hair. If dull ends need to be brightened, Linson utilizes a wet balayage application. 


  • Diagonal Back For A Connected Face-Frame: Linson uses diagonal back partings to connect the sides to the money piece. These foils should connect to the money piece and back foils, so the client’s highlights are blended throughout.


  • Combine Partings In The Back For A Blended Hairline: For clients that like to wear their hair up, a few foils in the back can go a long way—even if they can’t see them. “Everyone likes a little brightness underneath, so even if she can’t see this blend, other people can. It’s these little details that set you apart from other hairdressers and clients appreciate that,” Linson says.


So, he places three weaved, back-to-back foils starting at the back center hairline. Then to create a cohesive blend, he places three additional foils on either side of the center section using diagonal back partings.


Pro Tip: Connect the back foils by having the corners touch to create a U-shape section in the interior. 


Related: 3 Balayage touch-up tips for dimensional blondes 


Want to learn more? BTC-U Members have unlimited access to Linson’s class! Click here to become a member today!


Tip #3:  Covering gray and balayage at the same time? Use this time-saving zone placement

Think gray coverage clients are limited to one service? Think again! When 2021 #ONESHOT Platinum Winner Chrissy Danielle (@hairbychrissydanielle) shared her strategic application for covering gray and applying a balayage application in one appointment, we took notes!


Watch: The Blonde Roadmap: Gray Coverage Melt + Ribbon Balayage in One Service


Check out her zone placement for saving time behind the chair and avoiding unwanted warmth: 


  • Zone #1 (Base Color): Apply permanent color on the regrowth only. Keep scrolling to learn how to blend this zone! 


  • Zone #2 (The Danger Zone): This is the area between the base color and the balayage. Depending on the balayage placement, this section will be roughly two to three inches that is free of color or lightener. Keeping this area clean of any product will help to avoid creating warmth. 


  • Zone #3 (Balayage): Chrissy initially applies the lightener a little lower than midway on the section and fully saturating through the ends. Then, she uses the side of her brush to blend the product up to create a gradient, making sure not to blend up into the danger zone.


Related: How to cover grays & open air balayage at the same time


Ready to use this technique on your gray coverage clients? Click here to become a BTC-U Member and receive unlimited access to Chrissy’s class!


Tip #4: Pintura highlights: Sectioning, saturation & how to paint

Similar to the French word balayage meaning “to sweep,” pintura is Spanish for “to paint” and it is perfect for giving curly clients highlights that POP. The technique is simple: Strategically painting one curl at a time in the hair’s natural state. 2021 #ONESHOT Natural Texture Winner Christin Brown (@curlfactor) broke down everything you need to know about this curly highlighting technique. 


Watch: How to Safely Lighten Curly Hair


  • Sectioning: Work with the client’s natural head shape for high-impact placement. Christin takes radial partings around the client’s head to create a waterfall effect of highlights. This allows her to visibly see where each highlight lives against the client’s existing color, creating natural depth throughout.


  • Achieve maximum saturation without overloading the brush. Using her hand as a palette, Christin swipes the brush to pick up a medium-thick line of product—mimicking toothpaste on a toothbrush. “By setting up the brush this way, my accuracy when painting is much easier and I am able to saturate the hair evenly and in one application,” Christin explains. 


  • Tight tension + gentle painting motion = precise application. Holding the curl straight, Christin gently glides the lightener on, “kissing” the product onto the hair. “I’m not pressing down or smashing the product onto the hair—I’m literally just kissing the top of the curl and gliding down the hair shaft. Since I have that thick product line I am able to get the saturation I need,” explains Christin.


Related: Everything you need to know about pintura highlights!


Give curly clients the highlights they deserve! Click here to become a BTC-U Member and receive unlimited access to Christin’s course! 


Tip #5: Make highlights POP with a “cluster” placement 

How does BTC Team Member Mick Lewis (@hairbymickk) avoid over-foiling and ensure there is enough depth? He creates clusters of highlights with alternating weaves to create strategic brightness and dimension. 


Watch: Creating High-Contrast Blondes That Pop!


When working closer to the hairline, Mick takes fine weaves (almost a babylight). As he works back the weaves become chunkier, creating more darkness around the finer weaves allowing them to pop. 


Related: 3 Foil placement tips for dimensional brunettes


Want to see more? Click here to get access to Mick’s entire class by becoming a BTC-U Member today! 


Tip #6: Avoid lines of demarcation with diagonal-forward partings 

Popping in some foils at the back hairline are perfect for ponytail-loving clients. But if you’re noticing harsh lines at their next appointment—the problem could be with your sectioning. What does 2021 #ONESHOT Winner Sean Godard (@seangodard) suggest?


Watch: Express Highlights: Foil Placement + Toning Techniques


Start taking diagonal-forward partings instead of diagonal-back. Sean explains two reasons why:

  • Reason #1: “When the client pulls their hair up, they will see more linear ribbons of color, which is much more natural-looking than one sheet or panel of blonde.”


  • Reason #2: “Clients with longer hair usually like to wear their hair down and over their shoulder. So taking diagonal-forward partings will visually extend that color so the hair that falls over her shoulder will have dimension.”


Related: Fast + efficient foiling techniques to start using ASAP!


Fun fact: Sean broke down FIVE different hair color techniques in his course. Become a BTC-U Member for unlimited access! 


Tip #7: How to achieve full saturation when lightening locs 

Avoid spotty highlights and dark holes when lightening locs with a roll application. “One of the things I love about locs is the texture, but it can be stressful to make sure the entire loc is saturated fully and evenly,” explains Jeannetta Walker-Rodgers (@watchmyhairbounce). That’s why Jeannetta uses a two-step roll application: 


Watch: Blonding: Customized Foil & Balayage Application


  • Step one: Apply lightening vertically down the loc, just like a regular highlight. 
  • Step two: Pickup more product and use the side of the brush and a bit more pressure, reapply the lightener using a rolling motion. “This motion makes sure that the lightener gets into all the nooks and crannies of the loc,”Jeannetta explains. Secure the loc in a foil and let it process. 


Here’s a secret: Jeannetta’s course is a CO-LAB with Cassie Siskovic! Become a BTC-U Member for full access!  


Tip #8: Prevent foils and hair color from overlapping 

Picture this: You’re applying color between foils and run into a sticky situation—the formulas bleed into each other! Here’s how Olivia Smalley (@omgartistry) avoids this.


Watch: How to Book Blondes: Techniques + Business Tips To Grow Your Clientele


  • Work in tight sections around the head
  • Take into consideration the curvature of the head 
    • If the head is wide, take a wider section
    • If the head is small and more rounded, take a smaller section around the Mohawk area
  • Always lock the foils directly at the root 


Related: Foils bleeding or slipping? Try these hacks! 


Learn more foiling tricks PLUS Olivia’s business building strategies for the new year! Become a BTC-U Member now!