8 Cutting and Styling Tips for the Hair Your Client Really Wears
Ever wonder how to make your pixies fit perfectly at the nape? ColorProof’s got you!
The agenda was jam-packed when the ColorProof Evolved Color Care educators gathered in the O.C. for several days of “train the trainers” activities. There were updates from ColorProof Founders Jim and Cheryl Markham and Marketing’s Kimberly Price and Gina Huff. Coming soon—two exciting new products! Look for CC PrimeGenius, an anti-aging, style extending primer with micro-emulsion technology that repels water, and IronMaster, a color and heat protective setting spray, both due this fall.
Enter to Win a Free Product Bag from ColorProof!

Cuteness! Jagger joins his parents, Jim and Cheryl Markham, and the ColorProof team.
There was a very special men’s cutting session with Jim Markham, whose award-winning techniques brought clients like Johnny Carson and Paul Newman to his salon. There was news that Jim’s success story was featured on CNBC’s “How I Made My Millions” broadcast. There was time to explore the lovely area around the training venue, networking opportunities with colleagues and even an “Amazing Race, ColorProof Edition” for the artists. There was even a meet and greet with Jagger, the newest member of the Markham family and ColorProof mascot!

Hands on and happy!
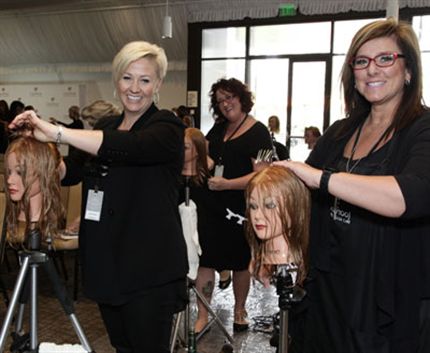
Most important, there was a full day of hands-on sessions to learn the four fabulous new cuts and style variations in the ColorProof 2016 collection, led by Director of Education Nicole Nixon. This collection is designed to meet the needs of salon stylists and the clients who want easy, natural, on-trend looks. It includes a shoulder-grazing bob, a grown-out pixie, a layered lob and a long-layered cut—essentially, something for everyone! The session was packed with knowledge, and here are some cutting and finishing tips worth remembering:

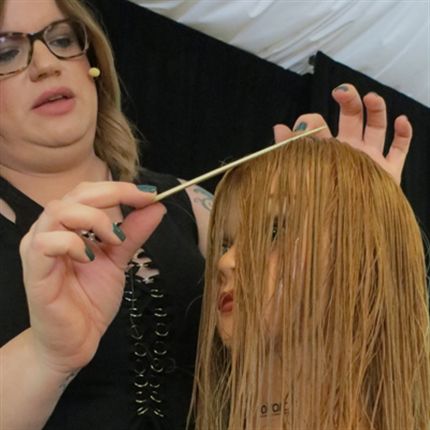
Use your comb and the round of the head to find the apex of the fringe.
1. Find The Fringe: To section out a fringe, place the comb on the front of the forehead where the head begins to round. The point where the comb lifts off the head is where the fringe begins. (But keep in mind, the starting point can be altered depending on the desired fringe shape.)
2. Elevate The Density: If your client has fine hair, sections should be elevated minimally. If your client has thick hair, elevate each section more to produce more layering and remove density.
3. Plan Ahead: Before cutting each section, ask yourself, “What will the hair do when I let it go?” If you don’t like the answer, make a new plan!
Here’s a trick for cutting curly hair.
4. Curve Control: To enhance curl and remove excess weight, create vertical sections and weave out the hair with shears. Place the shears at the point where the curl bends in each section and remove a small subsection of hair. The shears can be placed at several points on the length of the section, depending on curl pattern and the amount of density you wish to remove.
5. Cutting Corners: When creating layers on a blended bob, lift sections to 90 degrees and use blending shears to remove the corners. This trick makes the ends choppy and modern-looking.
It’s not pretty at first, but this is how your pixies will fit the head perfectly.
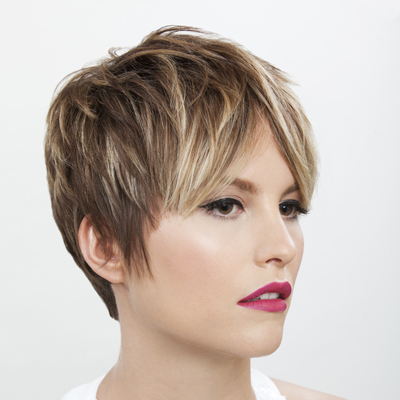
6. Pixie Weight Line: To create a neatly-fitting nape line, begin in the center back after establishing the perimeter. Gather the hair horizontally from nape to parting, elevating the hair 45 degrees off the parting. Cut horizontally just below the occipital, or at the desired weight line. As you reach the front, angle your fingers toward the face to create slightly shorter length in the front. Then create vertical subsections across the back, hold the hair straight out and point cut to connect the weight line to the perimeter.
Get easygoing, tousled texture this way
.

7. Tousled Texture: To create casual, free-form texture, mist sections with ColorProof UltraMarathon Strong Hold Color Protect Hairspray, then spiral wrap around a curling wand or iron in alternating directions. Omit the ends for a “lived in” look.
This is how Nicole curls her hair.
8. Nicole’s Waves: Nicole is known for her signature curls. To get the shape, take vertical sections, place a flat iron close to the root, twist the hair in a figure 6, then press lightly with the iron. Omit the ends. After a few seconds, release the section and gently tug on the ends to stretch the curl.
Attend a ColorProof Style Session!
At ColorProof’s 2016 Haircut and Style Collection Style Sessions, you’ll learn how to give every client a personalized haircut every time! A ColorProof Specialist will share two different approaches to creating layers that work beautifully on both straight or curly hair, using the client’s head shape and hair to dictate the overall shape and design. Contact your local distributor for more information!


