
5 Ways To Add Texture & Volume When Upstyling
Do This When Upstyling To Add Texture & Volume
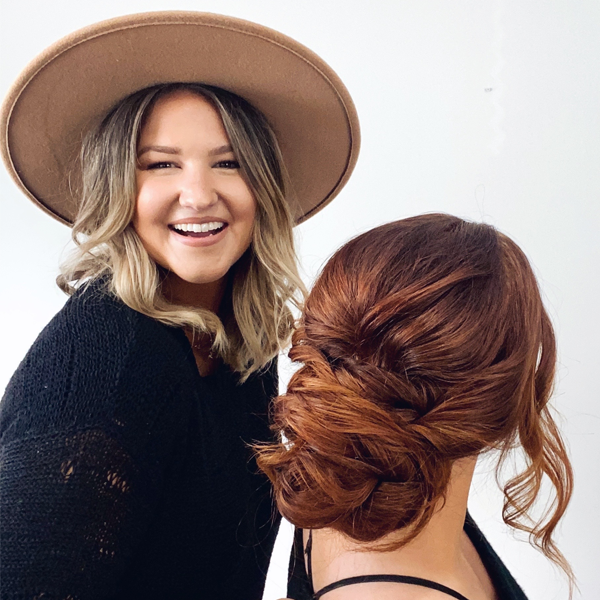
There’s nothing worse than creating a gorgeous bridal look just to watch it fall flat as the day goes on. But, don’t worry! Aquage and Caralee Pridemore (@caraleestyles) have a solution for you! Caralee took us through a textured low bun tutorial that’s perfect for fall and winter brides. Keep scrolling for Caralee’s tips for building a solid base that lasts all night and check out the finished look!
1. Crimp The Roots
Don’t make the mistake of adding volume last when styling or the hair will fall flat before she gets down the aisle. Instead, add volume at the roots when you prep the style to set the foundation.
Teasing the hair is a common way to start an updo, but Caralee prefers to use a crimping iron to add volume and texture at the base. She starts her upstyles by crimping the hair from the roots to about four inches down. Only crimp where it is needed when the client has thick hair. If the client has fine hair, she’ll crimp the entire head.
2. Use Buildable Products
Another way the bride’s hair can collapse on her big day is by using products that are too heavy. Caralee uses the Aquage Working Spray, Aquage Dry Texture Finishing Spray and Aquage Finishing Spray when styling because they feature a flexible, buildable hold that won’t weigh down the hair.
Shop must-have bridal styling products: Click here!
Check Out The Finished Look!
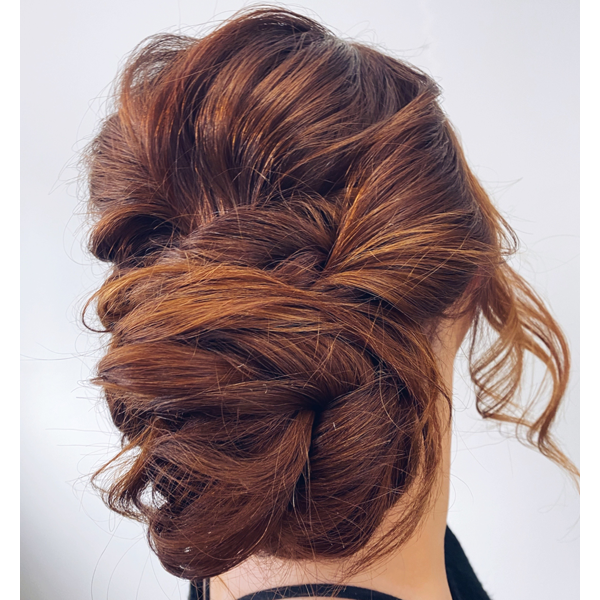
3. Curl The Entire Head
Caralee continues to add volume after crimping by curling the hair using a 1-inch curling wand. Here’s how she does it:
- First, apply Working Spray to the hair.
- Next, wrap the hair around a curling wand and release. Hold the curl in your hand to keep its shape.
- Spray Dry Texture Finishing Spray to the curl for extra hold and let go.
Note: You might be tempted to only curl where needed to save time, but Caralee advises against rushing the process. There are some steps you can’t skip to get the desired finish.
4. Use Padding For Shape
Instead of using a classic donut form as the foundation for a bun, Caralee prefers to rip it apart and use pieces to create a custom shape. She simply wraps thin, padded strips from the donut around the base of a ponytail and bobby pins them into place as she goes. This allows more control over how the bun will sit in the style and creates a more natural-looking appearance.
5. Tease When Needed
Crimping the hair during prep allows you to forgo teasing, but that doesn’t mean you won’t use it at all. Caralee likes to tease the crown for extra height before adding it to the bun so the style doesn’t lay too flat against the head.
More from
Aquage
-
News
These Are The Hottest Hair Launches To Close Out Summer 2023
-
Haircare
60-Second Restorative Mask
-
Conditioners
3 Ways Aquage’s Rebrand Is Saving Our Oceans
-
BTC Hair Trend Report
2023 Hairstyling: 11 Trends You Need To Know
-
Facebook Lives
4 Tips For Clean, Trendy Braids
-
This Year’s BIGGEST Products: 2022’s Most Talked About
-
Accessories
15 Styling Trends That Will Be Everywhere in Winter 2023
-
Texturizers
Spray Wax
-
Styling
The HOTTEST Styling Trends Of Fall 2022
-
Blonde
Aquage Debuts Sustainable Rebrand: See The New Packaging!
-
Blow Dryers
Dixie D’Amelio’s Spiky Updo At The MTV VMAs
-
Curls
Defining Gel
-
#ONESHOT HAIR AWARDS
The BTC Show 2022: 10 Things We Saw
-
The BTC Show
#THEBTCSHOW 2022
-
Buns
The Internet’s Early 2000s Obsession Lives On Through Sleek-and-Spiky Hairstyles
-
Beachwaves
Red Carpet Waves: 4 Hacks To Avoid Stiff, Crunchy Hair
-
Product Launches
Monthly Launch List: April 2022
-
Accessories
2022 Styling Trends To Know: Blowouts, Money Piece Braids + Hair Rollers
-
Beachwaves
CBD In Haircare: The Facts, Myths & What You Should Know
-
Product Launches
CBD Leave-In Conditioner
-
Bridal
Working Spray
-
Dry Shampoo
Dry Shampoo
-
Shine
Beyond Shine™
-
Styling
Detailing Crème

