
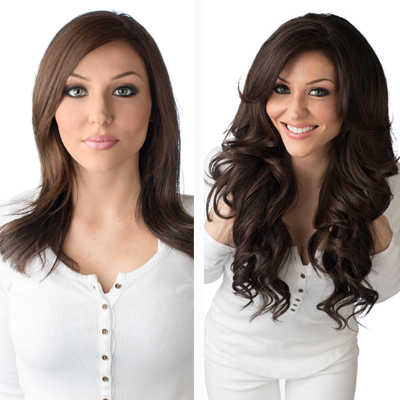
You Had Me At Halo

Products Used
VIDEO 
HOW-TO STEPS
-
1
HALOCOUTURE Extensions are placed on your client’s head like a Halo, sitting about 1 to 3 inches behind the hairline. Gently slide the back of the hair extension right below the occipital bone with the sides positioned slightly above the ears.
Note: You do not need to use excessive force or pressure on the Miracle Wire while positioning the extensions. Depending on personal comfort, your client may adjust the hook to the appropriate eyelet closure. When properly fit, it should feel snug but not tight.
-
2
Once the extensions are secure, use the back of your tail comb to gently pull your client’s hair out and over the top of the extensions, while gently holding it in place. Start the process from the front, moving toward the back.
-
 3
3Work the comb all the way around, making certain the extensions are fully covered, including the wire. The weight of the hair laying on top of the extensions helps keep it secure and in place. It’s really that simple!
BONUS How-To Fishtail Updo
HALOCOUTURE extensions also make creating intricate, lengthy styles a breeze. This summer-inspired loose fishtail updo was created using a single halo weft.
https://youtu.be/kAmCUzwVSdE
YOU MIGHT LIKE THIS
-
Styling
Big Hair for Fine Hair!
-
Hair
Ammonia-Free Perm
-
Hair
Dreamy, Red Carpet Locks from Hairdreams
-
Braids
Festival Hair: Glitter-Bombed Braids & Twists
-
Hair Color
Chemical-Free Money Piece? Here’s How!
TRENDING NOW!
-
BTC Hair Trend Report
The Biggest Haircut Trends of 2024
-
Blonde
Conditioner Before Toner: Common Hair Myth Debunked
-
Monthly Product Launch List
11 New Game-Changing Hair Launches To Add To Your Arsenal
-
Copper
What Is The "Cowboy Copper" Hair Trend? Here's What It Really Means...
-
Copper
Muted Bronze
-
Haircuts
SHAG 101: The Dos And Don'ts
-
Frizz
Straighten & Smooth 2A, Fine-Medium Density Hair
-
BTC Hair Trend Report
WWYD: How Hairstylists Are Navigating Inflation

