Last updated: March 14, 2018
WATCH: Texturizing and Adding Movement to Dense Hair Using a Razor
Ready to Showcase Your Razor Cutting Skills? Get a Sam Villa Razor Kit Today!
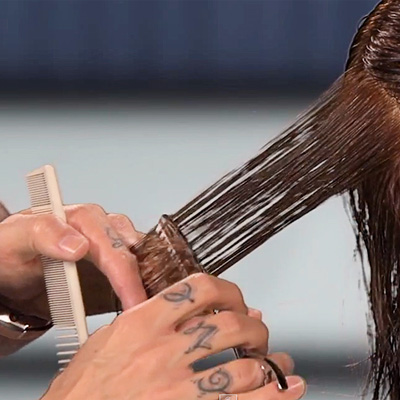
How many techniques do we use to add texture to the hair, remove weight and add movement? There are a variety of texturizing techniques that Sam Villa has given you over the years. Stylist Andrew Carruthers shares yet another technique utilizing the Sam Vila Razor with the 9-Gap Blade.
Why the Sam Villa Razor with 9-Gap Blade? The ‘U’ grooves in-between the gaps hold the hair around them and out of the way. These blades only a small amount of hair is removed with each sweep. As well, you are in complete control of how much weight you remove! Along with the Sam Villa Razor, you should use a Sam Villa Long Cutting Comb. This comb grants you a comfortable length with narrow teeth at one end to smooth out your sections. Be sure to use a black comb for lighter hair and white comb for darker hair as the contrast will enable you to stay on point and see exactly what you are doing. Prior to any razor technique, it is essential to use product to create ‘slip’ to the hair for the razor to glide smoothly throughout. Otherwise the cuticle gets roughed up and results in unattractive ends.
Products
Redken Satinwear 02 prepping blow dry lotion
– Great as a cutting lotion
– Not too heavy and will not weigh hair down or make it appear oily
Diamond Oil Shatterproof Shine
– Use for extra added benefit for dense hair
Artist: Andrew Carruthers
Manufacturer: Sam Villa
HOW-TO STEPS
-
1
First, divide the hair into 2 sections—from top of the head to the nape
-
2
Clip the left side out of your way
-
3
Take your first diagonal forward section from the occipital to the nape and clip the remaining hair out of your way
-
4
Work smart and utilize clips—you never want to re-texturize the previous section
-
5
Comb your first section with the fine teeth of the comb
-
6
Pick up the razor and do not be intimidated to go in deep
-
7
Glide down the section with soft sweeps, not too much tension
-
8
You will notice right away that you are not taking a lot of hair away
-
9
Take another diagonal forward section and clip the remaining hair out of your way
-
10
Pick up the razor and once again, glide down the section with soft sweeps
-
11
Because you are working on the upper portion of the section, you do not need to worry about cutting any of the previous section
Tip: Notice how Andrew is getting very close to the scalp. This can be intimidating and we encourage you to try this on a friend, family member or mannequin. Get close at the scalp! You are below the occipital, which is a fairly protected area of the head. The importance of getting this close is, this is where the bulk and weight lives on dense hair texture.
-
12
Take another diagonal forward section and clip the remaining hair out of your way
Tip: This section is just above the occipital—the top end of your diagonal forward section. Be more careful getting into the hair that could potentially stick out if cut too short.
-
13
At the top of this section, give the hair a push toward the scalp to read the hair
-
14
The point at which the hair bends is your safety net
-
15
Begin with the razor at this point and softly remove the hair all the way out to the ends
Tip: As Andrew glides down this section close to the nape, he begins his cut a little further from the head. Even though he is at the nape area, he is also at the hairline and needs to be more careful. Once you have completed your razor texturizing throughout the areas of need you can go back in with a blending shear, a dry cutting shearwith a long blade or place a straight blade into you razor to begin tweaking for added texture—“peaks and valleys”—Andrew’s texturizing technique allows us to take away the bulk and weight and the added texture for tweaking will to give the cut more pliability and movement.
More from
Andrew Carruthers