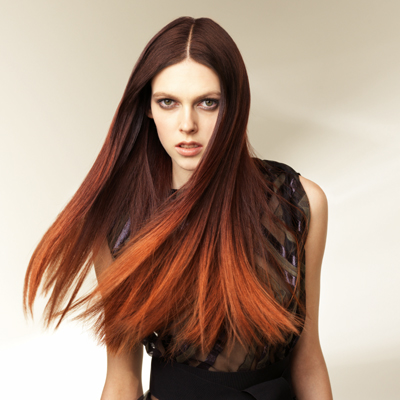
Great Lengths “Ombre Coloration” Extension


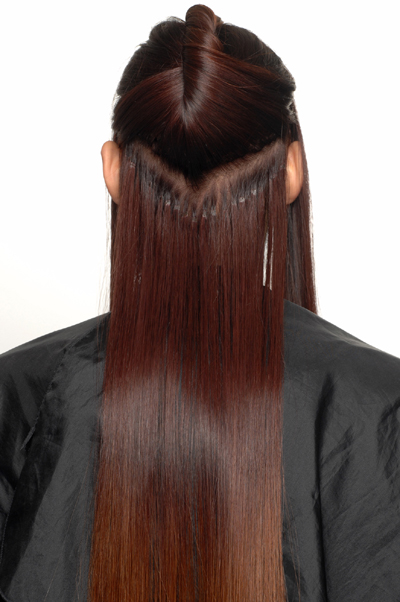
On the back of the head, create a “V” shaped section. Apply Great Lengths strands using “alternating” rows.


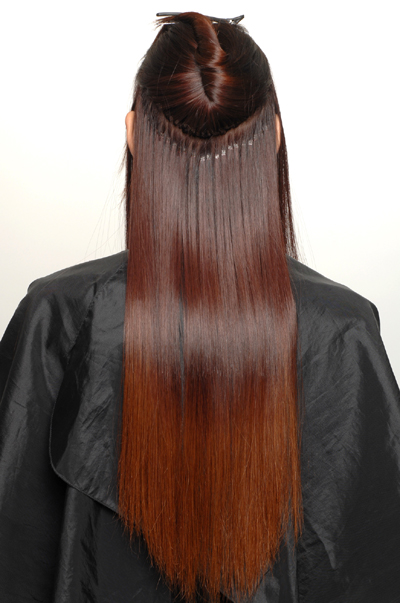
The second section is parallel to the first, again using “continuous” row placement.


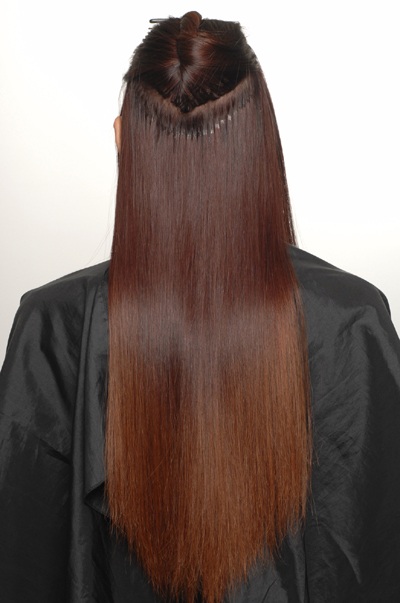
The third row is also parallel using “continuous” rows to build density.

Advertisement


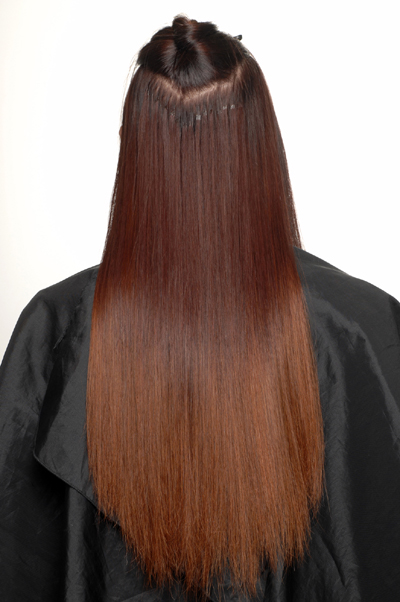
The fourth row, like the first, uses “alternating” rows.


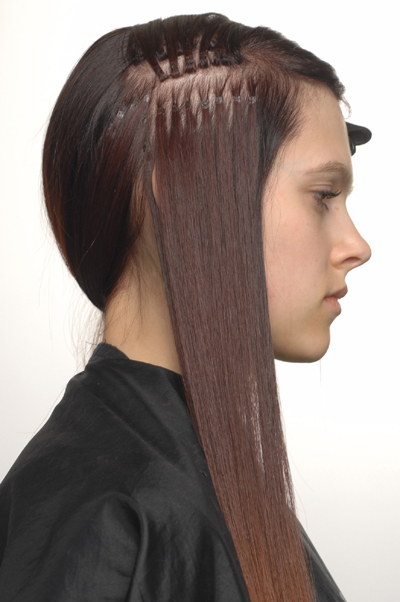
On the right side of the head, create a horizontal parting and apply extensions using “continuous” rows.


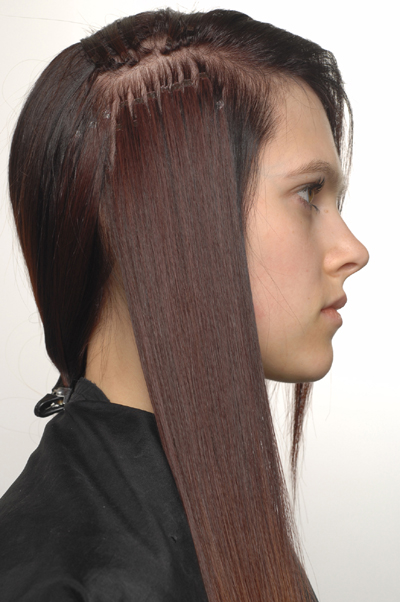
Another row using “continuous” rows.


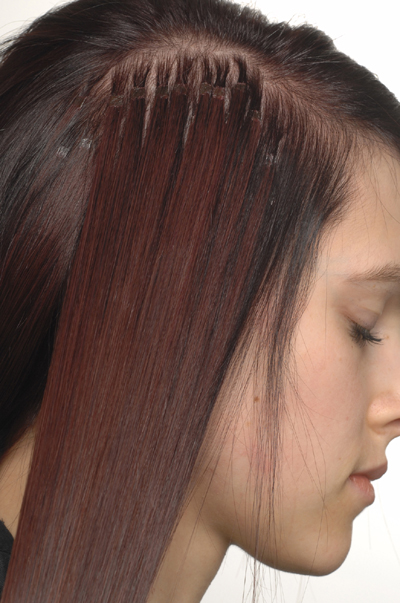
A third row on the right side using “continuous” row pattern.

Advertisement


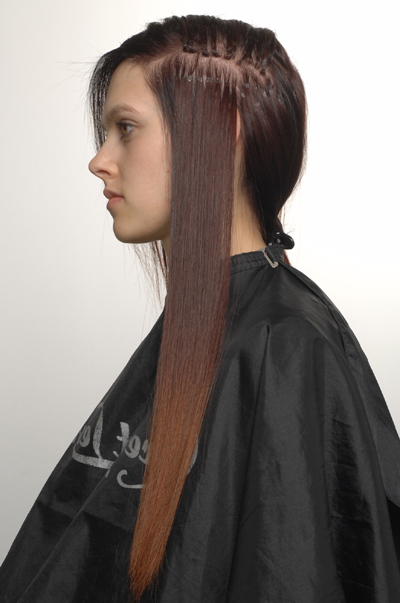
On the left side, create a diagonal parting using “continuous” rows.


Above that, create another row slightly shorter to the form of the head using “continuous” rows.


The natural hair in the halo area is cut in graduated layers at a 90-degree angle.


In the transition area between the natural hair and Great Lengths strands, blend the layers using a slicing motion. Make sure to blend softly between colors.

Advertisement


Front view: Bring front and sides straight forward. Cut in a high and narrow arch.


Establish the final length making sure to keep soft edges.


Great Lengths “Ombre Coloration” Extension
Want to get creative with your color clients? It’s time to think outside the box. This “Ombre” style from Great Lengths is the perfect option. It’s bold without being overboard. It’s feminine without being too girly. And it’s beautiful and unique for any season.
HOW-TO STEPS 
-

 1
1 -
 2
2On the back of the head, create a “V” shaped section. Apply Great Lengths strands using “alternating” rows.
-
 3
3The second section is parallel to the first, again using “continuous” row placement.
-
 4
4The third row is also parallel using “continuous” rows to build density.
-
 5
5The fourth row, like the first, uses “alternating” rows.
-
 6
6On the right side of the head, create a horizontal parting and apply extensions using “continuous” rows.
-
 7
7Another row using “continuous” rows.
-
 8
8A third row on the right side using “continuous” row pattern.
-
 9
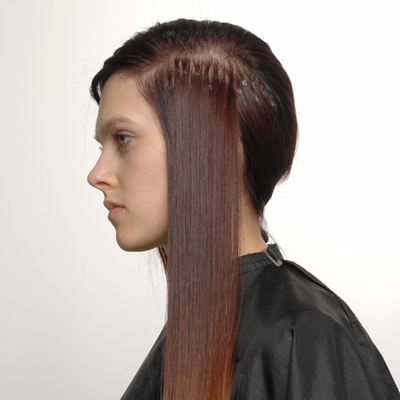
9On the left side, create a diagonal parting using “continuous” rows.
-
 10
10Above that, create another row slightly shorter to the form of the head using “continuous” rows.
-
 11
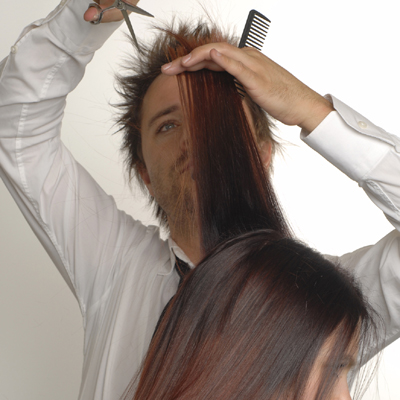
11The natural hair in the halo area is cut in graduated layers at a 90-degree angle.
-

 12
12In the transition area between the natural hair and Great Lengths strands, blend the layers using a slicing motion. Make sure to blend softly between colors.
-
 13
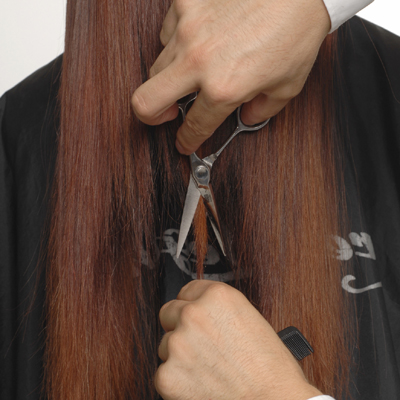
13Front view: Bring front and sides straight forward. Cut in a high and narrow arch.
-
 14
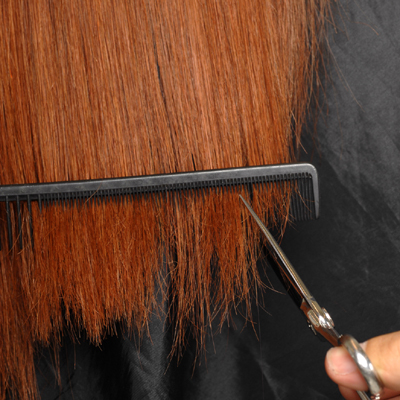
14Establish the final length making sure to keep soft edges.
-
 15
15
YOU MIGHT LIKE THIS
-
Balayage
Hair Painting With Extensions
-
Hair
Ombré with Extensions from Great Lengths
-
Hair Color
Honey and Amber Ombré by Great Lengths
-
Hair Color
Orchid Ombré by Great Lengths
-
Hair Extensions
Asymmetrical-Twisted Updo


TRENDING NOW!
-
BTC Hair Trend Report
The Biggest Haircut Trends of 2024
-
Copper
What Is The "Cowboy Copper" Hair Trend? Here's What It Really Means...
-
Bobs
How to Avoid a Bulky Bob: 4 Techniques To Try
-
Uncategorized
TikTok's Viral "Scandinavian Hairline" Is Actually Not New...
-
Hair Color
WWYD: How To Stop Your 6N From Turning Orange
-
BTC Hair Trend Report
Quiet Luxury Blonde: The "Old Money" Trend Explained
-
Glossing/ Toning
How To Achieve "Glass Hair": Smart Hacks From Hairdressers
-
Curly
Long Layers: 10 Pro Tips + Common Cutting Mistakes


