
e Salon “Extension” Step-by-Step

Advertisement
Advertisement
Advertisement
e Salon “Extension” Step-by-Step
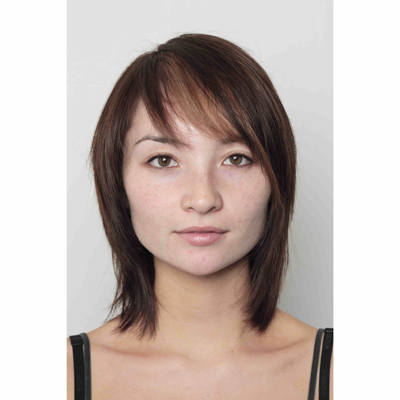
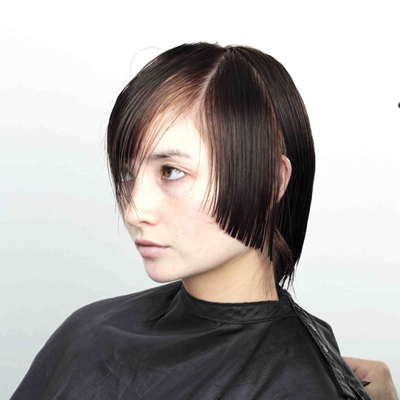
The Extension step-by-step incorporates diagonal and 90-degree cutting techniques to produce this asymmetrical look with a strong fringe. This popular Australian team offers up the how-tos for an edgy, geometric style designed to please the adventurous client.
Check out é Salon’s latest “Vacuous” Collection
For more information about é Salon please visit www.esalon.com.au

Subscribe to behindthechair.com “On Paper” Magazine–4 Issues Only $29.95!
Next Issue: COLOR with Beth Minardi!
HOW-TO STEPS 
-
 1
1 -
 2
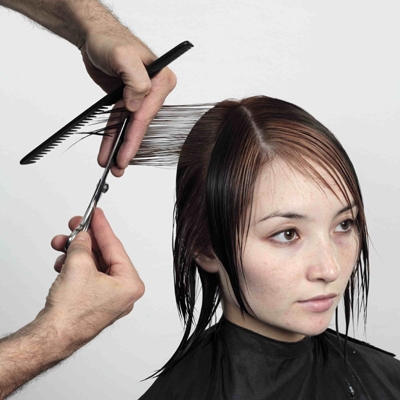
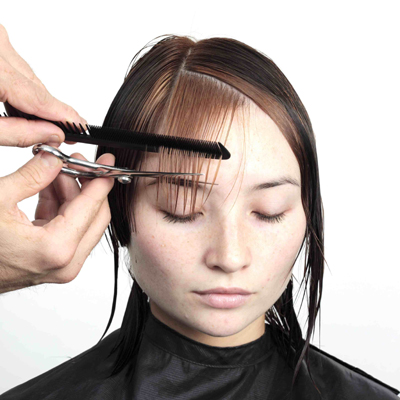
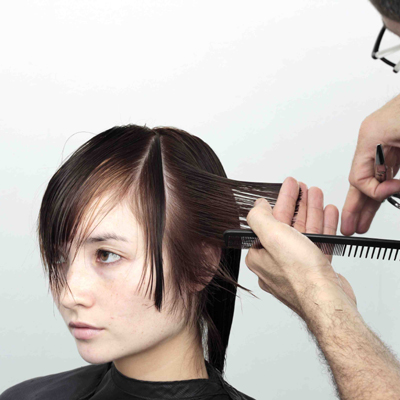
2Step 1: Starting at the sides take a diagonal forward section, bring back to a vertical at the centre of the ear, and cut your guide in at 90 degrees, to your desired length. Follow this pattern all the way to the front over-directing back to a stationary guide at the centre of the ear.
-
 3
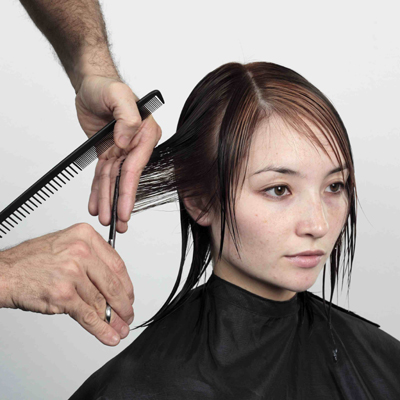
3Step 2: Continue working through Step 1.
Step 1 Repeat – Starting at the sides take a diagonal forward section, bring back to a vertical at the centre of the ear, and cut your guide in at 90 degrees, to your desired length. Follow this pattern all the way to the front over-directing back to a stationary guide at the centre of the ear.
-
 4
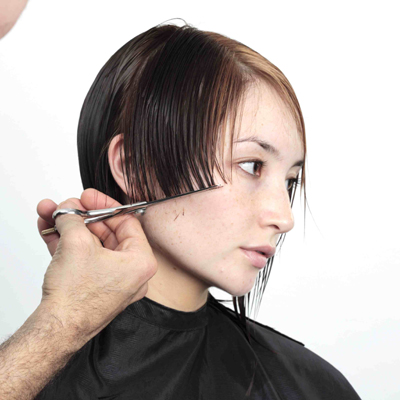
4Having completed the side, now take a slight diagonal back section, and cut a solid perimeter to the skin, with no elevation or tension. The design line should be on a slight upward slope. Continue all the way to top of this section
-
 5
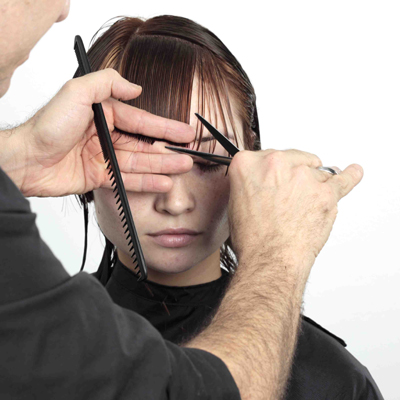
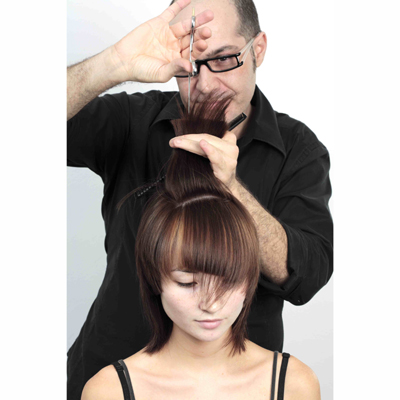
5Take a slight diagonal section from the parting to the right eye. Over-direct this section slightly toward the opposite eye and cut an asymmetric design line as the fringe. Continue back toward the crown area.
-
 6
6Repeat Step 4 – Take a slight diagonal section from the parting to the right eye. Over-direct this section slightly toward the opposite eye and cut an asymmetric design line as the fringe. Continue back toward the crown area.
-
 7
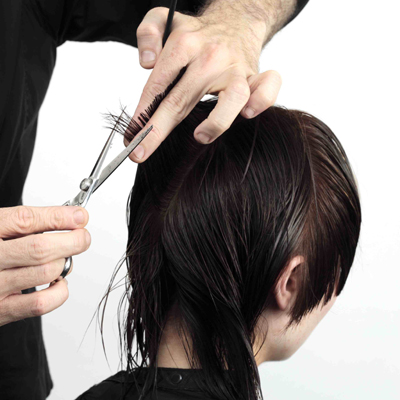
7Next, take diagonal back section on the left side and connect this area into the fringe. Continue up the side until you reach the top. You will have left a slight section between the side and the fringe to leave as an accent piece.
-
 8
8Example of fringe connection
-
 9
9Follow the above steps on the opposite sides before starting Step 8 –
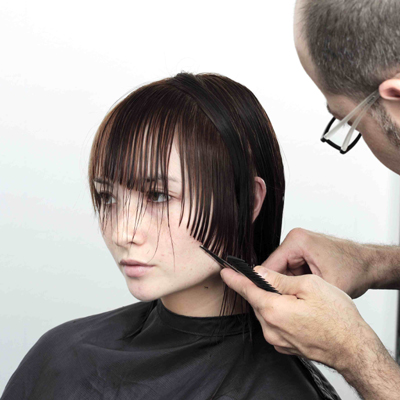
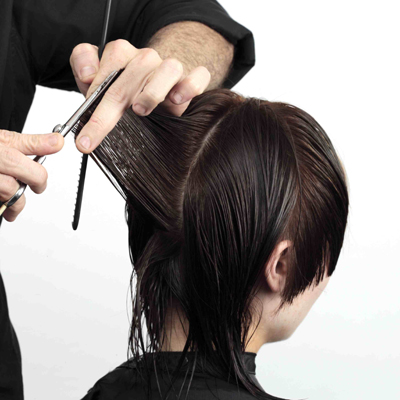
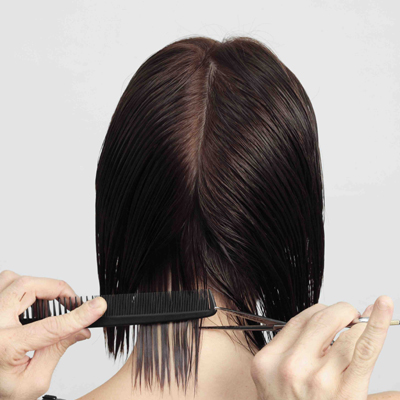
Step 8: Take vertical sections down the centre back, cutting the guide at 90-degrees from the head. Follow the head shape at 90 degrees cutting to desired length. Continue on both sides bringing everything back to the stationary 90-degree guide.
-
 10
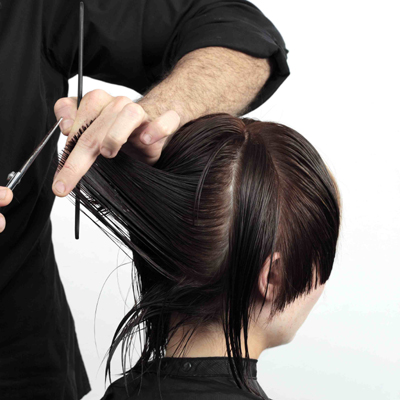
10Continue taking vertical sections down the centre back, cutting at 90-degrees from the head. Follow the head shape at 90 degrees cutting to the desired length. Continue on both sides bringing everything back to the stationary 90-degree guide.
-
 11
11Continue Step 9
-
 12
12Continue Step 9
-
 13
13Take the base line, cutting directly on the skin allowing for natural head curve. Follow this until you have no more hair in our sections.
-
 14
14Rework sections initially took and deep point and texturise in order to personalise the haircut and eliminate any excess weight.
-
 15
15Rework sections initially took and deep point and texturise in order to personalise the haircut and eliminate any excess weight.
-
 16
16We finish applying TIGI S-Factor Dream Drops and L’Oreal Professionnel Serie Expert Liss Control before blow drying.
YOU MIGHT LIKE THIS
-
Hair
diPietro Todd Academy Extension Technical
-
Hair
GL Apps Extensions from Great Lengths
-
Hair Extensions
Tape-In Extensions: How-To
-
Hair Extensions
How-To: U-Tip Extensions
-
Hair Color

Transformation: Metallic Rose Ombré
TRENDING NOW!
-
BTC Hair Trend Report
The Biggest Haircut Trends of 2024
-
Copper
What Is The "Cowboy Copper" Hair Trend? Here's What It Really Means...
-
Bobs
How to Avoid a Bulky Bob: 4 Techniques To Try
-
Uncategorized
TikTok's Viral "Scandinavian Hairline" Is Actually Not New...
-
Hair Color
WWYD: How To Stop Your 6N From Turning Orange
-
Celebrity
10 BIPOC Celebrity Hairstylists Who Are Making Major Waves In The Industry Right Now
-
Glossing/ Toning
How To Achieve "Glass Hair": Smart Hacks From Hairdressers
-
Curly
Long Layers: 10 Pro Tips + Common Cutting Mistakes

