Platinum 101: Your Complete Guide To Bleach Outs
5 Tips To Perfect The Platinum Process
Ready to start painting platinums like a pro? We’ve got you. Blonding expert Chrissy Danielle (@hairbychrissydanielle) is breaking down her blonding roadmap to bleach outs below! Keep reading for five KEY tips to pre-tone, process, melt and gloss bright white platinums every time. Plus, helpful diagrams and videos to show you how it’s done!
1. Lift To Tone Underlying Pigments
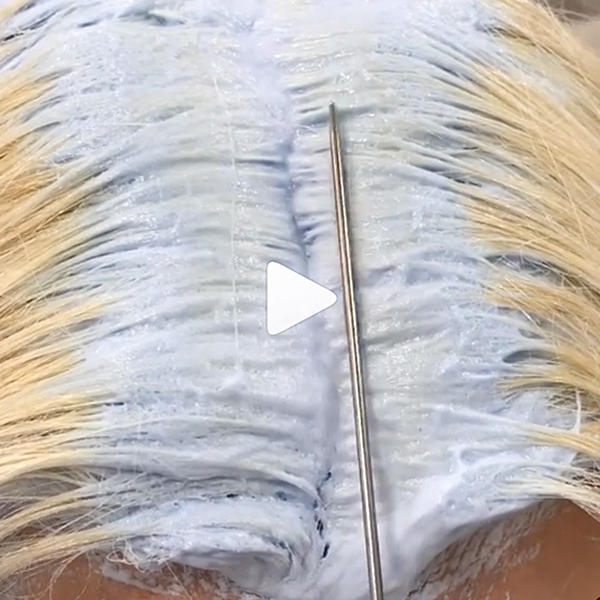
Processing is the most important step when achieving a bright white platinum. While the lightener processes, look for the lightest yellow possible—think the inside of a banana peel—to ensure that you’re able to control warmth, even if you’re toning with a Level 10.
For example: Here’s the difference between 30-minute and 45-minute processing times (and blue lightener can be deceiving!). Chrissy checks if the blonde is ready with a tail comb, pushing the lightener away from the hair to see its true lifted tone.
Check Out The Difference & Swipe For Chrissy’s Tail Comb Trick!
View this post on Instagram
2. Only Pre-Tone The Root Area
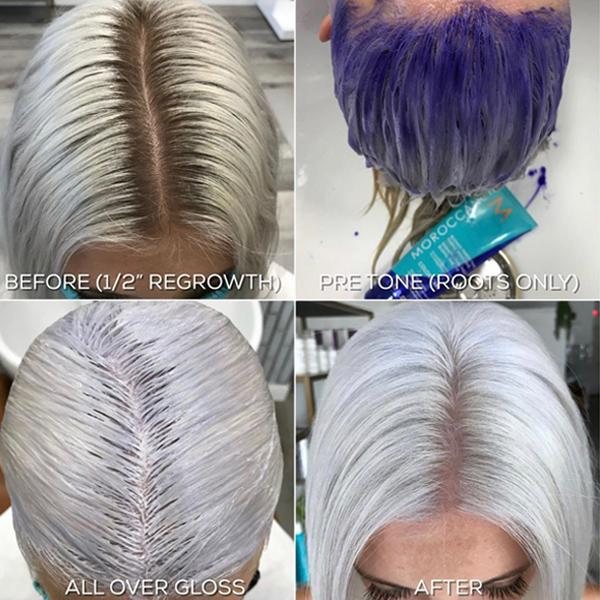
All 👏 Hair 👏 Lifts 👏 Warm 👏 “Even the whitest of white blondes have warmth in them,” shares Chrissy. That’s why she applies Moroccanoil® Blonde Perfecting Purple Shampoo to the roots only BEFORE glossing. This prevents buildup of tone on the ends and helps neutralize warmth in the freshly lifted hair for an even canvas to gloss.

3. Tone or Color Melt? Read This!
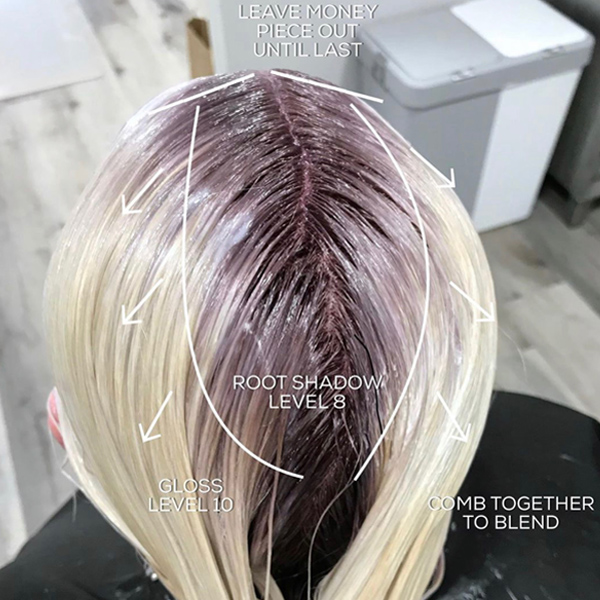
Chrissy prefers to color melt platinums to achieve a softer grow-out and a more natural look. Here are a few rules to melt by:
- Use a Level 8 at the roots (anything darker may leave bands) and a Level 10 at the ends.
- Leave the money piece out of the shadow initially and apply the all-over gloss on everything else INCLUDING the money piece.
- Then, tap the shadow root on top of the gloss for the last 5 minutes.
- If you are applying just one gloss without a shadow root, always start at the roots and work down to the ends.
Pro Tip: Brush the melt together to blend. “The more you brush, the more seamless the melt will be and I promise you the ends will not get too dark,” shares Chrissy.
Peep The Shadow Melt Placement Below!

4. How To Avoid Over-Depositing Gloss
For an all-over gloss without a shadow root, always start at the root, apply to the fresh blonde and process for 10 minutes. Then, walk the gloss down through the ends and allow everything to process for an additional 10 minutes. Remember: The ends are the most porous and will grab the gloss more quickly, so this ensures a more seamless blend.
5. Prevent Harsh Bands & Uneven Lift
The less regrowth = the easier the bleach out. Clients must come in every 4 to 5 weeks, according to Chrissy. Here’s why: Having more than 1/2-inch of regrowth can cause unwanted banding or uneven lift.


