Foil Bleeds & Uneven Blends? Use These 3 Foil Placement Techniques
Watch The Live Demo: 3 Foil Placement Techniques From @cassandraplatinum
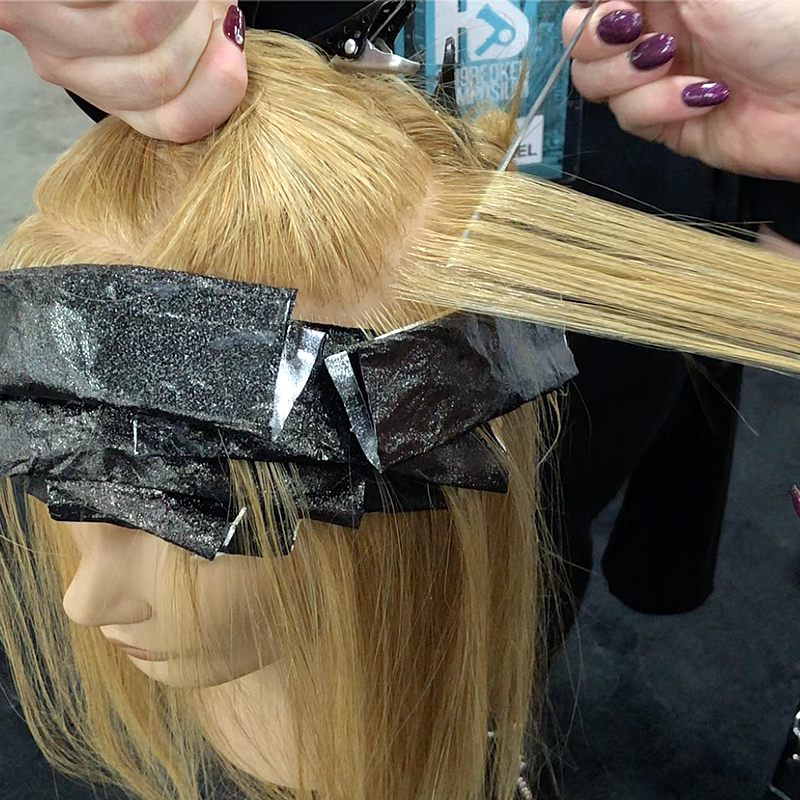
You’ve learned traditional foil placement techniques in beauty school—why not add some fresh and creative approaches to your color arsenal? We’re dishing out three different placement tips that will help you maximize impact around the hairline, work more efficiently and a foil folding technique to prevent bleeds and slipping.
Redken Brand Ambassador, blonder and corrective color specialist Cassandra McGlaughin (@cassandraplatinum) is teaching it all in this demo from Redken Symposium 2019. Get the tips, check the timestamps and watch the entire video below!
Products Used
Watch The Live Demo Below!
1. Hairline Foil Placement (0:05)
Start babylights with a horizontal foil at the hairline. Instead of working in a traditional foil placement method, working directly on top of the previous foil, shift from one side to the other for a more rounded placement. This will help you achieve better coverage at the recessions and make sure the corners aren’t cut off.
2. Work In Alternating Triangles For Maximum Impact (1:02)
Opposed to working off of a Mohawk section, Cassandra suggests this on both sides—start from the bottom and work all the way up on a horizontal diagonal section. Alternate weaving front and back triangular sections, continuing to square off the side section as you move up the head with the same pattern.
This will help you maximize impact and coverage by using less foils. “Each foil is doing the work of three foils because of where it’s covering,” shares Cassandra.
3. Foil Folding Tip To Prevent Bleeds & Slipping (3:30)
To prevent foils from slipping and bleeding, use this folding technique to create a secure low-profile foil that hugs the round of the head. Follow these steps:
- Take a triangular section and weave off the top.
- Fold the foil 3/4 of the way up, then fold all the way up.
- Create a third “light” fold and press onto the corners, not the bottom of the foil where the product is.
- Adjust the lip underneath with a tail comb.
More from
Redken
-
Clarifying
Why Does My Hair Hurt When It’s Dirty? Doctors Weigh In
-
Beachwaves
How To Wear the “Olsen Dip” Hair Trend Like It’s 2005 Again
-
Celebrity
Prom Hairstyle Inspiration for Every Hair Type
-
Balayage
How To Create Custom Brondes With Toning & Glossing
-
BTC Hair Trend Report
The Most Popular Shades EQ™ Formulas For 2025
-
Blowouts
Classic Blowouts are Back: Your Go-To Guide for the Polished Look
-
Black Shampoo
The 10 Best Toning Shampoos for Blondes, Brunettes & Reds
-
Brunette
2025’s Biggest Hair Color Trends
-
New Appointments
Redken Education Team Welcomes Two New Roles
-
Accessories
NYFW Hair Trend: Maximalism is Back
-
Postpartum Hair Loss Hits Hard—Here’s How to Handle It
-
Celebrity
Sabrina Carpenter’s Hair: How to Get Her Curtain Bangs
-
Bobs
What is “The Charlotte”? A Look at 2025’s Romantic One-Length Haircut
-
Celebrity
Sza’s Super Bowl Look: Get Her Cherry Vinyl Curls
-
BTC Hair Trend Report
Trending Haircuts: The Hime is Everywhere Right Now
-
Celebrity
How To Get Sabrina Carpenter’s Grammys Hair
-
Haircare
Redken Control Hairspray
-
Haircare
Redken Root Lifter Volumizing Spray
-
Haircare
Redken Stay High Mousse
-
Haircare
Redken Quick Blowout
-
Celebrity
Grammys 2025: The Best Celebrity Beauty Looks
-
Monthly Product Launch List
11 New Hair Launches to Kick Off 2025
-
Blonde
Soft Blended Blonde on Level 4 Base
-
Blonde
Butter Cake Blonde Curls


