
The Clippered Men’s Cut from Pivot Point

Advertisement
Advertisement
Advertisement
Advertisement
The Clippered Men’s Cut from Pivot Point
HOW-TO STEPS 
-
 1
1Alex prefers short, clean cuts. Texturizing the thick interior lengths will make his hair easier to style, especially as it begins to grow out.
-
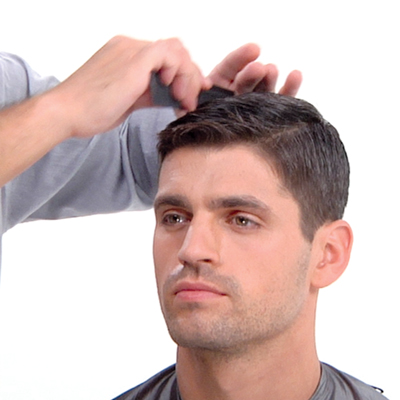
 2
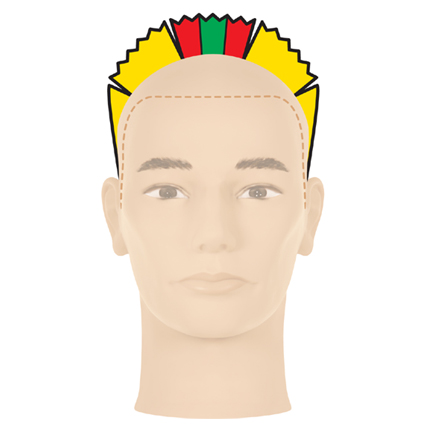
2The structure graphic shows high gradation in the exterior, which blends into high graduation in the interior. The center top is sculpted with uniform and increase lengths.
-
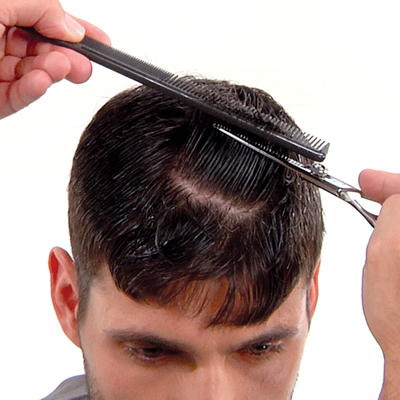
 3
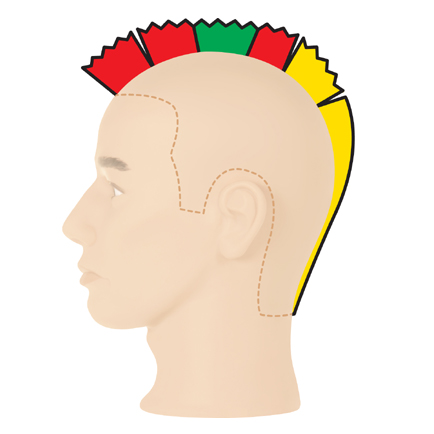
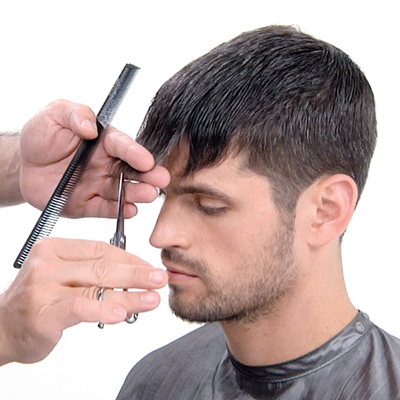
3The structure graphic shows high gradation in the exterior, which blends into high graduation in the interior. The center top is sculpted with uniform and increase lengths.
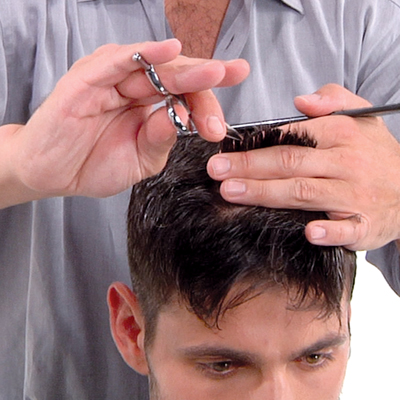
-
 4
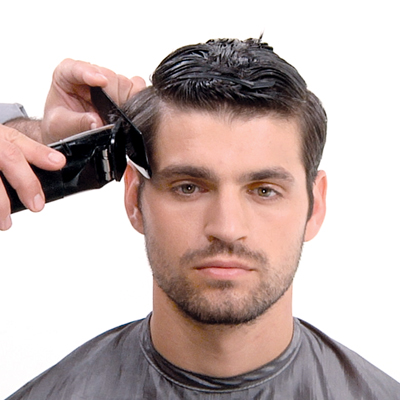
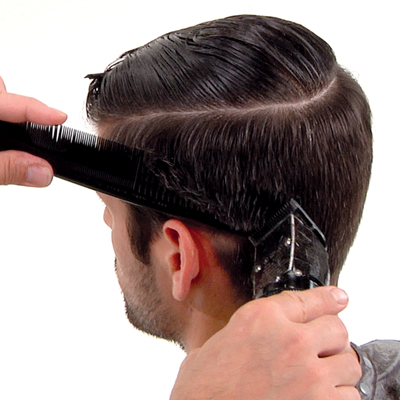
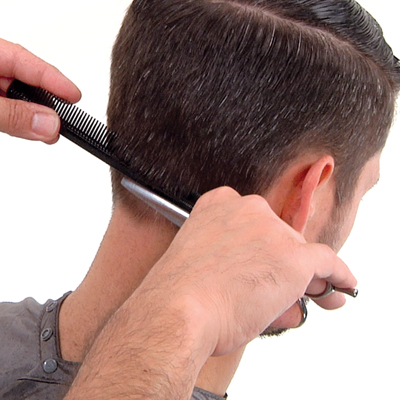
4Begin at the right sideburn area. Use the wide teeth of a large comb to project the hair at 90 degrees. Angle the comb for a high line of inclination and move the clippers across the comb. Slowly move the comb upward and outward between clipper strokes to create a high line of inclination.
-
 5
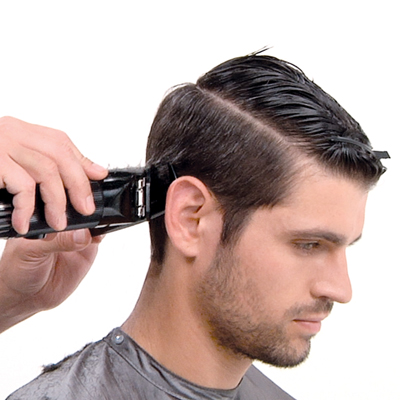
5Tilt the head forward and work through the back starting at the nape and working up. Adjust the position of the comb to work around the hairline to blend the lengths.
-
 6
6Continue working toward the left side. Angle the comb slightly to help blend the side and back lengths while maintaining the line of inclination.
-
 7
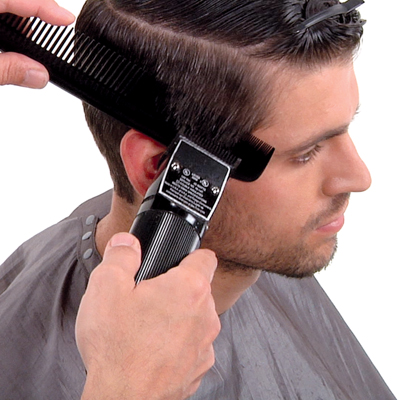
7Return to the right side and switch to the fine teeth of the comb. Position the clippers parallel to the teeth of the comb and refine the high gradation. Work toward and around the ear.
-
 8
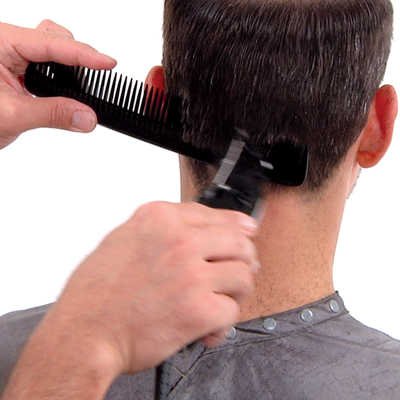
8Work through the back. Move the comb and clippers in unison maintaining the line of inclination. Work with the freehand clipper technique to clean and refine the perimeter. Then work toward the left.
-
 9
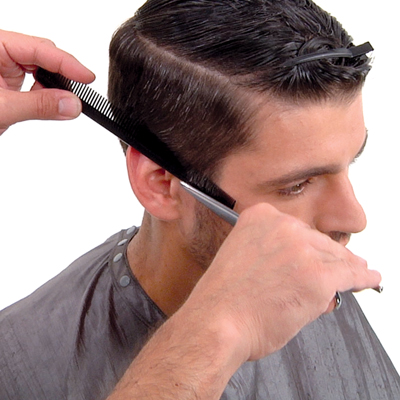
9Further refine the perimeter lengths using the taper comb with the shear-over-comb technique.
-
 10
10Tilt the head slightly as you work through the nape. Position the taper comb and shears to blend into the high gradation. Work to the left side.
-
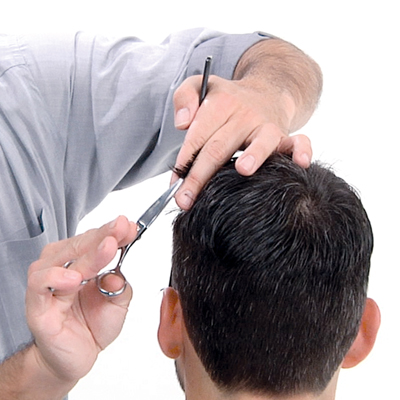
 11
11Move to the interior and subdivide with a center part. Visually determine the desired length and angle before continuing.
-
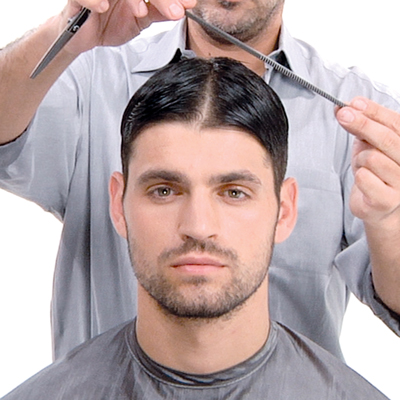
 12
12Take a vertical parting above the right ear. Distribute and project at 90 degrees. Position your fingers nonparallel and notch to create a length increase toward the top.
-
 13
13Move to the left side, maintaining the same finger position. Work from the ear toward the front, shifting the hairline back. Then work to the center back.
-
 14
14Connect top lengths starting in the crown. Distribute straight up and notch horizontally. Work toward the front shifting the last parting back for a length increase.
-
 15
15Distribute the fringe lengths forward. Use low projection and notch horizontally to remove the corner and blend with the sides.
-
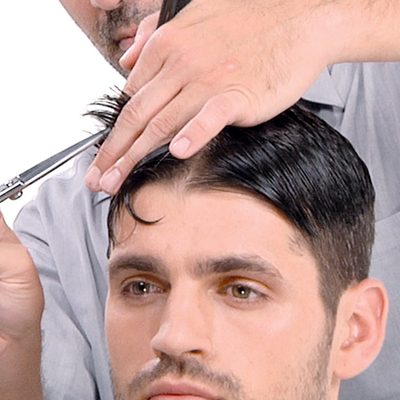
 16
16Use the comb to lift the hair from diagonal partings while using the taper shears through midstrand and ends. Work diagonally in one direction and then in the opposite direction to texturize the interior.
-
 17
17Apply wax through the hair especially in the interior. Then use a styling comb and distribute the hair from a side part. Allow the hair to dry naturally.
-
 18
18Comb the fringe down and you have a more modern look.
-
 19
19Or, give it a coif and your client will look straight out of Mad Men!
Credits
Featured Artist | George Accattato | artandsciencesalon.com
Makeup Artist | Rommy Najor | artistsbytimothypriano.com
Photography | David Raccuglia | davidraccuglia.com
Videographer | Marcin Wawrzyczek | marcin.tvSee other looks in the Meta Men collection from Pivot Point!
YOU MIGHT LIKE THIS
-
Barbering
Men’s Disconnected Tapered Cut
-
Haircuts
How-To: Brad Pitt
-
Barbering
Men’s Medium Textured Cut
-
Barbering
Medium-Length Men’s Razor Cut
-
Barbering
Scissor-Over-Comb Modern Pomp
TRENDING NOW!
-
BTC Hair Trend Report
The Biggest Haircut Trends of 2024
-
Blowouts
Bombshell Blowouts: 4 Ways To Create Lift With Longevity
-
Copper
What Is The "Cowboy Copper" Hair Trend? Here's What It Really Means...
-
Curly
Long Layers: 10 Pro Tips + Common Cutting Mistakes
-
Ask A BTC Expert
5 Foil Tips & Tricks From @the.blonde.chronicles
-
Frizz
Straighten & Smooth 2A, Fine-Medium Density Hair
-
Copper
Muted Bronze
-
Haircuts
SHAG 101: The Dos And Don'ts

