
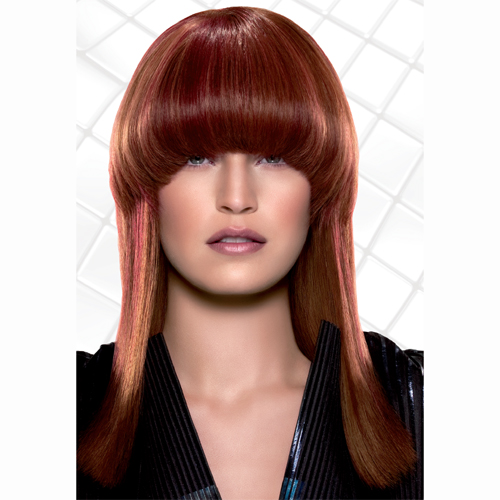
The Bold Fringe from Alfaparf

Advertisement
Advertisement
The Bold Fringe from Alfaparf
HOW-TO STEPS 
-
 1
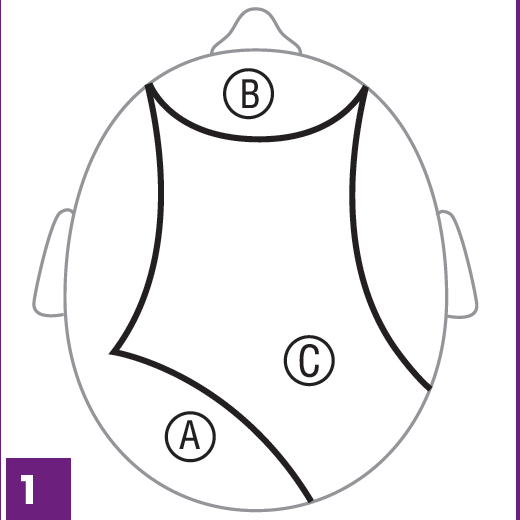
1Divide the hair into three panels as shown. See additional views in the following pages.
-
 2
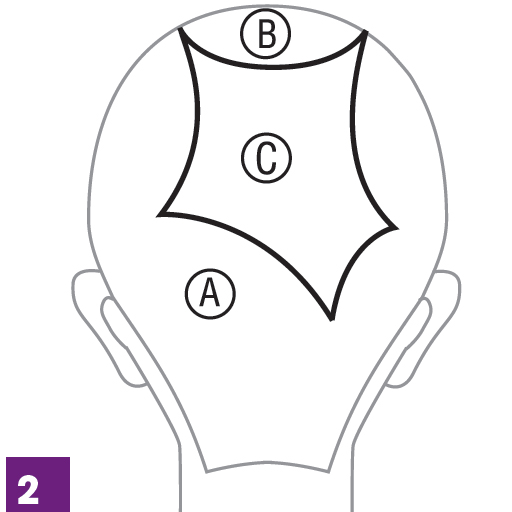
2Divide the hair into three panels. See next slides for additional views.
-
 3
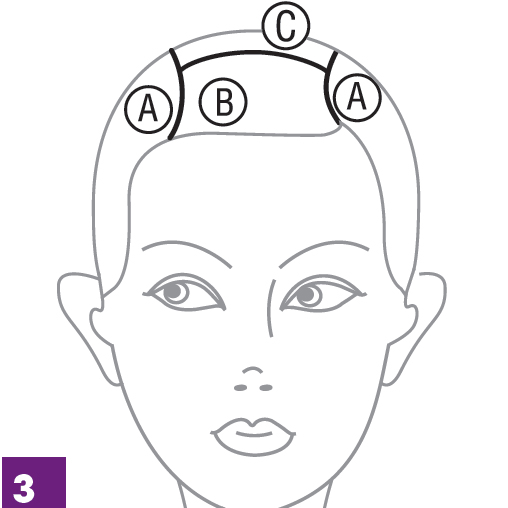
3Divide the hair into three panels. See next slide for additional view.
-
 4
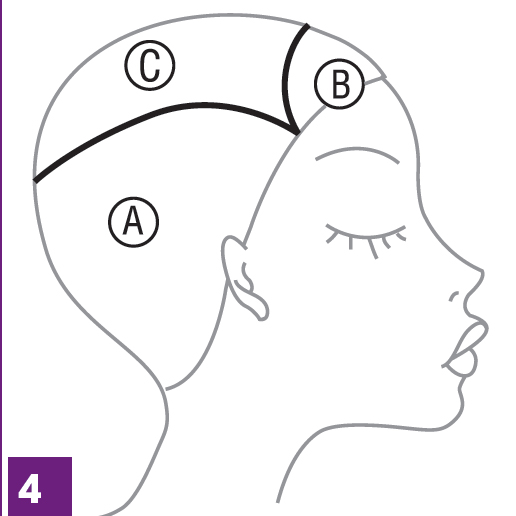
4Divide the hair into three panels. See previous slides for additional views.
-
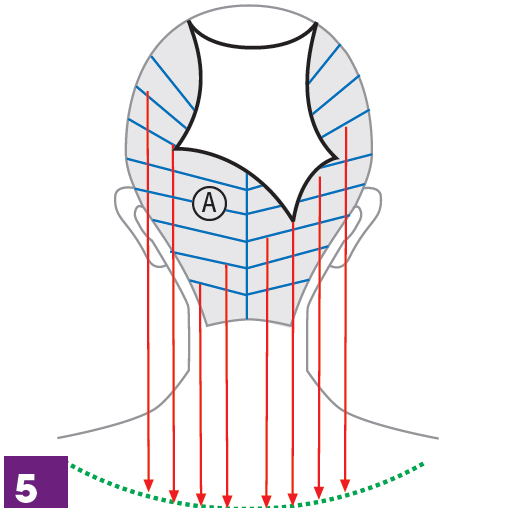 5
5Divide panel A into diagonal inverted sections. Comb the hair downwards and cut a long and slightly rounded perimeter
-
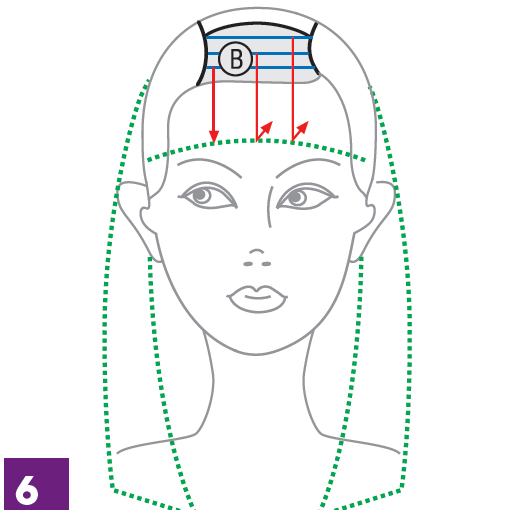 6
6Work panel B, taking horizontal sections to get a round fringe. Slightly lift each section to create a soft graduation rounding the perimeter.
-
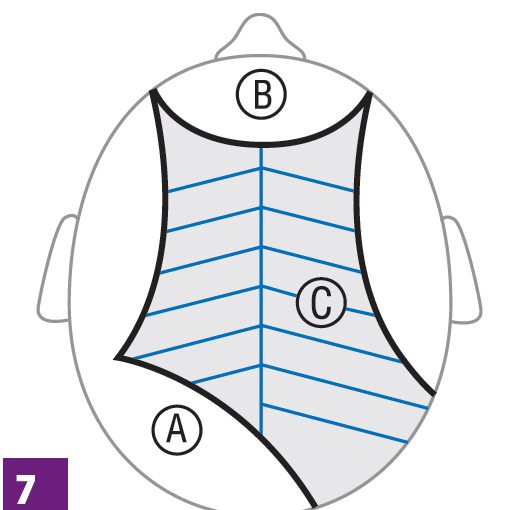 7
7Divide panel C into diagonal sections; use section A as a guideline starting from the forehead. Cut a squared line. Overdirect all the other sections on the first one keeping a low elevation to maintain the weight.
See the next slide for an additional view. -
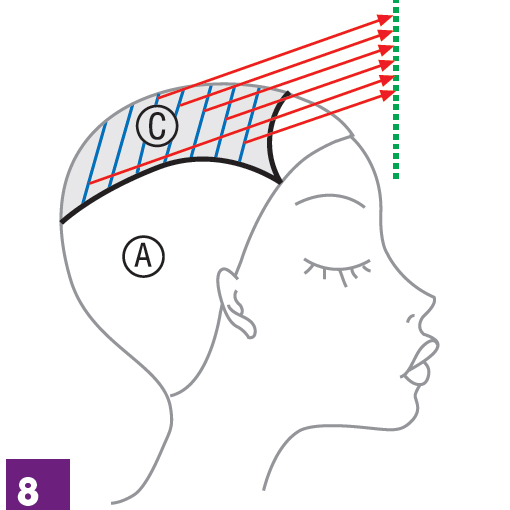 8
8Divide panel C into diagonal sections; use section A as a guideline starting from the forehead. Cut a squared line. Overdirect all the other sections on the first one keeping a low elevation to maintain the weight.
See the previous slide for an additional view. -
 9
9After drying, take the hair in the longest part of panel C and refine the perimeter length to visually
join panel C and panel A. Continue with a soft cut, overdirecting each section to the first one.
Like the color? See the step-by-step!
YOU MIGHT LIKE THIS
-
Hair Color
Deep Brunette with Plum Accent from Alfaparf
-
Hair
Asymmetrical, Funky Cut from Alfaparf
-
Blonde
3-D Blonde from Alfaparf
-
Hair
Tramonto Twist from Alfaparf Milano
-
Hair
“Alba” Updo from Alfaparf Milano
TRENDING NOW!
-
BTC Hair Trend Report
The Biggest Haircut Trends of 2024
-
Copper
What Is The "Cowboy Copper" Hair Trend? Here's What It Really Means...
-
Monthly Product Launch List
11 New Game-Changing Hair Launches To Add To Your Arsenal
-
Frizz
Straighten & Smooth 2A, Fine-Medium Density Hair
-
Copper
Muted Bronze
-
BTC Hair Trend Report
WWYD: How Hairstylists Are Navigating Inflation
-
Haircuts
SHAG 101: The Dos And Don'ts
-
Ask A BTC Expert
5 Foil Tips & Tricks From @the.blonde.chronicles

