Symmetrical Bob with a Fringe from Aveda
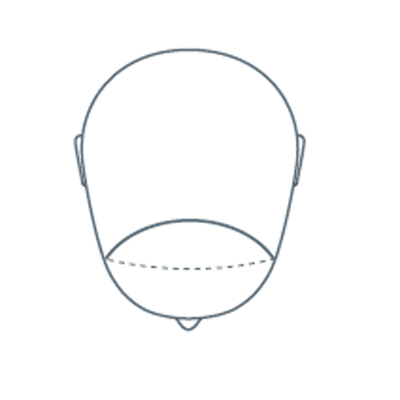
Section off a crescent shape that starts from the front recession and extends 2" back from the front hairline. This will become the fringe.
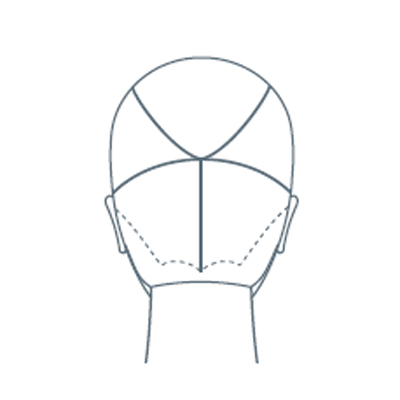
Create a section that runs along the parietal ridge extending to just above the occipital bone. Repeat on the other side. This creates panel 2.
Create a vertical section down the center back with the remaining hair.
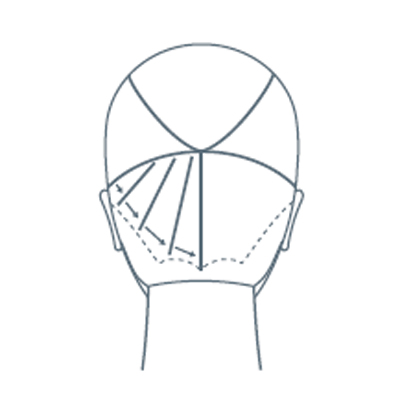
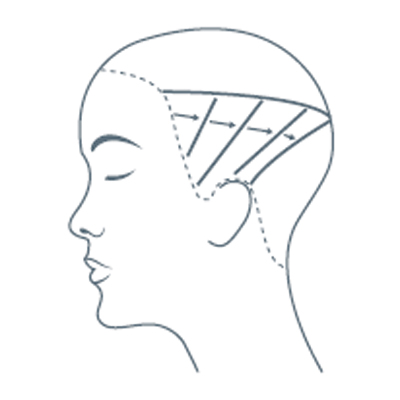
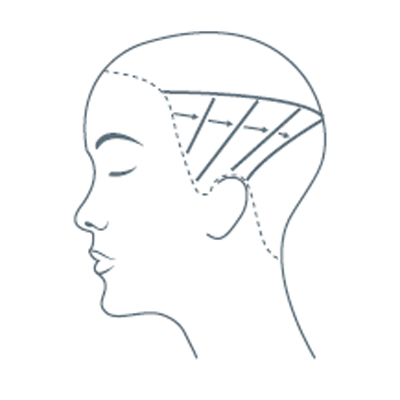
Take a diagonal subsection that extends from the occipital bone down to the nape, as illustrated. Cut a graduated line.
Advertisement
Pivot the subsequent subsections from the occipital bone, making them more horizontal as you work up the head. Stop once you reach panel 2. Direct each subsection down to the previous subsection (traveling guide).
Take subsections above the occipital bone on the diagonal and extend them to the front hairline. It will be elevated below the occipital bone and cut. Work subsequent subsections in this manner up to panel 2.
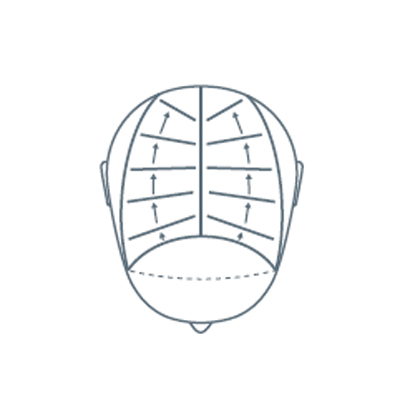
Cut panel 2 by taking horizontal subsections starting at the center back and directing them down to the previously cut subsection. Continue to cut using a graduated technique. Work in this manner until you reach the center parting. Repeat on the other side.
Take down fringe and blow-dry. Take horizontal subsections and cut fringe to desired length. Use the tip of the razor to texturize the entire haircut. Cut in the perimeter.
Advertisement
Symmetrical Bob with a Fringe from Aveda
Seamless, symmetrical, flawless. This banged bob from the Aveda Neo Goth Collection frames the face and presents a strong, clean silhouette.
Cut by Tristin Morrison, Senior Creative Director, Aveda Canada
SHOP Aveda Education in the BTC Online Store!!
To learn more, go to www.aveda.com
Subscribe to behindthechair.com On Paper Magazine!
SUBSCRIBE NOW!
HOW-TO STEPS
-
1
Section off a crescent shape that starts from the front recession and extends 2″ back from the front hairline. This will become the fringe.
-
2
Create a section that runs along the parietal ridge extending to just above the occipital bone. Repeat on the other side. This creates panel 2.
-
3
Create a vertical section down the center back with the remaining hair.
-
4
Take a diagonal subsection that extends from the occipital bone down to the nape, as illustrated. Cut a graduated line.
-
5
Pivot the subsequent subsections from the occipital bone, making them more horizontal as you work up the head. Stop once you reach panel 2. Direct each subsection down to the previous subsection (traveling guide).
-
6
Take subsections above the occipital bone on the diagonal and extend them to the front hairline. It will be elevated below the occipital bone and cut. Work subsequent subsections in this manner up to panel 2.
-
7
Cut panel 2 by taking horizontal subsections starting at the center back and directing them down to the previously cut subsection. Continue to cut using a graduated technique. Work in this manner until you reach the center parting. Repeat on the other side.
-
8
Take down fringe and blow-dry. Take horizontal subsections and cut fringe to desired length. Use the tip of the razor to texturize the entire haircut. Cut in the perimeter.
-
TRENDING NOW!
-
BTC Hair Trend Report
The Biggest Haircut Trends of 2024
-
Extension Application
What are V-Light Extensions? The Future of Fine-Hair Extensions is Here
-
Glossing/ Toning
5 Purple Shampoo Hacks For The “I Still See Yellow” Client
-
Copper
What Is The "Cowboy Copper" Hair Trend? Here's What It Really Means...
-
Blonde
The Biggest Hair Color Trends of 2024
-
Dry-Cutting
Bang Breakdown: How To Cut 2024's Top Fringe Trends
-
Business
5 Genius Pricing Ideas Every Stylist Should Know
-
Bobs
Textured Vs. Layered Bob: Read This To Learn The Difference!