
Disconnected Cutting How-To from Joico Smoke and Mirrors Volume II

Advertisement
Advertisement
Advertisement
Advertisement
Disconnected Cutting How-To from Joico Smoke and Mirrors Volume II
HOW-TO STEPS 
-
 1
1 -
 2
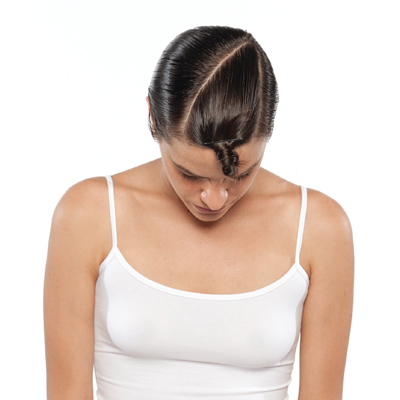
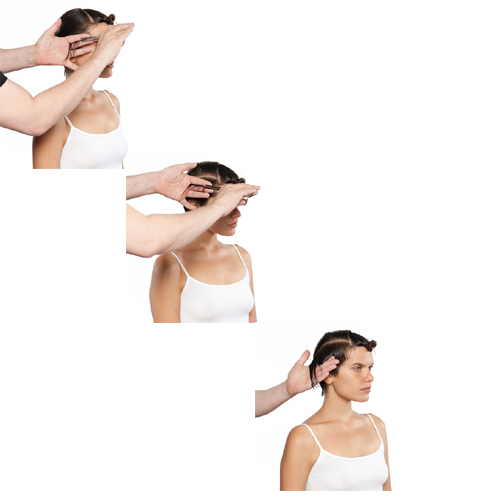
2View of sectioning pattern.
-
 3
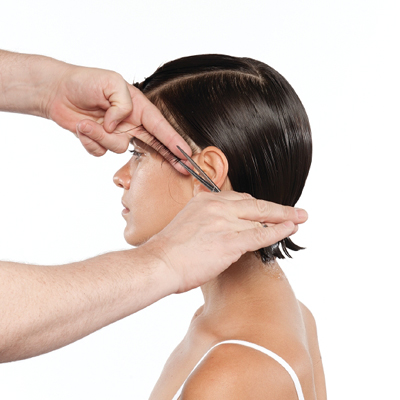
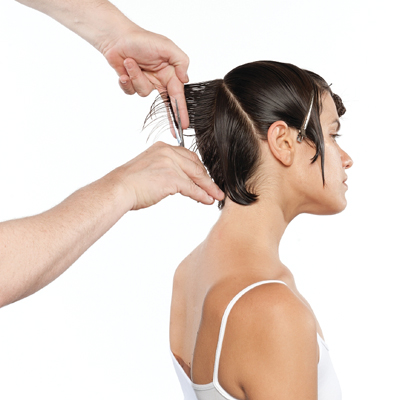
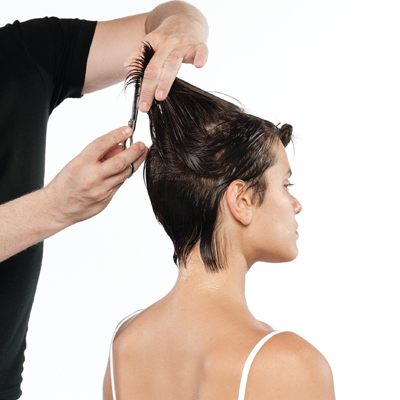
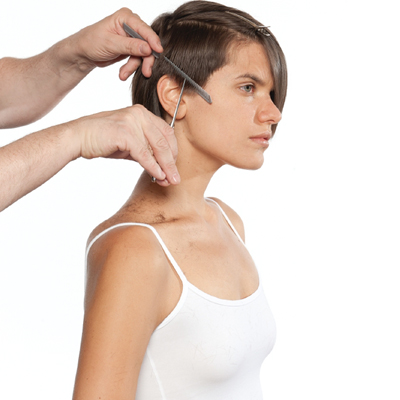
3Take a diagonal parting from the temple to the hairline; use graduation to cut length to produce a neat, fitted head shape. Continue working toward the back of the ear. Note that the partings will become more vertical. Do not over-direct, as this will create heaviness and weight (particularly when working with thick hair).
-
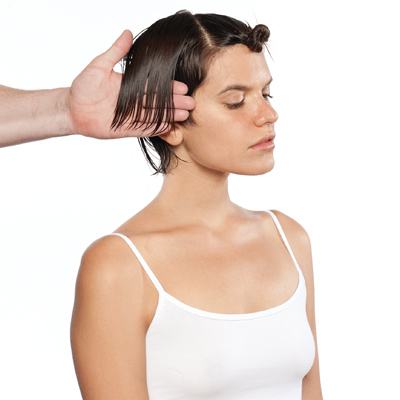
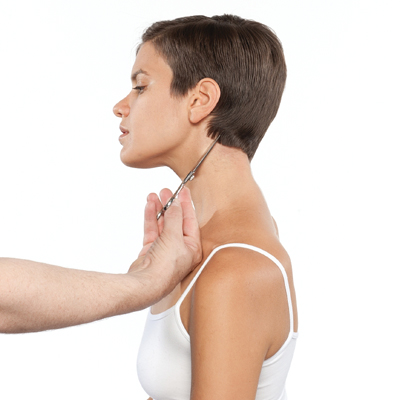
 4
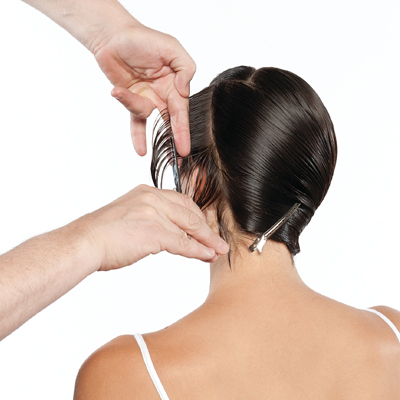
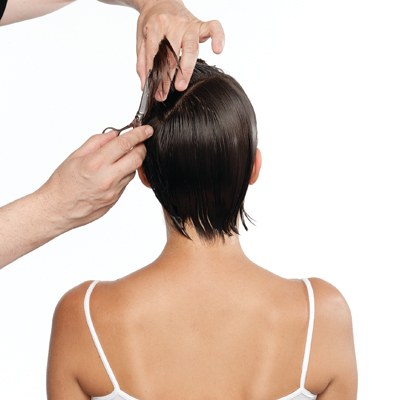
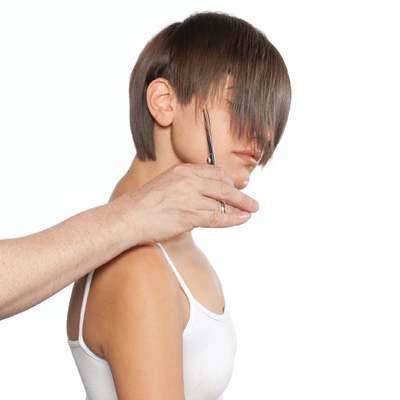
4Continue with the traveling guideline. Connect into the back, nape area; cut to a length that fits neatly to the head shape (a flatter head shape).
-
 5
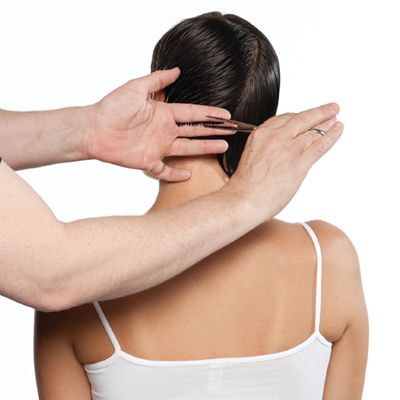
5Continue working toward the center back area in the same method as before. The guide is a traveling guide. Pay particular attention at the crown area; reduce tension to accommodate the hair growth pattern.
-
 6
6Work neatly and methodically by cross-checking at regular intervals to ensure fluidity throughout the haircut; remove corners or weight.
-
 7
7Continue working on the back nape area. Note that the partings are now being slightly overdirected to the last guide; this will produce more weight and length, as the back area is slightly asymmetrical. The degree of overdirection will vary based on hair texture, length, and density; extreme overdirection will create more length and weight on one side.
-
 8
8Continue working through the opposite side area, but note that the area behind the ear will not connect. Take a diagonal parting for the first guide and cut to the desired length. Continue with traveling guideline and pivot around the side area; the last remaining parting will be more vertical. Always elevate, lift and apply tension to remove any excess weight.
-
 9
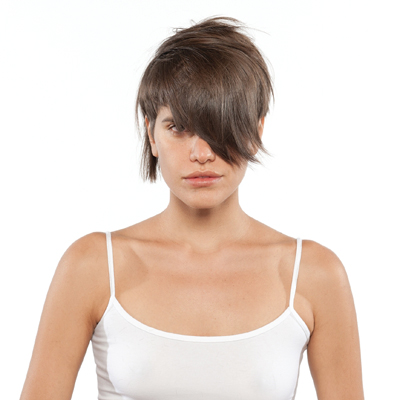
9Note the lengths above the temple area; this will not connect to the underneath area, this area is disconnected. The overhanging lengths will be lightened when working through the top area.
-
 10
10Take a diagonal parting from the front hairline that extends to the crown area and cut to the desired length. Ensure the hair is cut short enough to reduce internal weight while retaining a longer softer fringe area; the length will connect to the back, crown area.
-
 11
11Continue with the same sectioning pattern. The remaining partings are overdirected to the first parting. The top length is longer and will overhang the side areas. Return to the original parting (on the top of the head) and repeat on the opposite side; note there will be fewer partings to connect, as this side is slightly lighter. Remove sufficient length so that the top is not heavy and bulky. Blow-dry the hair smooth by using the wrapping technique. The haircut will be completed when the hair is dry.
-
 12
12Use a chipping and pointing technique to further refine the hairline.
-
 13
13Repeat pointing and chipping in nape and hairline areas. Always work with the natural shape of the hairline.
-
 14
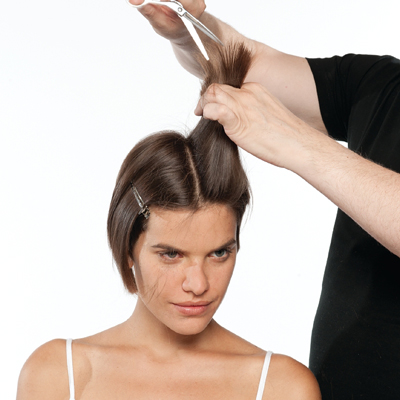
14Take partings from the crown area to the front hairline; chip and point to remove any excess weight. View of perimeter and disconnected top and side areas.
-
 15
15Repeat chipping technique throughout the top area.
-
 16
16Refine hairline around the ear area as before. Use a combination of chipping and pointing.
-
 17
17Refine perimeter by pointing and chipping into hair.
-
 18
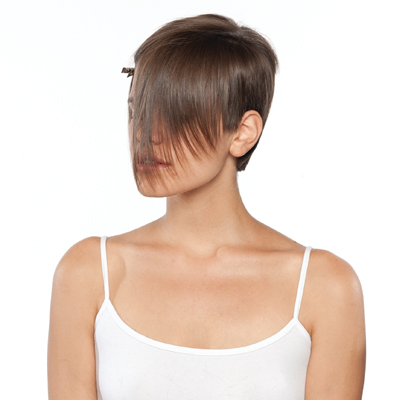
18View of hair prior to color placement. Always reassess the haircut after color placement.
-
 19
19For more information please visit www.joico.com
YOU MIGHT LIKE THIS
-
Dry-Cutting
Half Upstyle: Sleek Top Knot + Waves
-
Hair Color
Joico’s “Alison” Minimum/Maximum Color How-To
-
Hair
Long and Layered from Joico
-
Hair Color
Icy Lavender Color Pop from Joico
-
Hair Color
Raspberry Plum Color Formula
TRENDING NOW!
-
Curly
Long Layers: 10 Pro Tips + Common Cutting Mistakes
-
BTC Hair Trend Report
The Biggest Haircut Trends of 2024
-
Copper
What Is The "Cowboy Copper" Hair Trend? Here's What It Really Means...
-
Haircuts
SHAG 101: The Dos And Don'ts
-
Bobs
The '90s Bob: How To Cut & Style This Trending Haircut
-
BTC Hair Trend Report
Quiet Luxury Blonde: The "Old Money" Trend Explained
-
Blonde
Dear Clients, Read This Before Going Blonde!
-
Balayage
How To Turn A Brassy Lift Into A Brunette Balayage

