
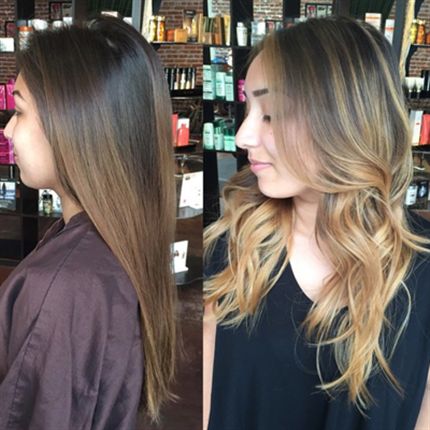
How-To: Caramelized Balayage

COLOR FORMULAS 
HOW-TO STEPS
-
1
In the front: use Formula A in diagonal back sections starting in front of the ear and working up toward the parting, skipping every other section. Leaving every other section uncolored creates a more dimensional look, says Jonathan.
-
2
Using Formula A, balayage a strong face frame on the hairline from Zone 2 through the ends, making sure to fully saturate the ends, and feathering up from the ends toward the midlengths of each section.
-
3
Continue this pattern on both sides of the head, wrapping each highlighted section in plastic wrap.
-
4
In the back: starting in the nape area, once again take diagonal back slices on the left and right side, creating a V-shaped section. Balayage every other section working up toward the top of the crown, making sure to fully saturate the ends.
-
5
Process for 30 to 45 minutes, until a Level 9 yellow is achieved. Then rinse and shampoo.
-
6
Apply Formula B at the roots only until yellow is minimized and slightly deepened in tone to a Level 8 (about four minutes).
-
7
Apply Formula C from midlengths to ends, and process for five minutes.
-
8
For the last two minutes of process time, melt Formula B into Formula C to create a blend between the two shades, melting the roots into the middle sections.
-
9
Follow with Bumble and bumble Quenching Shampoo & Conditioner.
-
10
Apply Bumble and bumble Styling Creme in Zone 1 only for root lift and added density.
-
11
Apply Bumble and bumble Hairdresser’s Invisible Oil at ends for heat protection and as an end sealant. Rough-dry at roots for added volume and around brush lengths for a smooth finish.
-
12
Using the 1¼-inch Hot Tools Marcel Curling Iron, create a texture wave by curling in the midsection only, leaving the roots and ends straight.
-
13
After the curl set is complete, break up the waves with your fingers and finish with Bumble and bumble City Swept Finish to give a second-day finish to waves. Complete the style with a light layer of Bumble and bumble Spray de Mode Hairspray.
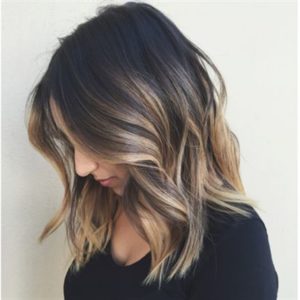
About two months after her original transformation, Jonathan’s client decided she wanted an even bigger change, so Jonathan chopped her mid-back-length locks into an ultra-texturized lob! “I decided to keep the length at a point where the color on her ends would still be prominent,” Jonathan shares. “This new shape complements her color perfectly.”
YOU MIGHT LIKE THIS
-
Balayage

Caramelized Balayage
-
Balayage
How To Enhance Naturally Curly Hair With Balayage
-
Balayage
Guy Tang Balayage Technique | Infused Metallic Dimension
-
Balayage
Balayage Tip: Replacing Clear Color with Conditioner
-
Balayage
Kim Vo’s Dip and Tip Technique: The Evolution of Balayage
TRENDING NOW!
-
BTC Hair Trend Report
The Biggest Haircut Trends of 2024
-
Blonde
Conditioner Before Toner: Common Hair Myth Debunked
-
Monthly Product Launch List
11 New Game-Changing Hair Launches To Add To Your Arsenal
-
Copper
What Is The "Cowboy Copper" Hair Trend? Here's What It Really Means...
-
Frizz
Straighten & Smooth 2A, Fine-Medium Density Hair
-
Copper
Muted Bronze
-
Haircuts
SHAG 101: The Dos And Don'ts
-
BTC Hair Trend Report
WWYD: How Hairstylists Are Navigating Inflation

