Articles > Haircuts > Learn How To Cut Long Layers With A Razor
Last updated: February 18, 2021

Learn How To Cut Long Layers With A Razor

Surface Hair Wayne Grund Learn How To Cut Long Layers With A Razor
close formula

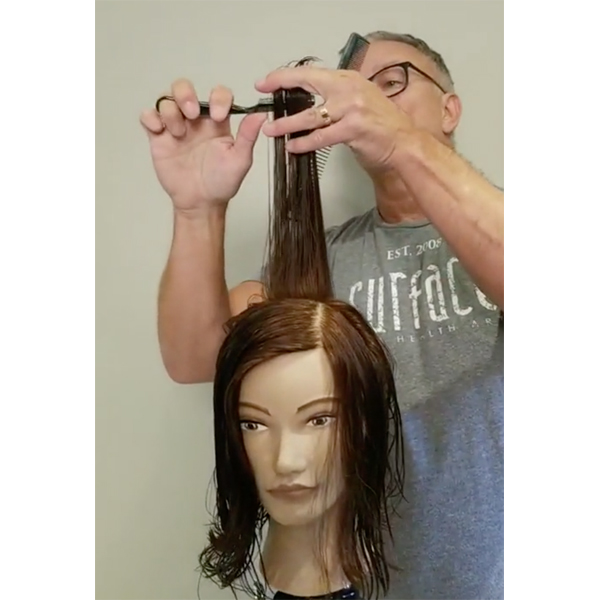
Master Razor Cut Long Layers With These 6 Tips

Do you struggle with razor cutting? It can be an intimidating tool but quarantine is the perfect time to get more comfortable with it—and Surface Founder & CEO Wayne Grund (@waynegrund) is here to help! He recently went live on Surface’s Facebook to demo how he cuts long layers with a razor. Watch the full tutorial below, then keep scrolling to get six of the key tips he shared!


Watch The Video How-To Below

Products Used


1. Choosing A Razor

The razor you use can affect the finish of your cut, which is why Wayne recommends using one that has a soft silica blade, like the Surface Razor. DO NOT use a razor with a metal guard because that can cause abrasions and potential damage.


Note: You could use scissors to cut long layers but Wayne says they tend to leave the ends too blunt.


2. Sectioning + Establishing The Perimeter

Before cutting any layers, you first need to establish the perimeter. Here’s how Wayne creates his perimeter guide:

  • Start by creating three sections—one in back and one on each side.


  • Then, moving horizontally from the bottom of one ear to the other, create a subsection and clip the top half out of the way.


  • To work efficiently, if you are right-handed, start on the left side of the subsection. “If you start in the middle, you’ll have to comb hair on the right and left out of your way and it takes more time,” notes Wayne.


  • Then, hold the hair in front of the second knuckle, put the back of the blade against the hair and lightly bevel it under.


From there, cut the remainder of that subsection and then use the guide to establish the perimeter around the rest of the head.


3. A Cheat For Your Guide

So you’re almost done with the perimeter and have one side section left. Now what? For extra security, simply move the fringe out of the way, then take a small piece of hair from the side that was just cut and a small piece of hair from the uncut side. Bring the two together and razor cut so the lengths are even. Now you have a guide in the front to follow as well as the one in back.


4. Razor Cutting The Layers

Starting at the crown, it’s important to stand behind the client and only razor cut sections that are no wider than the blade of the razor. Why? “If you create layers, short or long, and you allow that ridge line to go to the top of the occipital bone, where the weight falls it’ll collapse flat,” explains Wayne. Then, just lift the section up and razor from underneath to get a nice shattered edge. 


Pro Tip: The thicker and heavier the hair is, the deeper of a shatter motion you use when razor cutting.


5. What To Do With A Deep Side Part That Feels Heavy

Do clients with a deep side part complain about one side being too heavy? There’s a third section you can razor cut to remove some of that bulk. Working on the side with the most hair, move the top half out of the way. Then, take a section of hair and cut so it mirrors the opposite side of the head. That way, when the top half falls back over it, you’ve got framing on both sides of the head.


6. How To Create Volume At The Crown

For clients who crave volume in the crown, Wayne says you’ll need to cut framework in that area. Here’s how:

  • At the crown, lift up the center section and identify the bending point, aka the focal point, of the hair.


  • Then, starting at that bending point, lightly razor cut up to frame the edge of that section.


  • Repeat on the section directly behind that plus on the section to the right and left.


10 Productive Ways To Spend Your Time In Quarantine

More from
Surface