
6 Brazilian Balayage Tips From @romeufelipe

Improve Your Balayage Technique With These 6 Tips!
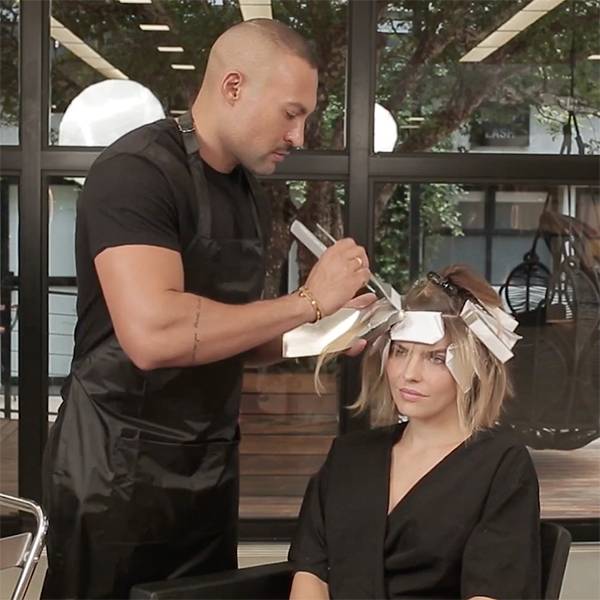
We KNOW your clients have brought you photos of @romeufelipe’s work, and for good reason. His Brazilian balayage technique creates natural-looking, luxe blondes, like his clients have been lounging on the beach and just happen to look THAT GOOD. The Wella Professionals Global Ambassador taught two hair transformations for Wella’s WE Create on-demand show, and we’ve got his top tips for achieving the most effortless blonde!
Watch both of Romeu’s transformations AND hours of additional technical and business content FOR FREE: Click here to watch Wella WE Create!
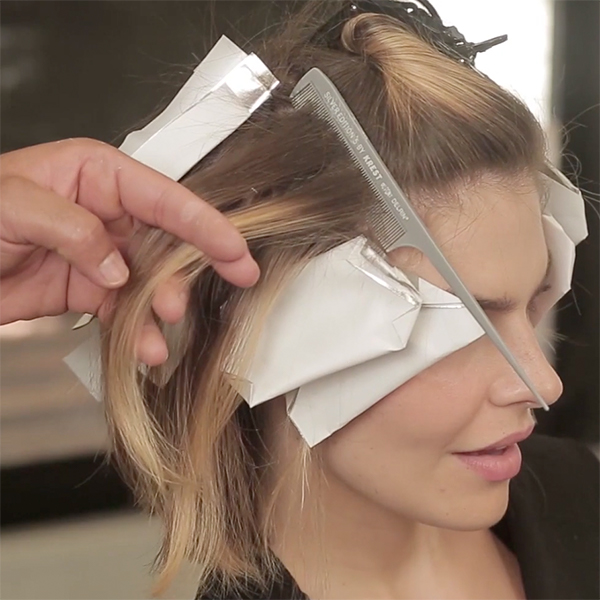
1. Create imperfect sections to mimic the natural hair fall.
When Romeu sections a client’s head, he pays attention to how her hair naturally falls. He keeps section lines just slightly imperfect, so the end result isn’t too uniform.

2. Use lots of product for the most even results.
The key to “after photos” like Romeu’s is in the product he uses and HOW he uses it. “Apply evenly, and a generous amount of product,” he said. “Not enough product and the color will be uneven. If I don’t apply evenly, I’ll get different shades of highlights on the same section.”
For this demo, Romeu used Wella Professionals Blondorplex with Welloxon Perfect 6%. The lightener includes a bond builder inside, offering up to 97% less breakage—crucial when you are performing lightening services!
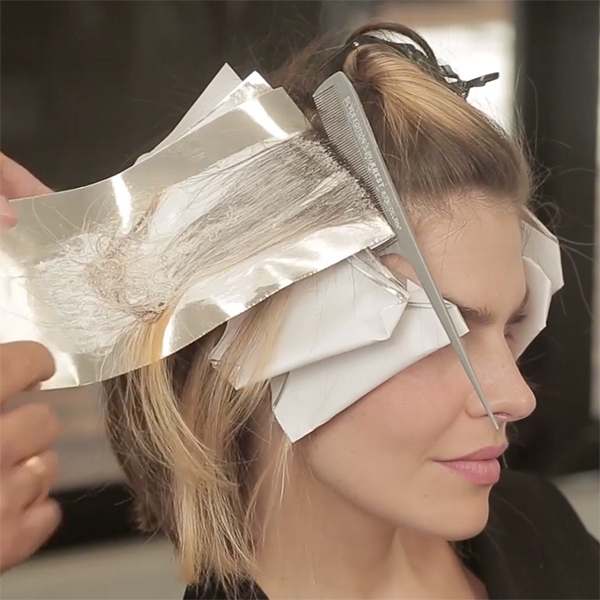
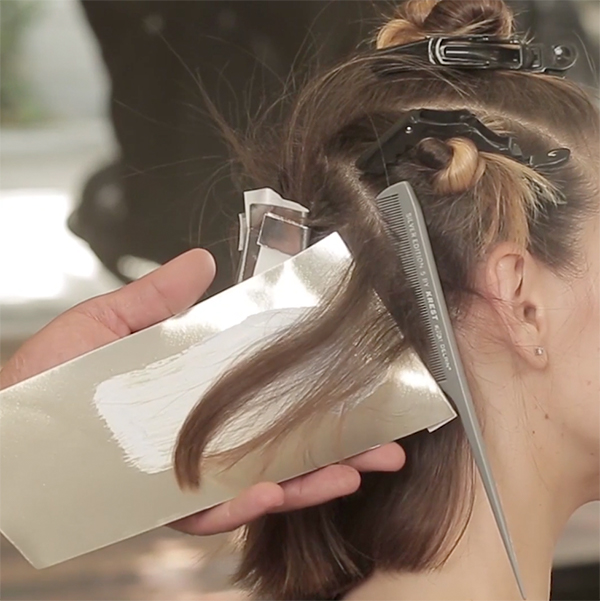
Pro Tip: Apply lightener to a foil BEFORE placing the section on the foil. This keeps the foil from slipping and helps ensure saturation.
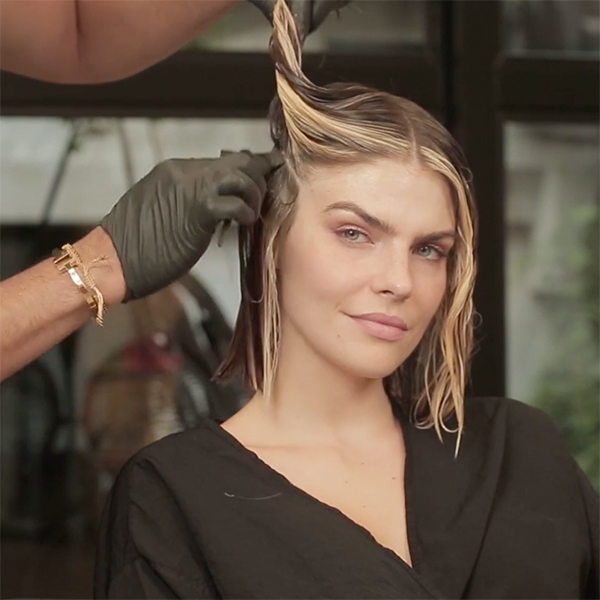
3. Spend time on the sections that matter most.
You don’t need to touch every single hair to achieve blonde goals. “I always focus more on highlights on the contour of the head,” Romeu said. This includes the coveted money piece. Save your efforts for what she will see in the mirror and maintain depth at the back of the head so the light pops even more.
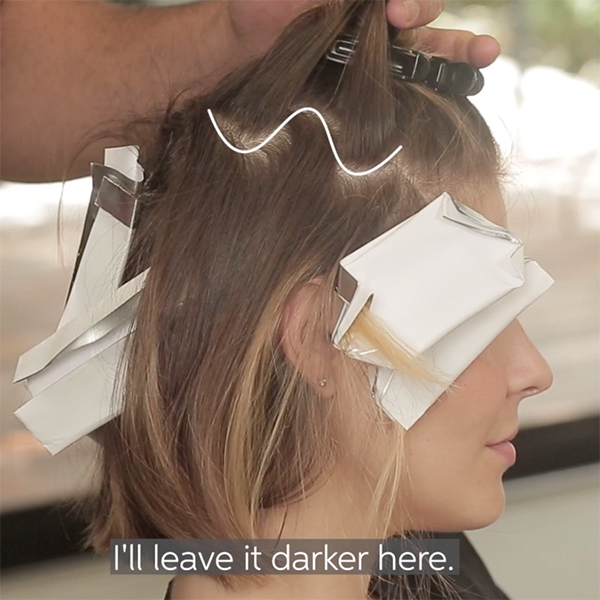
4. Use “half moon” weaves for a lot of dimension.
Larger, more rounded weaves not only help achieve more organic blonding results—they also help incorporate built-in lowlights in every lightened section.
5. Incorporate a soft backcomb for extra blending.
Romeu sometimes will lightly backcomb a slice section before applying lightener for a softer transition—but the key word is LIGHTLY. He does not aggressively tease the section and uses a light touch to get an easy blend.
6. Tone in a water drop shape.
Apply root toner about 2-3 centimeters down from the root—EXCEPT for the money piece. This area should be the brightest pop, so Romeu applies the toner here last, and only applies it about 1 centimeter down from the root. The result is a root shadow in a water drop shape, with the largest part of the drop around the crown and the smallest part at the front hairline.
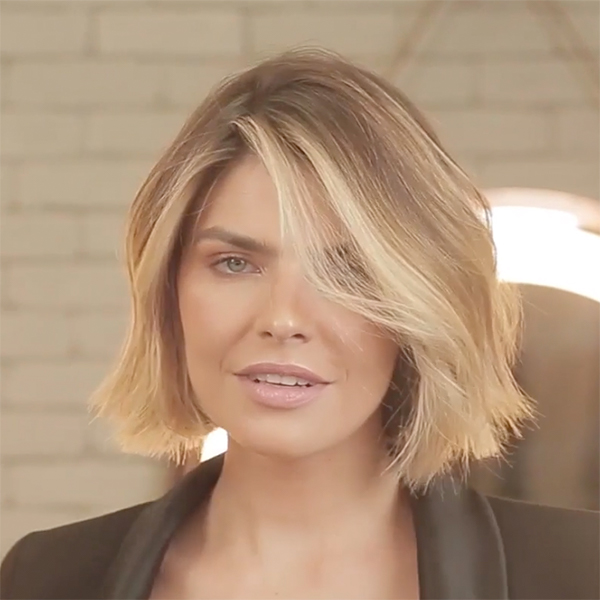
Check out the finished look & tap the beaker below for the formulas!
More from
Wella Professionals
-
Monthly Product Launch List
11 New Game-Changing Hair Launches To Add To Your Arsenal
-
Industry News
Wella Professionals Announces the “PROject the Now” Challenge Winners
-
Manufacturer Events
“The He(ART) of Hair”: Wella Company Names & Celebrates Beauty Envision Award Winners
-
Hair Color
Bold Color Trends You Need To Know For 2024
-
Glossing/ Toning
Clear Gloss Guide: 5 Ways To Build Your Ticket
-
Glossing/ Toning
Coral Crush
-
Blonde
6 Blonding Techniques To Save Your Client’s Hair
-
Bobs
The Biggest Haircut Trends of Summer 2023
-
Balayage
Your Official Guide To Barbie Blonde
-
Business
15 FREE Classes To Take For Hairstylist Appreciation Week
-
BTC Hair Trend Report
Your Complete Guide To Color Blocking
-
BTC Hair Trend Report
Chocolate Copper
-
Blonde
Warm Honey Bronde
-
Blonde
How To Formulate Toners For Honey Blonde
-
BTC Hair Trend Report
2023 Hairstyling: 11 Trends You Need To Know
-
Balayage
HONEY BLONDE CURL FORMULA
-
Best Of 2022
10 Toning Tips You’ll Need in 2023
-
Industry Events
Wella Company Celebrates Women Leaders In Founders’ Forum Panel
-
Clarifying
3 Steps To Properly Cleanse Curls & Coils
-
Clarifying
Aqua Pure Purifying Shampoo
-
Conditioners
NUTRICURLS Deep Conditioning Treatment
-
Celebrity
Juno Temple’s Grunge Blowout
-
#ONESHOT HAIR AWARDS
Libertas
-
#ONESHOT HAIR AWARDS
The BTC Show 2022: 10 Things We Saw

