Articles > Balayage > 4 Tips For Creating A Blended Balayage
Last updated: May 19, 2021

4 Tips For Creating A Blended Balayage

open color formula
close formula
  • Formula A (Lightener)

    Redken Free Hand Creamy Lightener + 30-volume Redken Pro-Oxide Developer

  • Formula B (Toner)

    Equal Parts Redken Shades EQ 4N + 5NA + Shades EQ Processing Solution

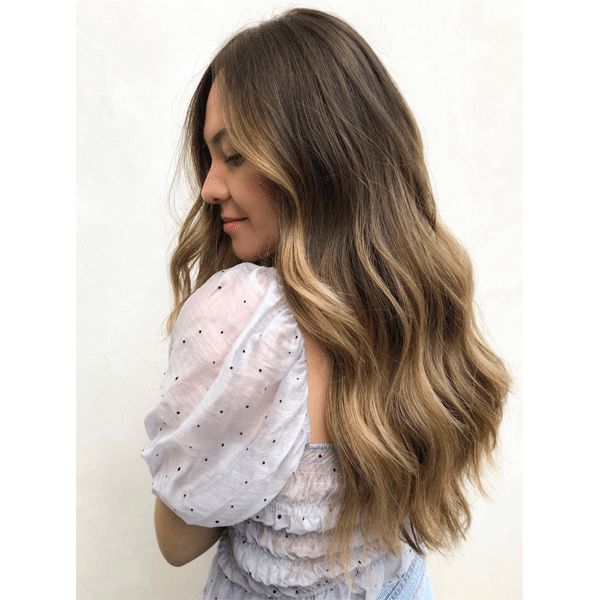
Use These Tips To Create A Blended Balayage

There is nothing we love more than a seamless, blended balayage. It’s just so satisfying don’t you agree? To break down how to create a flawless gradient when hair painting, we brought balayage queen Farhana Premji aka @xo.farhana.balayage to The BTC House to share all of her tips for creating a diffused transition zone. Scroll down for all of the deets and click here to purchase Farhana’s class on BTC University and learn EVERYTHING about her hair painting technique!


Check Out The Before & After!

open color formula
close formula
  • Formula A (Lightener)

    Redken Free Hand Creamy Lightener + 30-volume Redken Pro-Oxide Developer

  • Formula B (Toner)

    Equal Parts Redken Shades EQ 4N + 5NA + Shades EQ Processing Solution


1. Horizontal Partings For Clean Sections & A Natural Gradient


When it comes to her sectioning, Farhana always works with horizontal partings. Why? “It forces me to stay present in my sections and also keeps my work clean,” she explains. Also, Farhana prefers to paint the hair how it falls naturally. “Having a flat, horizontal section allows me to really focus on the transition zone, which is really important when creating a gradient for the finished result.”


2. How To Hold & Where To Paint


When it comes to tension and where to hold her sections, it all comes down to control. Farhana broke it down like this:


  • Hold the section just below midway (this will be relevant to the client’s length). This will allow you to keep control of the section as you paint the gradient up into Zone 2. If the client has existing lightness, hold their section right above where their existing lightness begins and begin painting there. This will bring their transition zone up and create a gradient with their existing color.


  • Keep a tight tension but don’t manipulate the client’s head position too much. “You want to keep control of the section,” she explains. “If I let go, my client’s head will bounce back a little bit, but I’m not pulling on the section to make it uncomfortable.”


3. Paint In A Non-Traditional V Shape


When painting, Farhana doesn’t necessarily paint in the traditional V shape, but definitely keeps it in mind. “Of course I like to favor the face,” she explains, “so I will bring my lightener up in the front of my sections. But I don’t really go that far up in the back of my section.” But to create that drool-worthy gradient, Farhana will use her brush to really diffuse the middle of the v, ending in a VERY blended V shape.


Pro Tip: When diffusing the center, use the tip of the brush and light-handed strokes to blend the lightener up until the product turns to powder. “You want to see the lightener on the individual strands of hair,” Farhana explains. It will give the result of a babylight and create a smooth transition zone.


4. Backcomb The Top Section To Create A Buffer


The goal of Farhana’s technique is to create a color that is low maintenance and will give the client a seamless grow out. To do that, she avoids bringing her lightener up too high and really relies on the transition zone to create a gradient. When painting her top section, Farhana will lightly backcomb not to diffuse, but to act as a buffer in order not to paint too high towards the client’s root.


Click through the slideshow to see more of Farhana’s day at The BTC House!

Products Used


Want to learn MORE from Farhana? Click here to purchase her course on BTC University and have lifetime access to the class!