Schwarzkopf Professional “2-Tone” Step-by-Step


Starting wiht the triangular section at the back of the head, cut the first section to create graduation. Subsequent sections are cut working toward the center back of the head using the previously cut section as a guide.

Advertisement


Repeat the same cutting technique on the other side of the head until the entire back section is complete.


Advertisement


Advertisement


The model is now ready for the color application.
The model's natural hair color is a base 7 Medium Blonde with previously lightened mid-lengths and ends.
Colors
First Color: Igora Vario Blond Plus, Igora Royal Developer - 10 Volume (3%)
Second Color: Igora Viviance 9.5-1 Pastel Cendre Blonde, Igora Viviance Developer (4%)
Third Color: Igora Royal Color Cream 9.5-0 (30g) Pastel Natural Blonde, Igora Royal Developer - 10 Volume (3%)

Advertisement


After drying the hair, secure a small triangular section over each ear and a small oblong section behind each ear.
Color the triangular and oblong sections with the second color, taking back-to-back slices. Color the remaining hair with the third color, from scalp to ends.


Schwarzkopf Professional “2-Tone” Step-by-Step
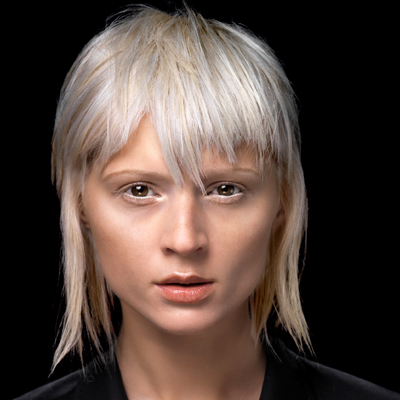
Give this modern cut and color from Schwarzkopf a try. A minimalistic feel and monochromatic color perfectly suits today’s edgy clients.
See the Collection: Essential Looks Diverse Collection!
BTC-TV.com: Watch it! See the 2 Tone trailer and download a clip!
Get the Schwarzkopf Diverse Step-by-Step and Look Book and DVDs.
To learn more, go to www.hansschwarzkopf.com
On Paper Keyword: schwarzkopfhair
HOW-TO STEPS 
-
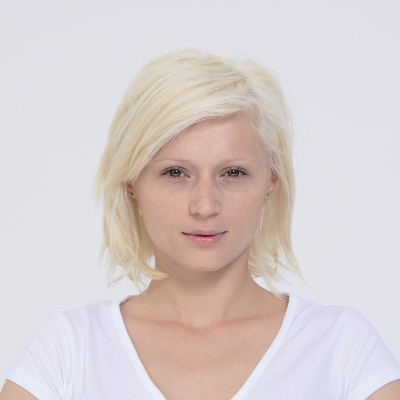
 1
1 -
 2
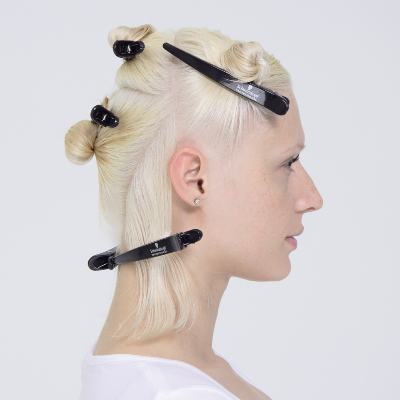
2Begin by sectioning the front of the hair from ear to ear. Just below the crown from side to side, create a new section and secure it with a clip. Take a deep V section beneath the crown, encompassing the entire occipital and nape area, leaving out a section behind each ear.
-
 3
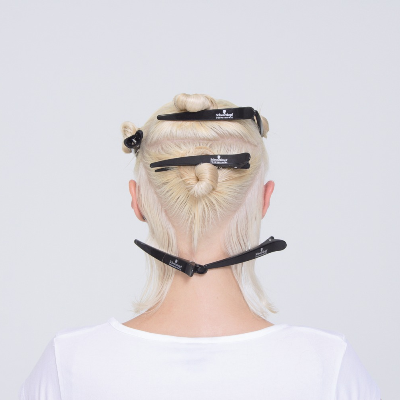
3This sectioning technique creates two large triangles, one in the crown area and the other one at the back of the head. The fringe area is clipped away, securing it in front of the ear.
-
 4
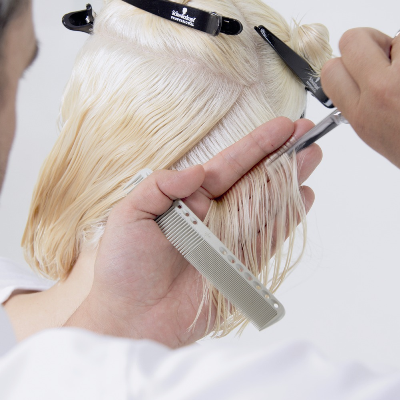
4Starting wiht the triangular section at the back of the head, cut the first section to create graduation. Subsequent sections are cut working toward the center back of the head using the previously cut section as a guide.
-
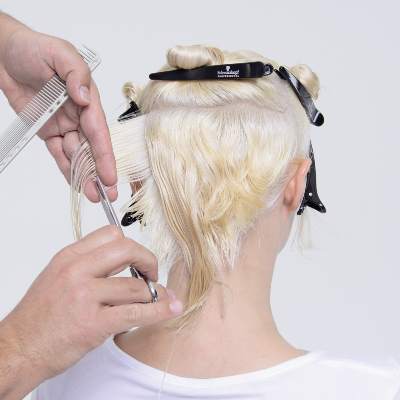
 5
5The same cutting technique is then repeated on the other side of the head until the entire back section is complete.
-
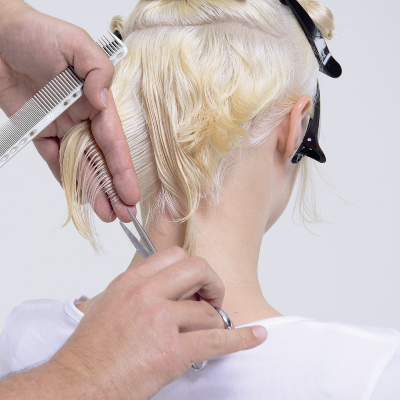
 6
6Repeat the same cutting technique on the other side of the head until the entire back section is complete.
-
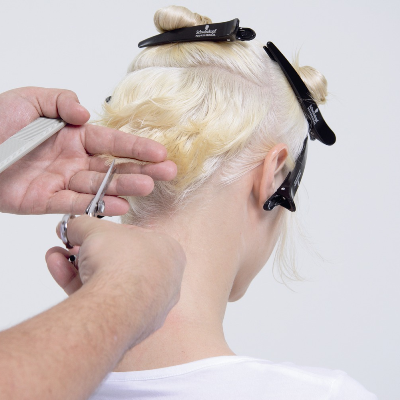
 7
7The back section is refined using the point of the scissors.
-
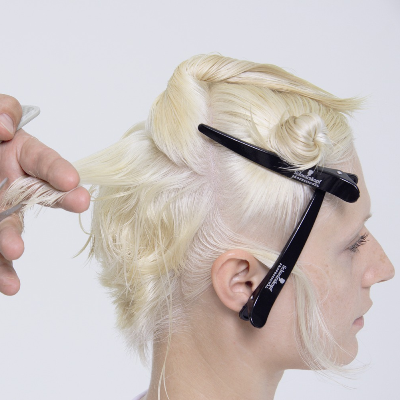
 8
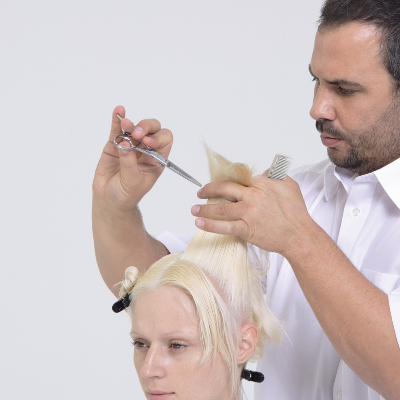
8Work through the triangular section up to the crown area by taking fine sections and pulling them up at a 90 degree angle to the head. Cut using the point of the scissors.
-
 9
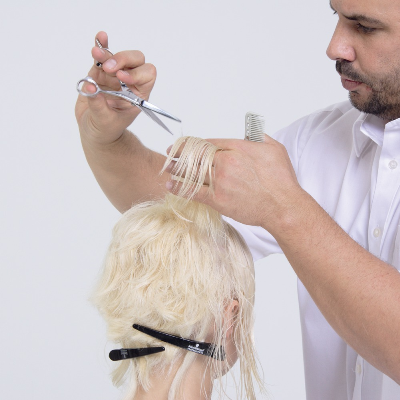
9Working forward from the crown, elevate all sections up and over direct them back to retain the length through the front.
-
 10
10Repeat the same technique on the other side of the head until the entire section is complete.
-
 11
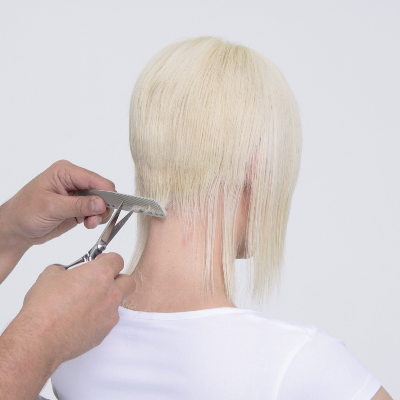
11Blow-dry the hair and use a flat iron to achieve a smooth finish. Refine the entire hair cut using a pointing technique.
-
 12
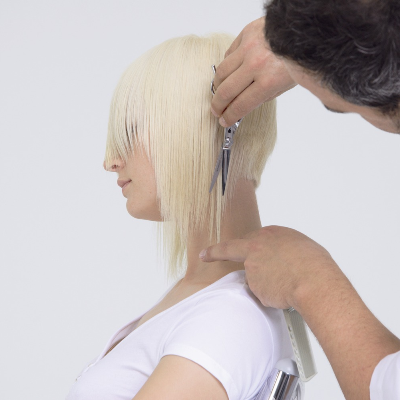
12Use a slicing technique to refine and soften the edges of the haircut.
-
 13
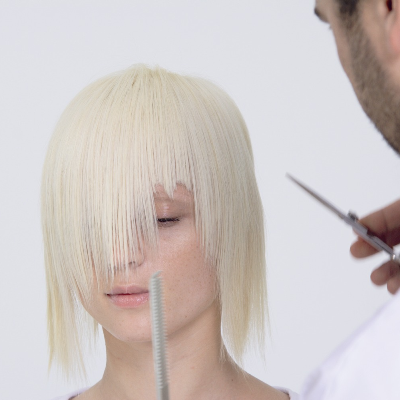
13Move to the fringe area and cut it visually using the point of the scissors.
-
 14
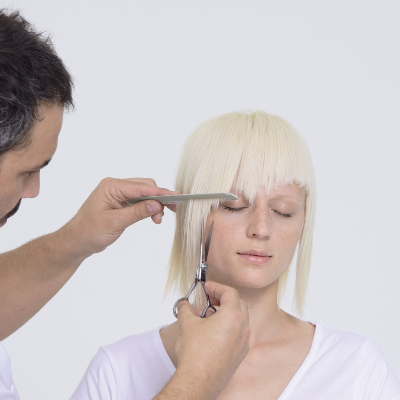
14Continue cutting the fringe with the point of the scissors.
-
 15
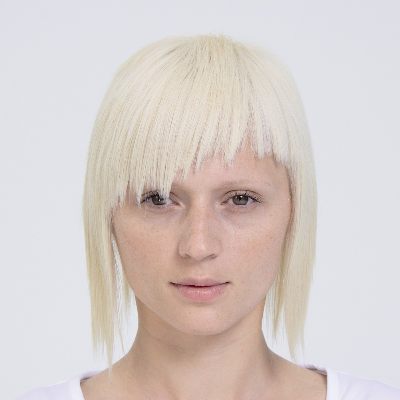
15The fringe is slightly longer on one side and is textured, not solid. It is important to visually adapt the fringe to each individual client.
-
 16
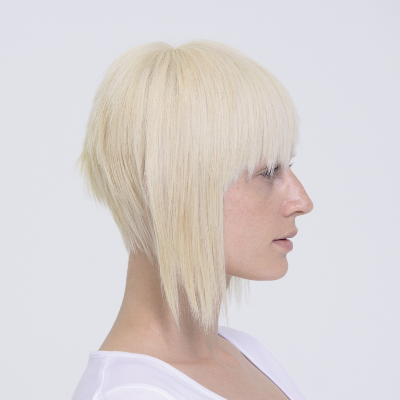
16The model is now ready for the color application.
The model’s natural hair color is a base 7 Medium Blonde with previously lightened mid-lengths and ends.
Colors
First Color: Igora Vario Blond Plus, Igora Royal Developer – 10 Volume (3%)
Second Color: Igora Viviance 9.5-1 Pastel Cendre Blonde, Igora Viviance Developer (4%)
Third Color: Igora Royal Color Cream 9.5-0 (30g) Pastel Natural Blonde, Igora Royal Developer – 10 Volume (3%)
-
 17
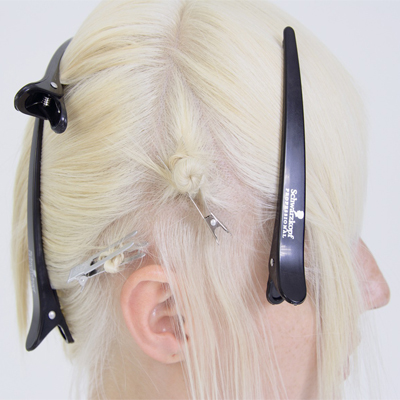
17Perform a re-touch aplication with the first color to achieve an even base. After the target lightness has been acieved, shampoo with BC Bonacure Hairtherapy Repair Rescue and follow with an application of BC Bonacure Hairtherapy Conditioner or Treatment.
-
 18
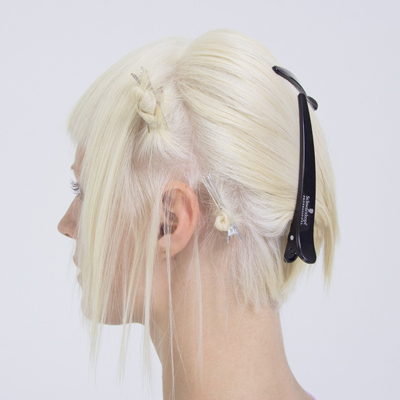
18After drying the hair, secure a small triangular section over each ear and a small oblong section behind each ear.
Color the triangular and oblong sections with the second color, taking back-to-back slices. Color the remaining hair with the third color, from scalp to ends.
-
 19
19
YOU MIGHT LIKE THIS
-
Hair Color
Dimensional Deep Copper
-
Hair
Schwarzkopf Professional “Dancer” Cut Step-by-Step
-
Bobs
Aqua Pearl from Schwarzkopf Professional
-
Hair Color
Multi-Tone Auburn
-
Blonde
Ultimate Platinum Blonde


TRENDING NOW!
-
Curly
Long Layers: 10 Pro Tips + Common Cutting Mistakes
-
BTC Hair Trend Report
The Biggest Haircut Trends of 2024
-
Copper
What Is The "Cowboy Copper" Hair Trend? Here's What It Really Means...
-
Haircuts
SHAG 101: The Dos And Don'ts
-
Bobs
The '90s Bob: How To Cut & Style This Trending Haircut
-
BTC Hair Trend Report
Quiet Luxury Blonde: The "Old Money" Trend Explained
-
Blonde
Dear Clients, Read This Before Going Blonde!
-
Balayage
How To Turn A Brassy Lift Into A Brunette Balayage


