
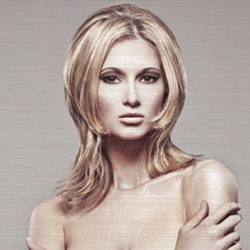
Sam Villa “The Bardot” Step-by-Step

Advertisement
Advertisement
Advertisement
Advertisement
Sam Villa “The Bardot” Step-by-Step
HOW-TO STEPS 
-
 1
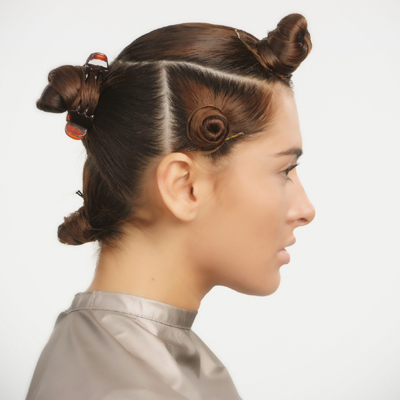
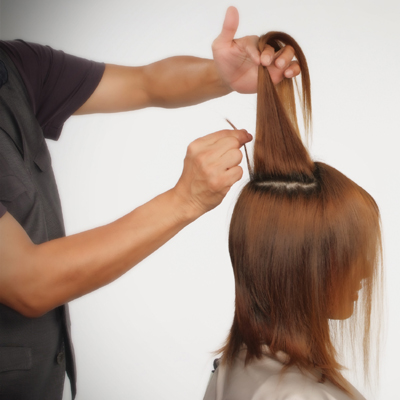
1Pre-section profile view. Note the isolated areas, a horseshoe section on top and the left and right front areas.
-
 2
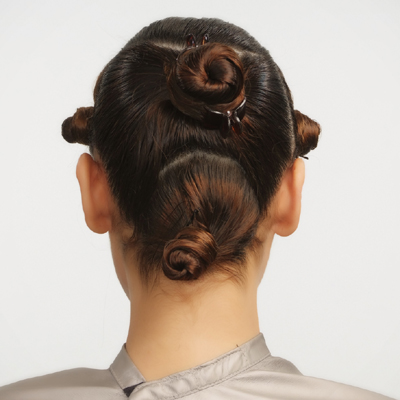
2Pre-section back view. Note the isolated curved nape section and the entire middle back area.
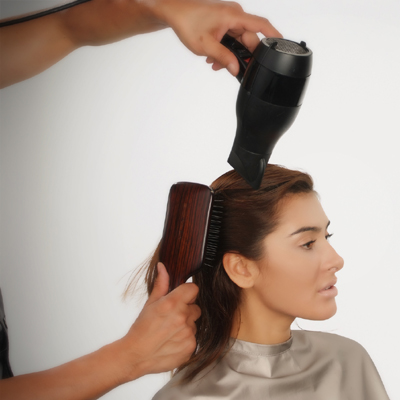
-
 3
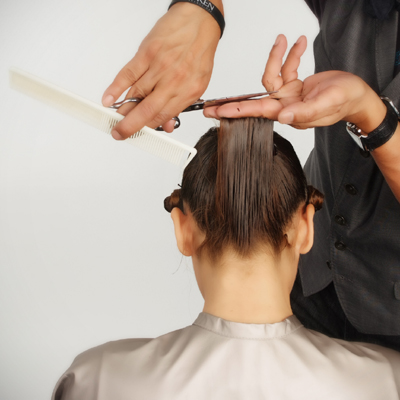
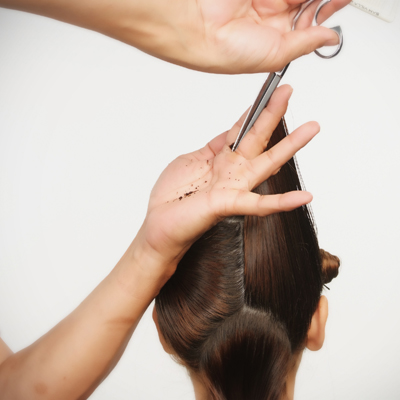
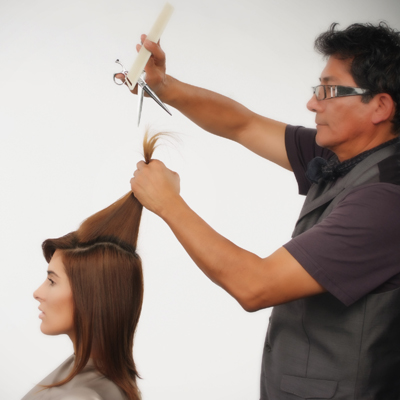
3Elevate the entire curved nape section 90-degrees vertical with your hand up against the head to ensure proper elevation.
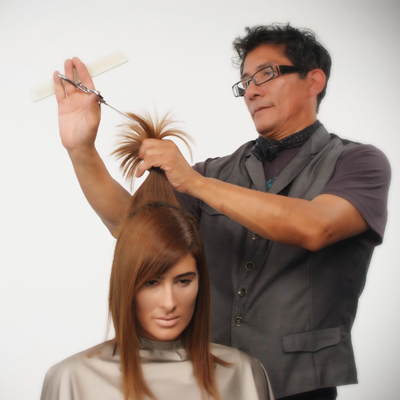
-
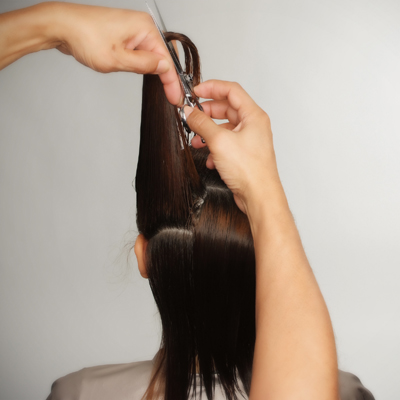
 4
4With a 90-degree finger angle, cut a horizontal line and work without over-directing.
-
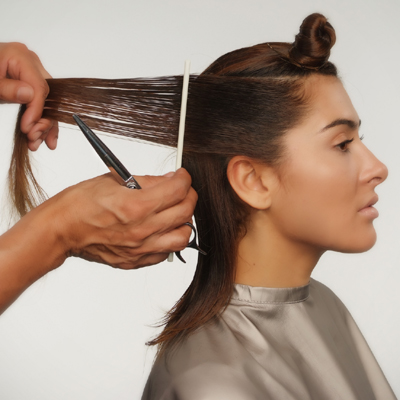
 5
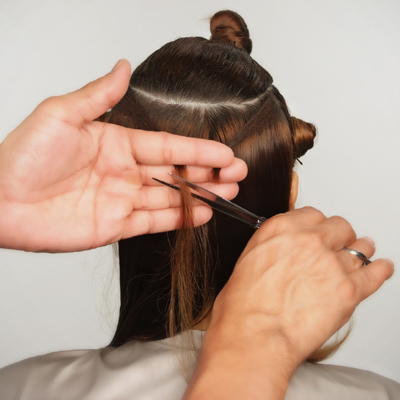
5Divide the back area in the center and cut the entire right back section with the elevation 90-degrees vertical and finger angle 45-degree diagonal. Note the over-direction behind the ear to maintain length behind the ear.
-
 6
6To create a guide for the left back area, take a piece from the left top of the back area and a section from the right top area. Marry the three sections in the center back and cut.
-
 7
7Note the center back piece from the right back area and the guide just created at the top left back. Now connect the dots.
-
 8
8Cut the left back section connecting the two dots with an elevation 90-degrees vertical and a 45-degree diagonal finger angle. Once again, note the over-direction behind the ear to maintain length behind the ear.
-
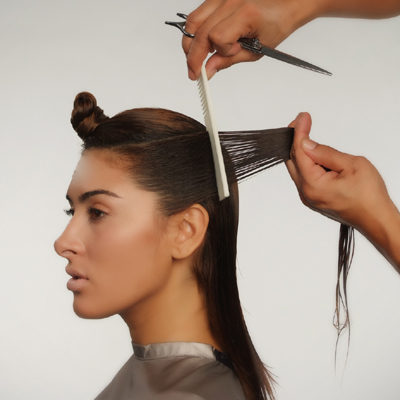
 9
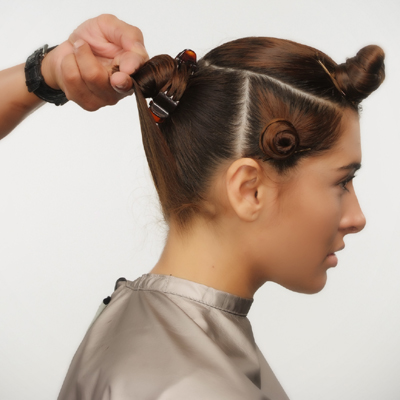
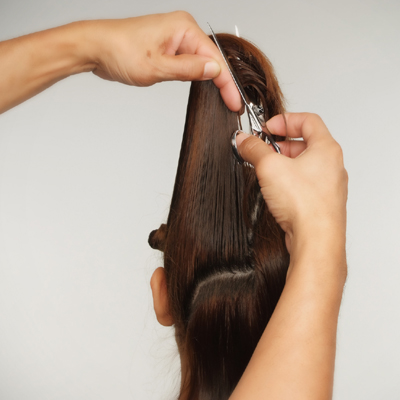
9Comb the right front vertically to set up the over direction in the front. Now connect this into the right back area.
-
 10
10Elevate the back with the front 90-degrees vertical connecting the front into the right back area.
-
 11
11Repeat the same in the left front area combing vertically to set up the over direction in the left front.
-
 12
12Note a back view of the left front area connecting into the back left area. Elevation 90-degrees vertical and finger angle 45-degrees diagonal.
-
 13
13Before cutting the top horseshoe area, apply Redken aerate 08 bodifying cream-mousse and blow dry by wrap drying with a flat paddle brush.
-
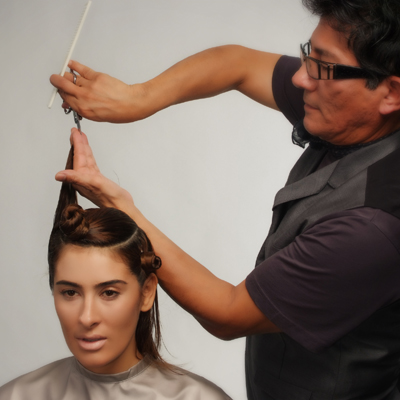
 14
14Note profile view. The top horseshoe area will be cut at least two inches longer than the center back. Do not connect.
-
 15
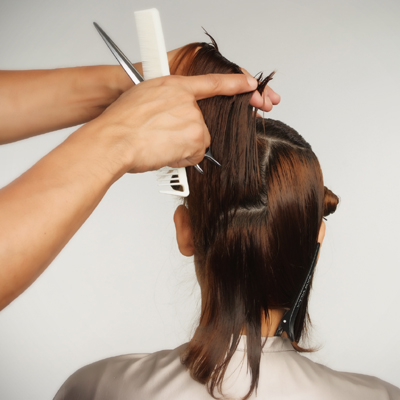
15Work with horizontal sections across the top horseshoe section, elevation 90-degrees vertical, and deep point cut to create a soft diffused horizontal line.
-
 16
16Note the elevation at the base of the crown is 90-degrees vertical. Continue to deep point cut each horizontal section, over-directing to a stationary guide to maintain length in front to complete the shape.
-
 17
17Learn more about Premiere Orlando!
Big Names are taking over Premiere’s Mainstage
So We Heard You Like Color
Premiere is back and ready to HEAT UP Orlando -

YOU MIGHT LIKE THIS
-
Blowouts
Brigitte Bardot-Inspired Blowout From Celebrity Stylist @hairbyadir
-
Styling
Textured and Teased—The Bardot Beehive
-
Hair
Jennifer Lawrence’s Hunger Games Hairstyles
-
Hair
Three ’70s Rock-Inspired Boho-Chic How-Tos
-
Hair
Bryce Dallas Howard’s Modern ’60s ‘Do at the Twilight Premiere
TRENDING NOW!
-
Curly
Long Layers: 10 Pro Tips + Common Cutting Mistakes
-
BTC Hair Trend Report
The Biggest Haircut Trends of 2024
-
Copper
What Is The "Cowboy Copper" Hair Trend? Here's What It Really Means...
-
Haircuts
SHAG 101: The Dos And Don'ts
-
Bobs
The '90s Bob: How To Cut & Style This Trending Haircut
-
BTC Hair Trend Report
Quiet Luxury Blonde: The "Old Money" Trend Explained
-
Balayage
How To Turn A Brassy Lift Into A Brunette Balayage
-
Blonde
Dear Clients, Read This Before Going Blonde!

