
Pivot Point International “Kitty” Mini-Tech

Advertisement
Advertisement
Advertisement
Advertisement
Pivot Point International “Kitty” Mini-Tech
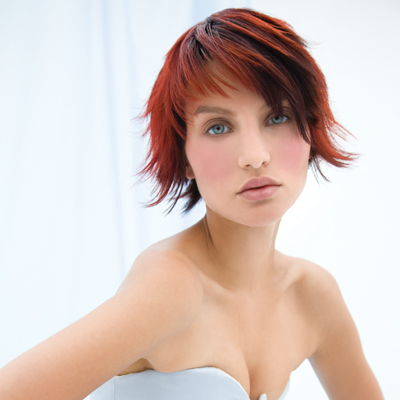
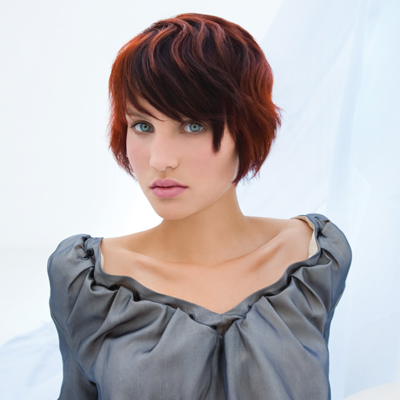
This sensibly sophisticated look from Pivot Point’s Kinetics Collection features vibrant color variations and uniquely scuplted lengths. With an easy, natural finish, this style transitions perfectly from day to night.
Purchase the Kinetics DVD/Book in the BTC Bookstore!
See the Collection: Pivot Point Kinetics
To learn more, go to www.pivot-point.com

Subscribe to behindthechair.com “On Paper” Magazine–4 Issues Only $29.95!
Next Issue: COLOR with Beth Minardi!
HOW-TO STEPS 
-
 1
1Kitty needs to update her color to something that highlights her striking eyes and bone structure. She also needs a style with more finishing options.
-
 2
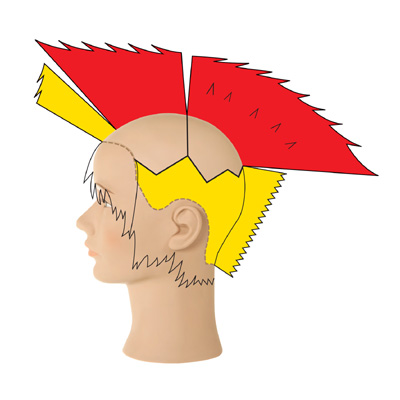
2Graduated form is sculpted in the back exterior and on the sides. The interior consists of increase-layered lengths with graduation in the fringe.
-
 3
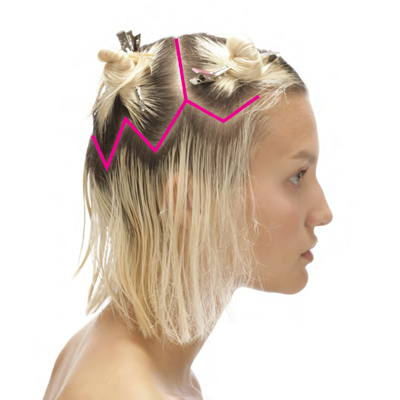
3Section the interior from the exterior with an irregular zigzag parting at the crest. Then, section the interior to into quadrants from the apex.
-
 4
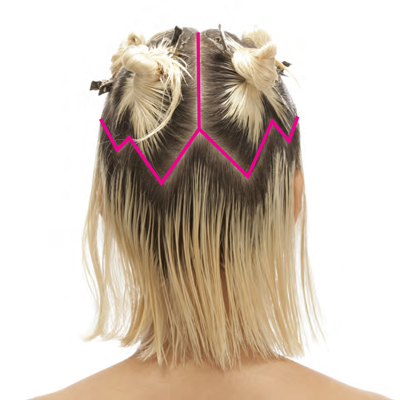
4Section the interior from the exterior with an irregular zigzag parting at the crest. Then, section the interior to into quadrants from the apex.
-
 5
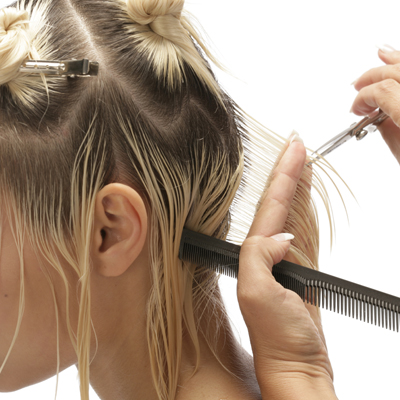
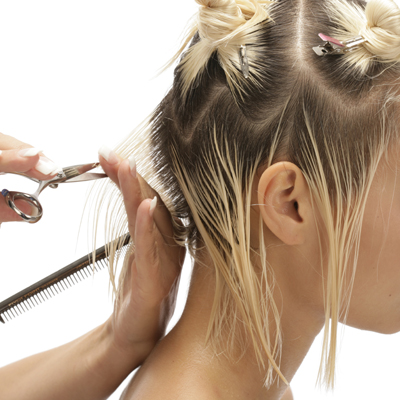
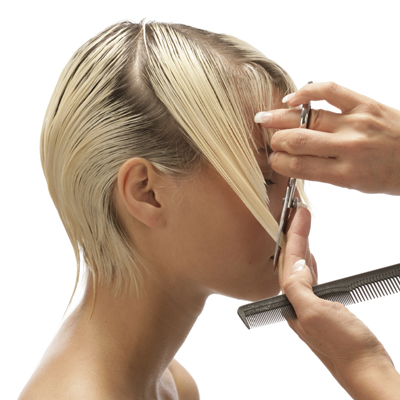
5Release a vertical parting in the center nape, distribute the hair perpendicular and project at 45-degrees. Notch to establish a mobile design.
-
 6
6Release a vertical parting on the right side adjacent to the center. Sculpt with the same techniques.
-
 7
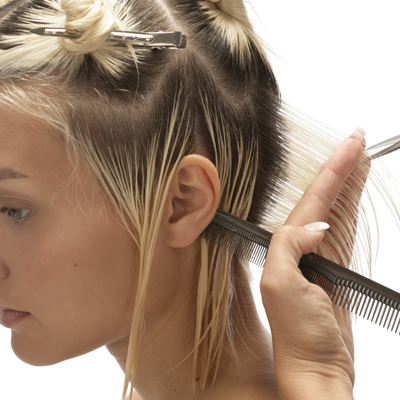
7Return to the left side. Release a vertical parting, distribute perpendicular, project at 45-degrees and use the last sculpted parting as a stationary design line. Work to the top of the ear. Move to the right side and use the same procedures.
-
 8
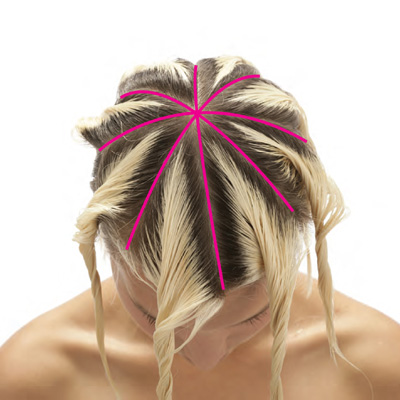
8Subdivide the entire interior into wide pivotal partings with the point of origin behind the apex. Note that the partings in the fringe area are wider than those at the sides and back.
-
 9
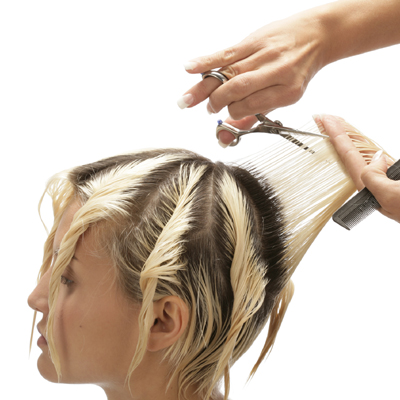
9Begin in the back and work toward the left. Project at 45-degrees from the point of origin. Slide cut to create increase-layered lengths. Sculpt the next partings individually using the same procedure as you work around the head.
-
 10
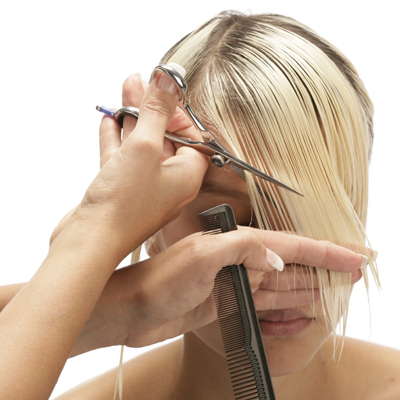
10Slide cut from above the right eye for a length increase toward the left.
-
 11
11Move to the right side of the fringe and shift the hair toward the front. Use the same length guide from the left side of the fringe, position your fingers nonparallel and slide cut to soften the lengths around the face.
-
 12
12Prior to the color design, filler is applied from base to ends to ensure an even color result.
-
 13
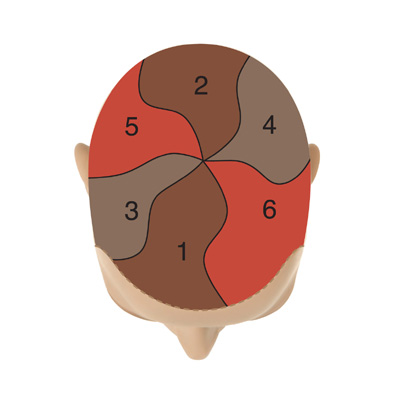
13A zigzag line separates the interior from the exterior at the lower crest. The interior is sectioned with six, irregularly curved lines that extend from the apex to the zigag sectioning line. A level 4, brown color will be applied in the exterior from base to ends.
-
 14
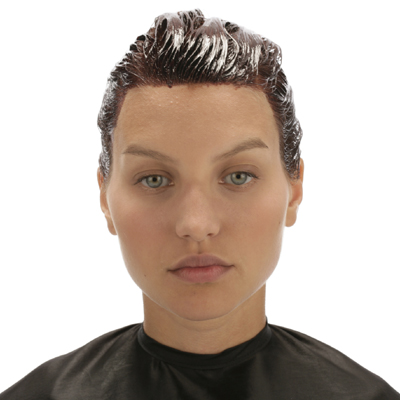
14Throughout the interior, the same level 4, brown color will be applied to the base. An alternation of level 7, red, level 5, warm brown and level 5, red demi-permanent colors with developer will be applied from the midstrands to the ends. Process, rinse, shampoo and condition before styling.
-
 15
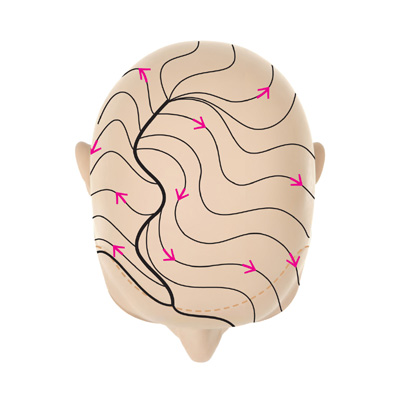
15The art shows the molding and air-forming patterns used to create an irregular, alternating oblong. The pattern is established from a wavy side part.
-
 16
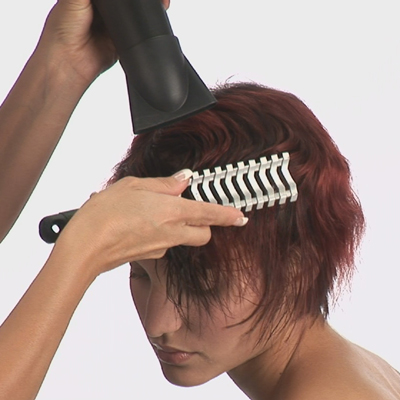
16After molding the hair to map out the directions and movements of the finished design, use only a couple of rows of a vent brush to enforce the second direction and ridge line of each oblong.
-
 17
17Credits
Artist: Marja Rahikainen, Pivot Point Finland
Makeup: Dino
Fashion Stylist: Venus Waterman @ Elenbaas Agency
Fashion Photography: Mike van den Toorn
Technical Photography/Videography: Tina Rayyan -
 18
18Credits
Artist: Marja Rahikainen, Pivot Point Finland
Makeup: Dino
Fashion Stylist: Venus Waterman @ Elenbaas Agency
Fashion Photography: Mike van den Toorn
Technical Photography/Videography: Tina Rayyan
YOU MIGHT LIKE THIS
-
Hair
Pivot Point International “Roos” Mini-Tech
-
Hair
Long and Layered Men’s Cut from Pivot Point
-
Hair
Pivot Point International “Jasmin” Mini-Tech
-
Hair
Pivot Point’s Inspirations
-
Hair
Pivot Point International “Jens” Mini-Tech
TRENDING NOW!
-
BTC Hair Trend Report
The Biggest Haircut Trends of 2024
-
Copper
What Is The "Cowboy Copper" Hair Trend? Here's What It Really Means...
-
Bobs
How to Avoid a Bulky Bob: 4 Techniques To Try
-
Hair Color
WWYD: How To Stop Your 6N From Turning Orange
-
Celebrity
10 BIPOC Celebrity Hairstylists Who Are Making Major Waves In The Industry Right Now
-
Glossing/ Toning
How To Achieve "Glass Hair": Smart Hacks From Hairdressers
-
Curly
Long Layers: 10 Pro Tips + Common Cutting Mistakes
-
Uncategorized
TikTok's Viral "Scandinavian Hairline" Is Actually Not New...

