
Speedy Bridal Side Braid

Advertisement
Advertisement
Speedy Bridal Side Braid
HOW-TO STEPS 
-
 1
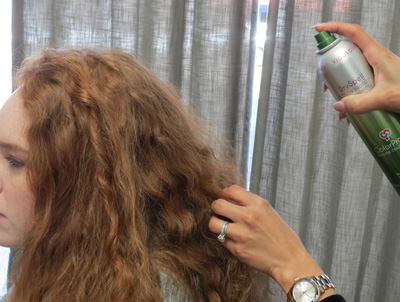
1Mist dry hair with ColorProof DrySpell Color Protect Dry Shampoo to produce texture and “grip” that will prevent the braid from slipping.
-
 2
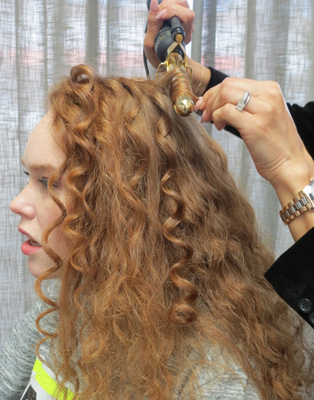
2Wind random strands around a closed curling iron or curling wand for polish and control. Twist each section, wrap the twisted hair around the barrel, hold and release.
-
 3
3Gently work ColorProof RuleBreaker Firm Flexible Wax through strands for definition and control.
-
 4
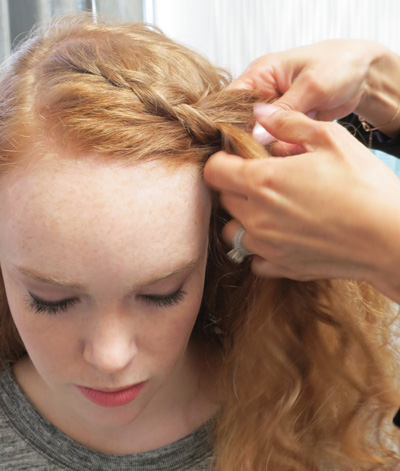
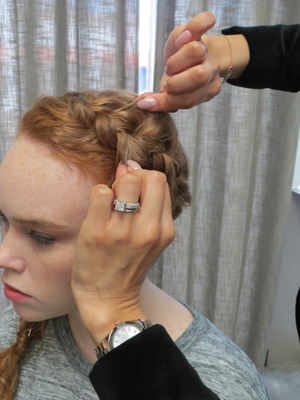
4Create a side part. With the start point at the parting, begin a Dutch (inside out) braid, incorporating hair from the hairline and from the other side of the section.
-
 5
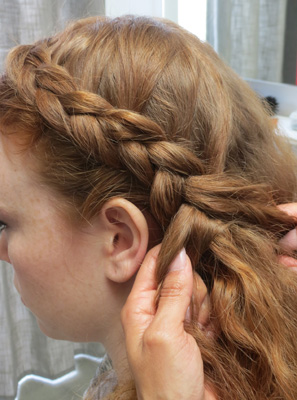
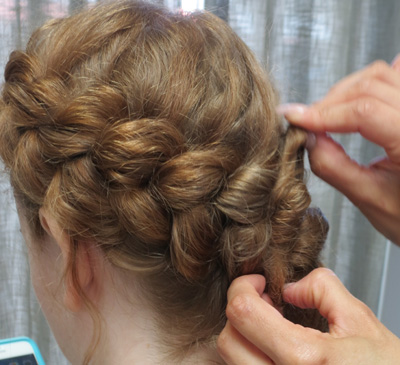
5Continue braiding, curving the braid around the head, behind the ear.
-
 6
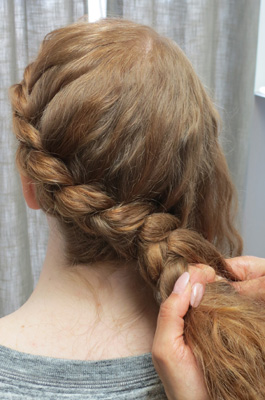
6At the nape, begin incorporating all of the hair into the braid.
-
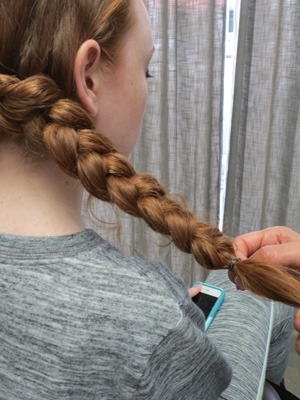 7
7Complete the braid, secure with elastic and wrap a small section of hair from the tail around elastic to conceal the band.
-
 8
8Insert pins into the braid at intervals along the head, to secure it and prevent bulging.
-
 9
9“Pancake” the braid by gently stretching the sides of each loop.
-
 10
10Curl the ends with a curling iron and mist once more with DrySpell, followed by WickedGood Weightless Shine Spray.
-
 11
11Finished look.
YOU MIGHT LIKE THIS
-
Hair
Holiday Braid from KMS® California
-
Hair
Intricate Side Braid
-
Braids
Rock and Romance Braid by Sharon Blain
-
Braids
The Power Braid
-
Braids
The Crown Braid from Pravana
TRENDING NOW!
-
BTC Hair Trend Report
The Biggest Haircut Trends of 2024
-
Blonde
Conditioner Before Toner: Common Hair Myth Debunked
-
Monthly Product Launch List
11 New Game-Changing Hair Launches To Add To Your Arsenal
-
Copper
What Is The "Cowboy Copper" Hair Trend? Here's What It Really Means...
-
Copper
Muted Bronze
-
Haircuts
SHAG 101: The Dos And Don'ts
-
Frizz
Straighten & Smooth 2A, Fine-Medium Density Hair
-
Business
Don't Fall Victim To Hair Industry Greenwashing—Read This First

