
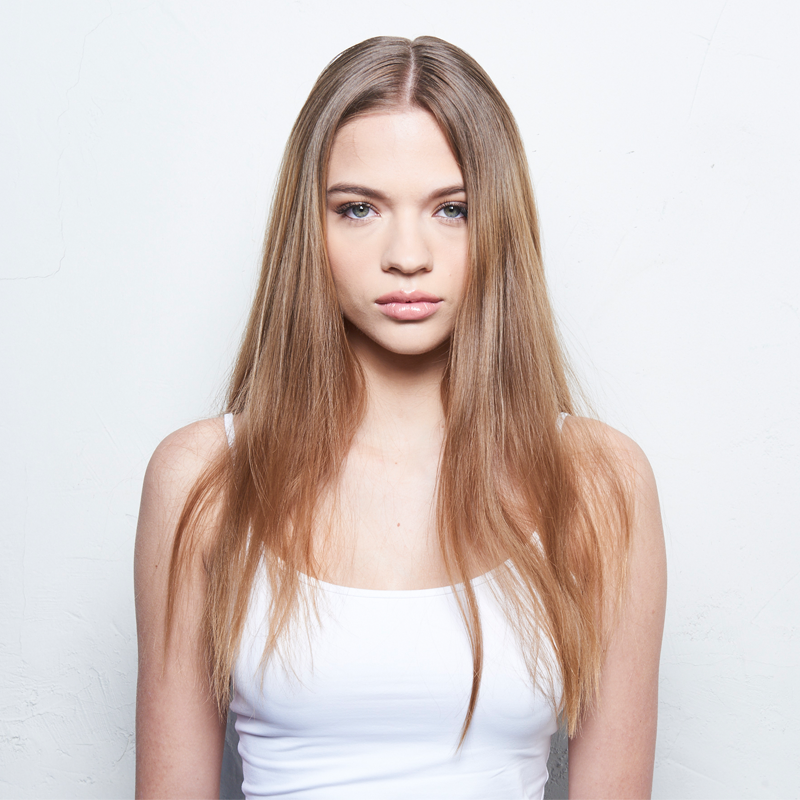
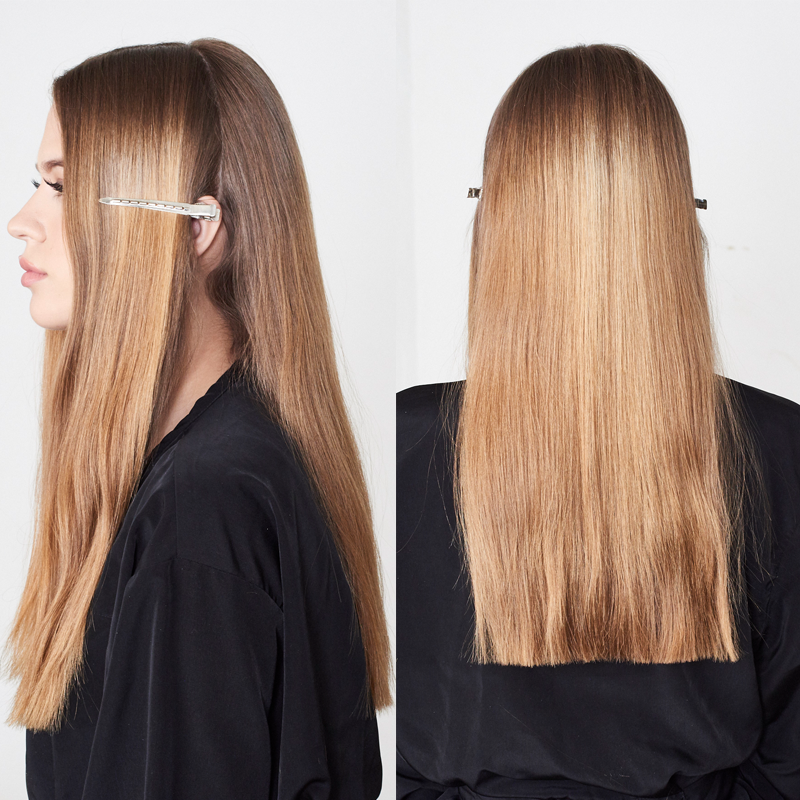
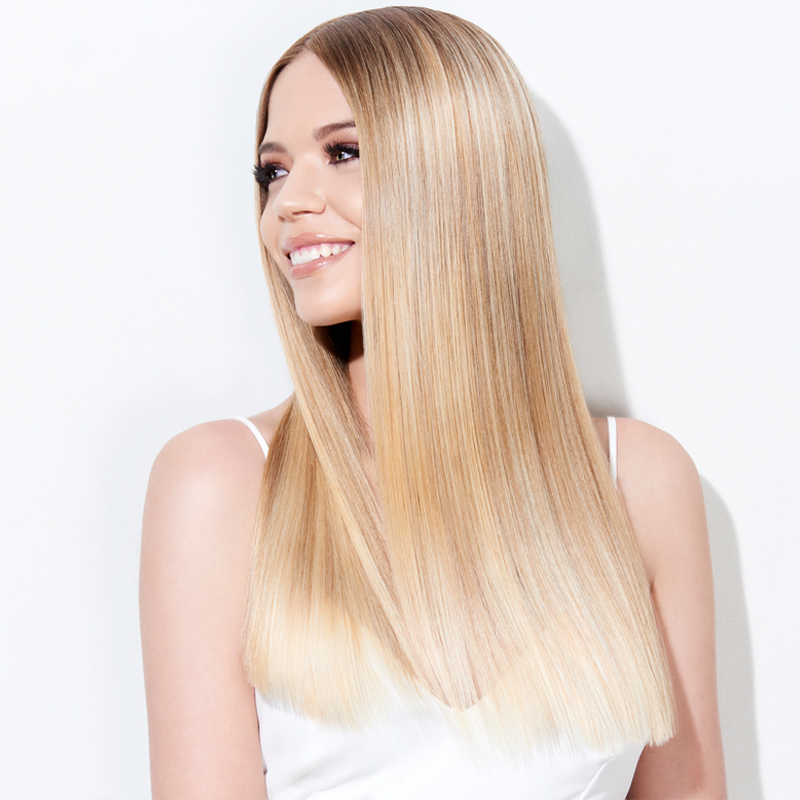
Blonde Babylights & Dimensional Foilayage
Blonde Babylights & Dimensional Foilayage
COLOR FORMULAS 
Products Used
VIDEO
HOW-TO STEPS
-

 1
1Before
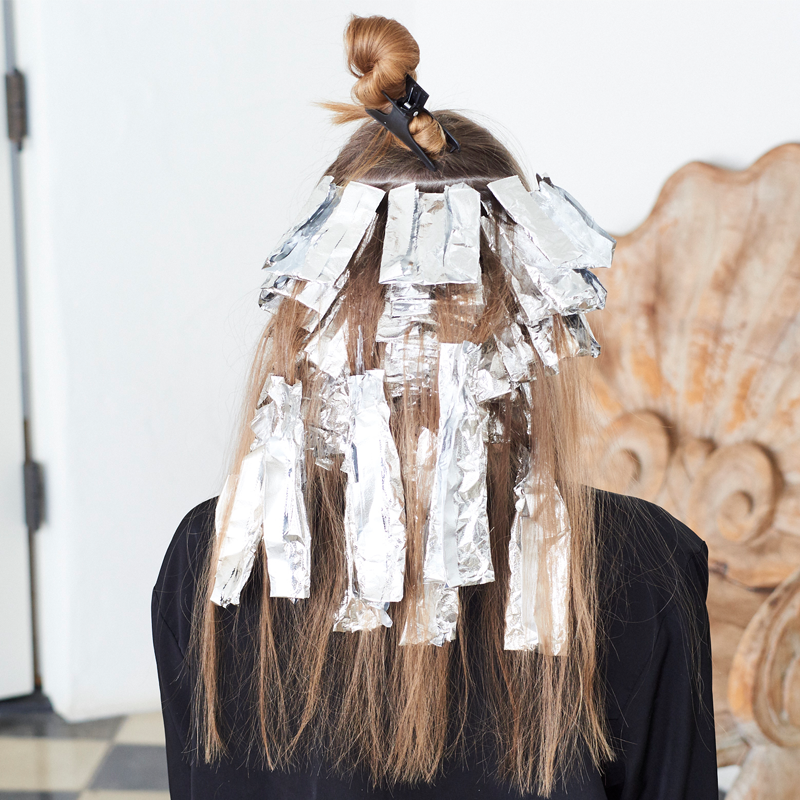
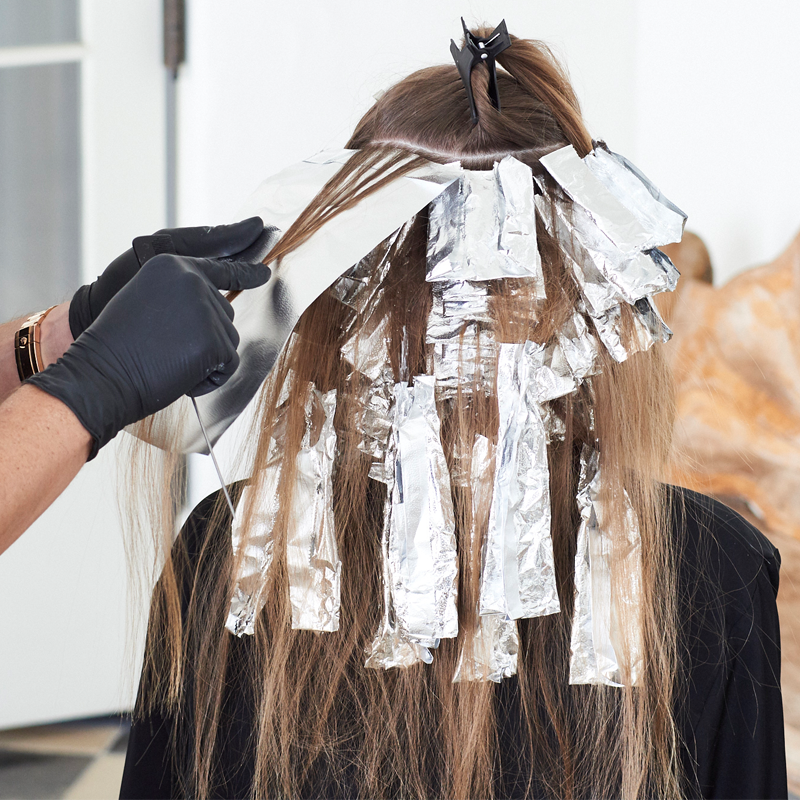
-
 2
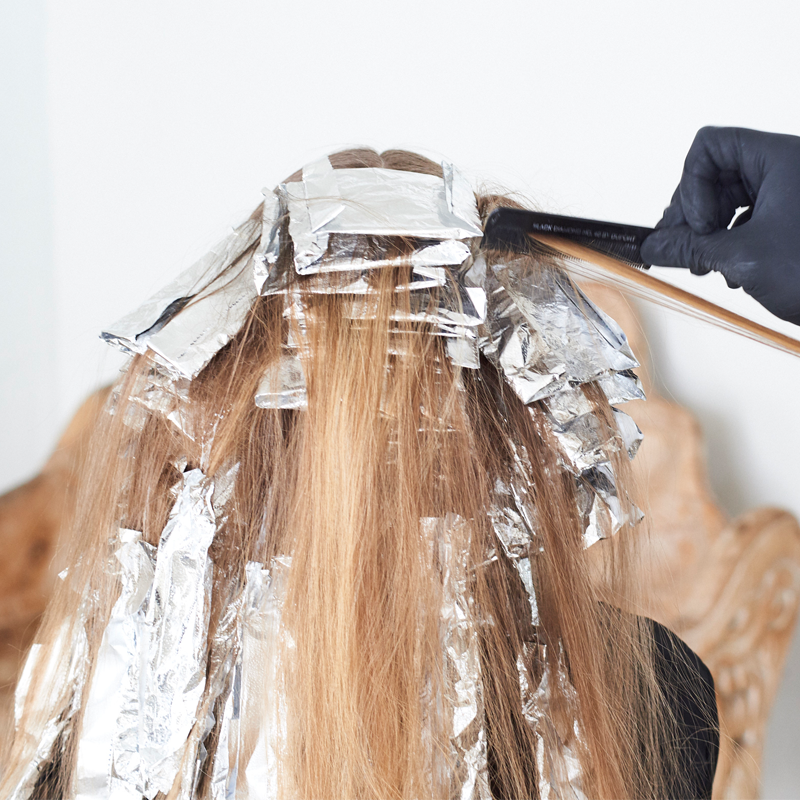
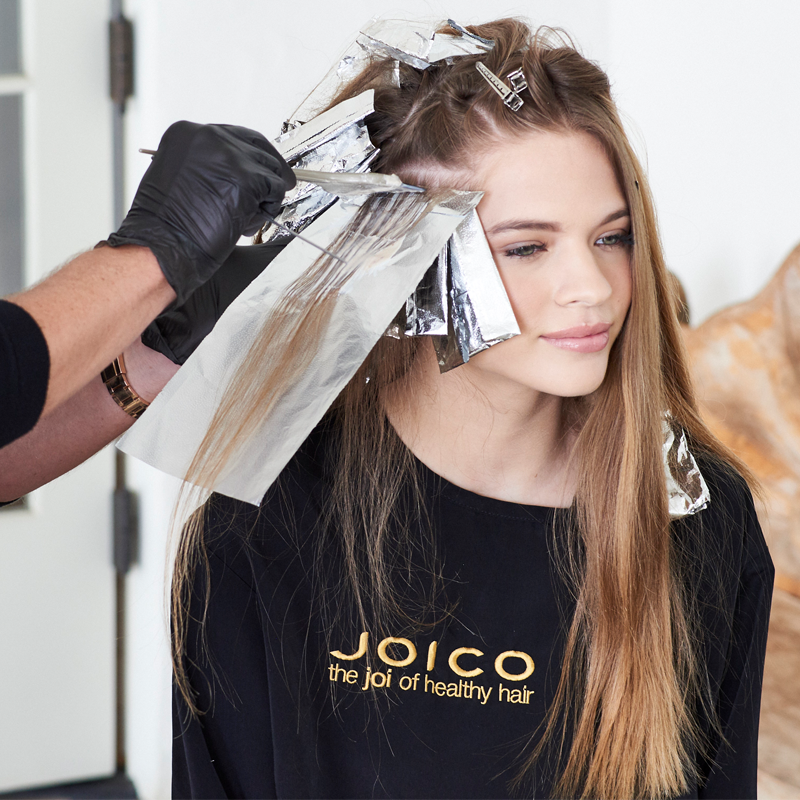
2Start by creating a center part, then section the hair from the top of the crown to the top of the ears on both sides.
-
 3
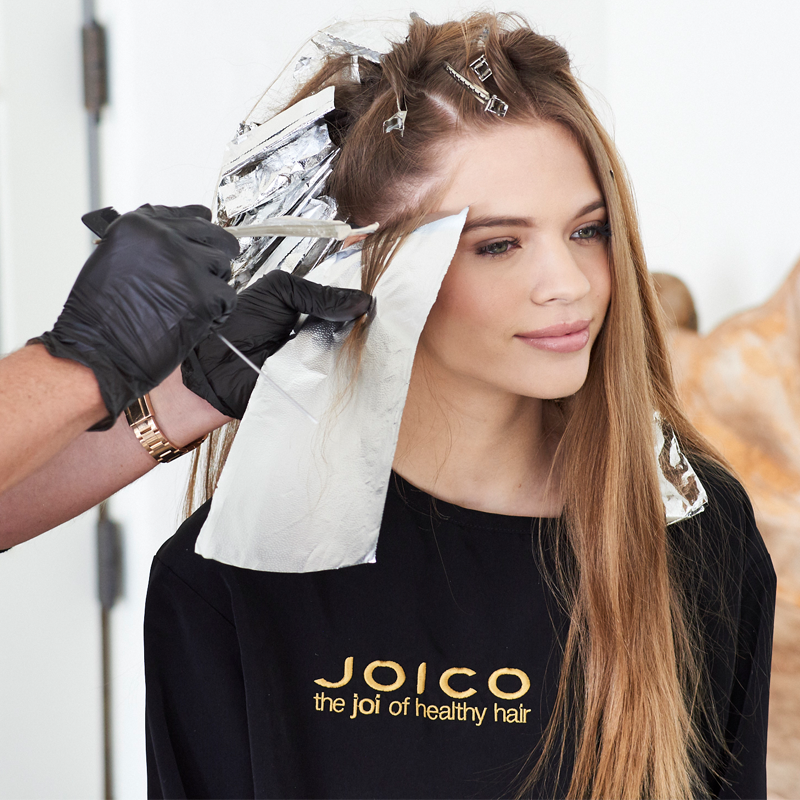
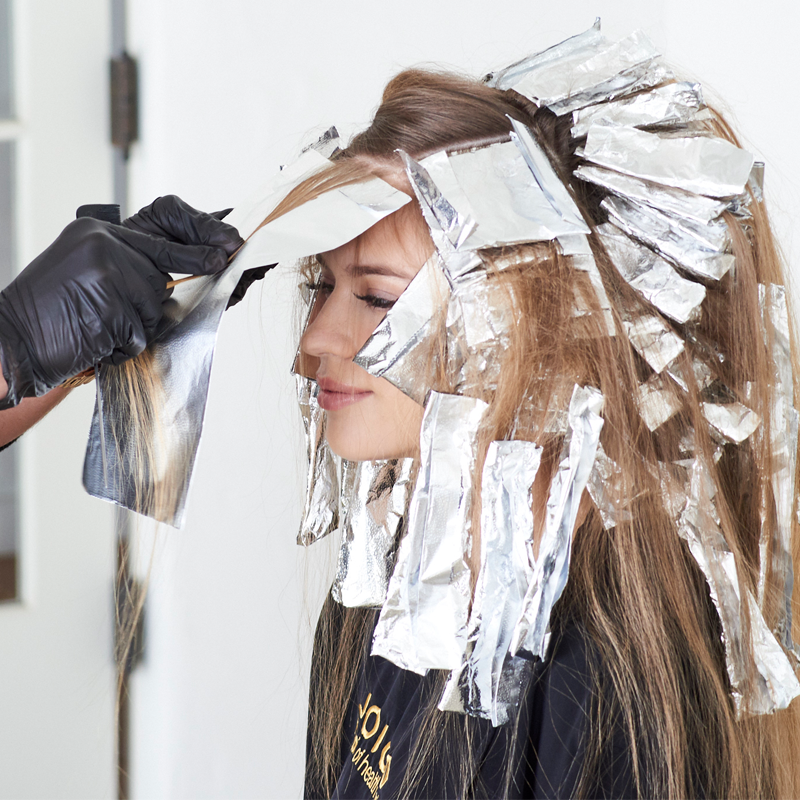
3Starting in the back and directly above the ears, create a horseshoe-shaped subsection across the occipital bone. Then take a center-back parting from the horseshoe through the nape.
-
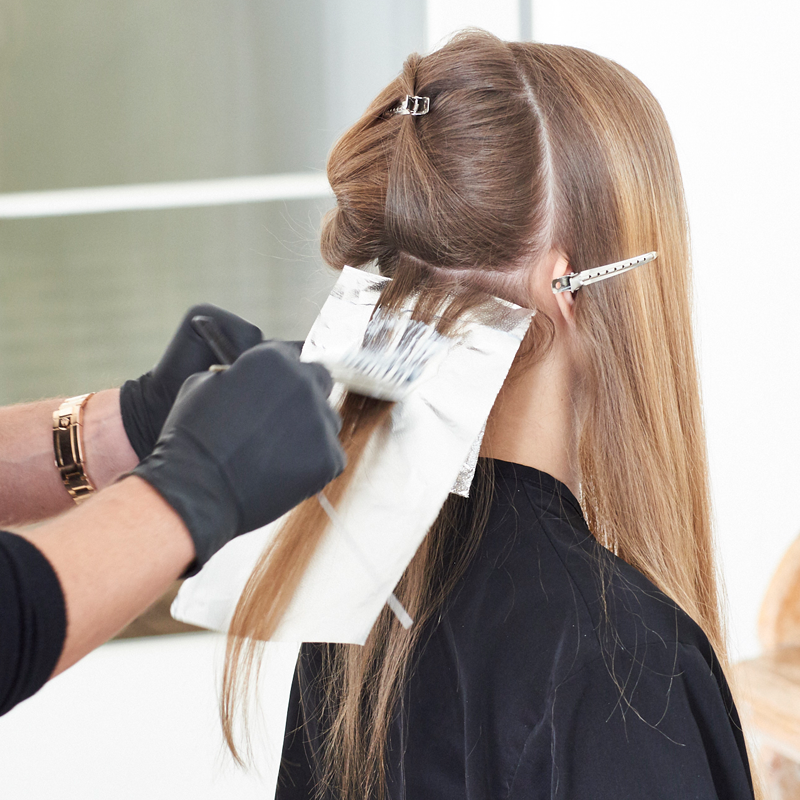
 4
4Starting at the bottom section, take a horizontal weave and apply Formula A, leaving behind a fine veil of natural hair at the hairline for a natural-looking, softer effect. Then apply Formula A starting 1 inch from the scalp through the ends.
-
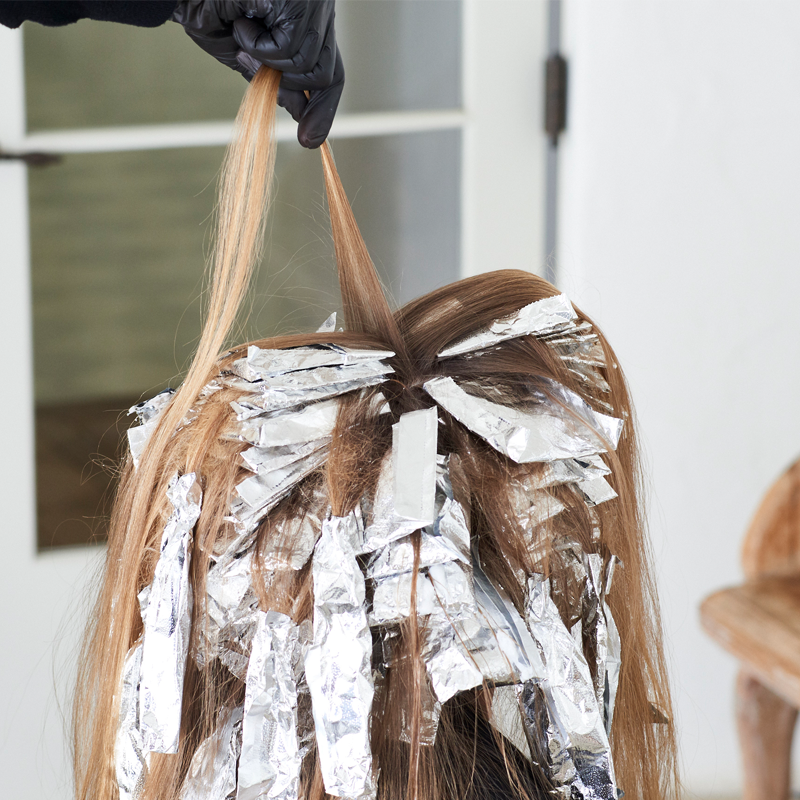
 5
5Leaving out a fine veil of natural hair, take another weave and apply Formula A.
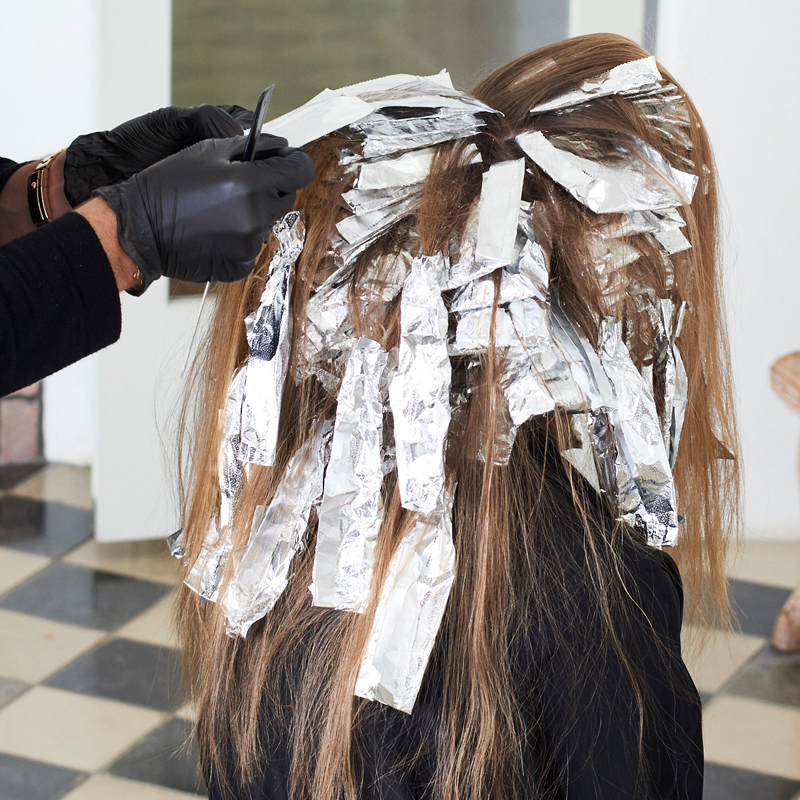
-
 6
6Continue this pattern up the back of the head until you reach the horseshoe section, then move to the opposite side and repeat.
-
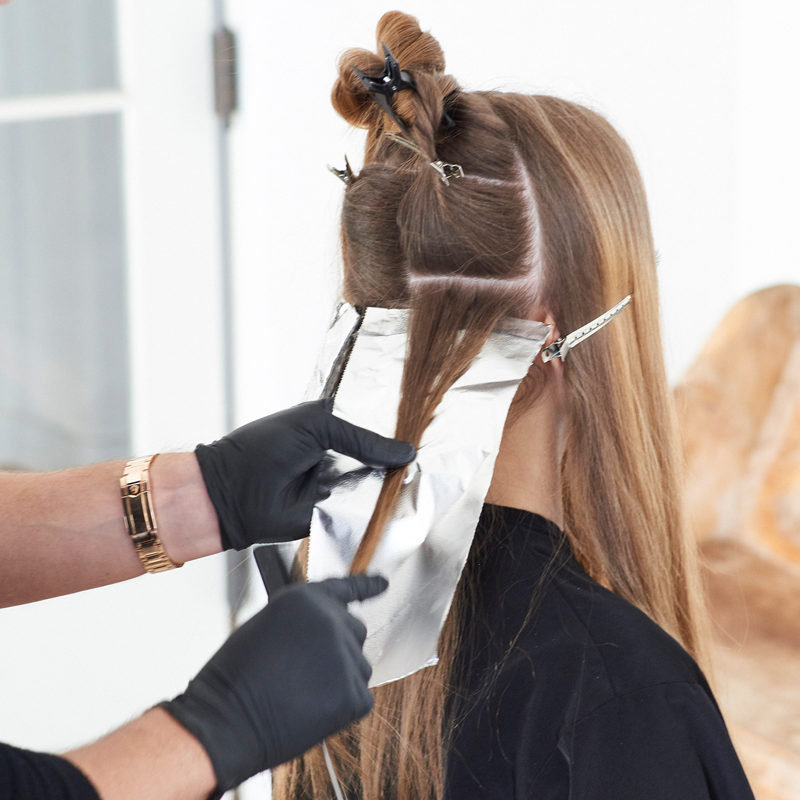 7
7At the horseshoe section, start applying Formula A in a bricklay pattern.
-
 8
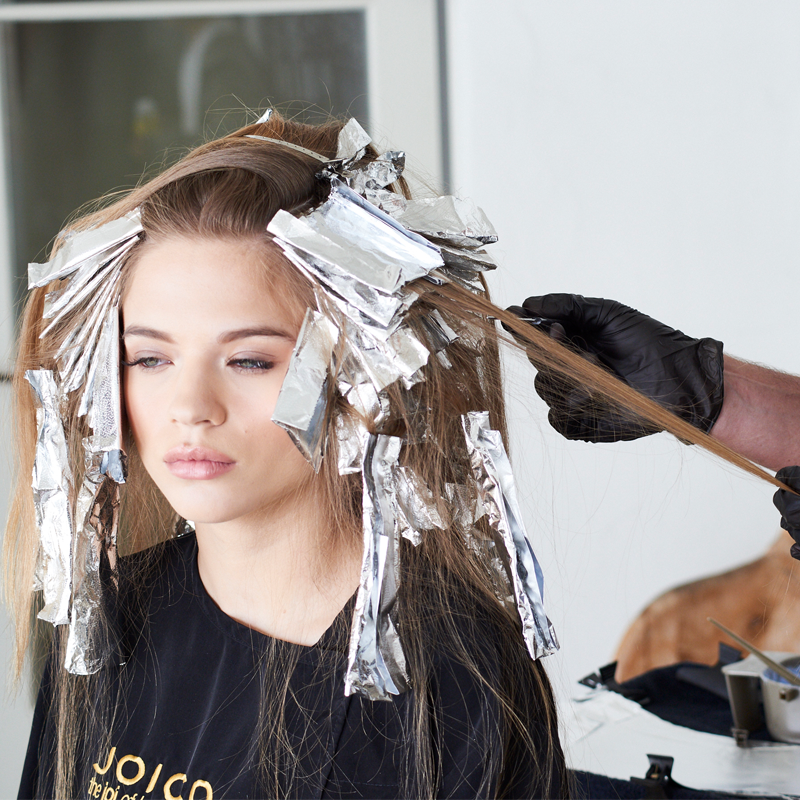
8Continue taking fine weaves and applying Formula A until you reach just beneath the crown.
-
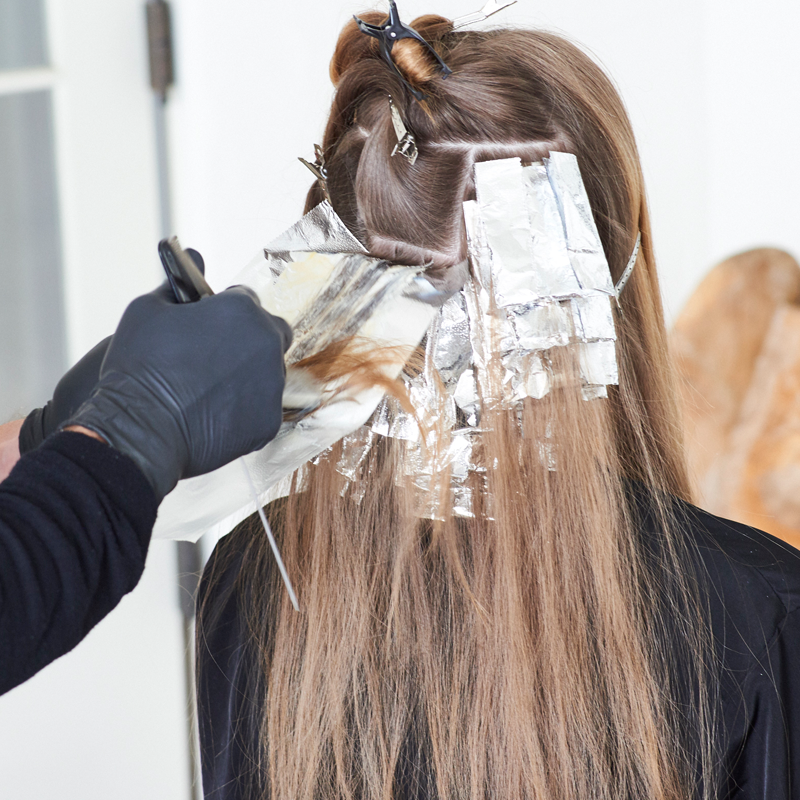
 9
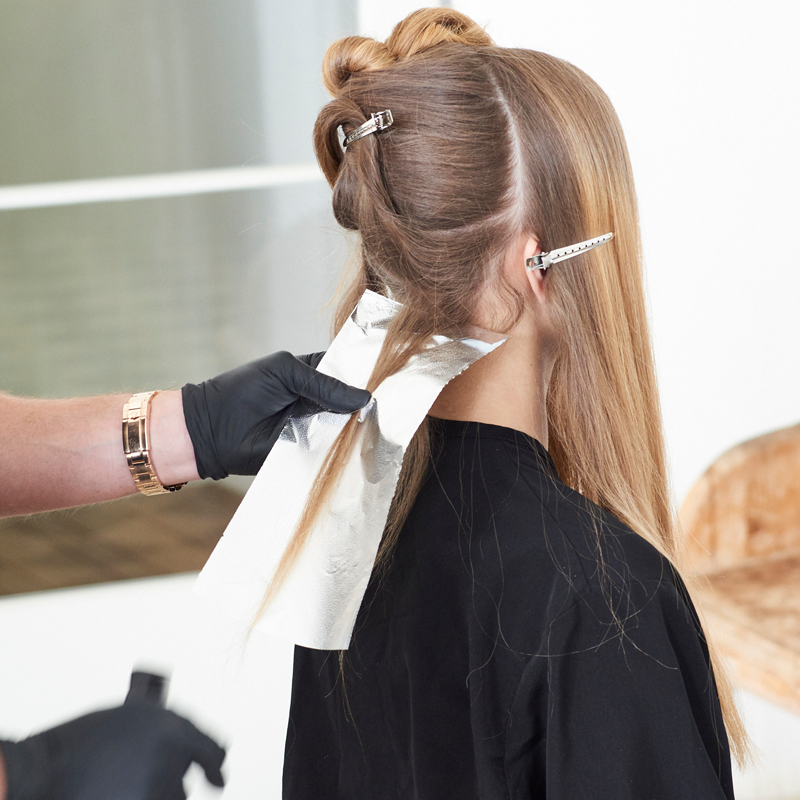
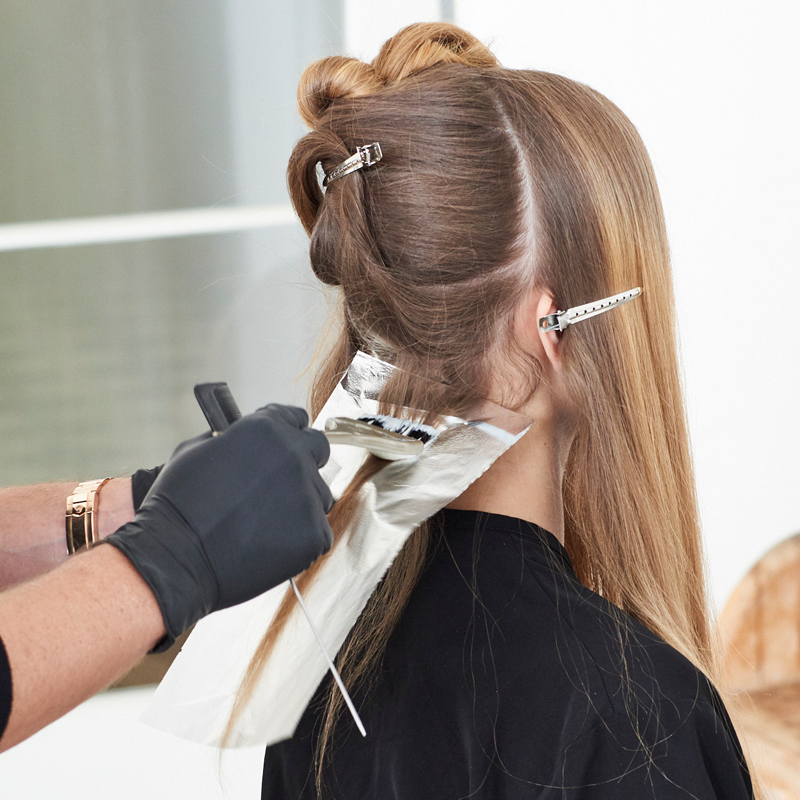
9Then, switch to a foilayage technique on the ends to add dimension and brightness. Working section by section, take the ends left out of foils in smaller subsections. Lightly backcomb the hair, apply Formula B from mids to ends by feathering the lightener to create a gradual shift of brightness.
Pro Tip: “For better control, don’t fight gravity,” Denis recommends. “Clip the hair left out and work from the bottom toward the top.”
-
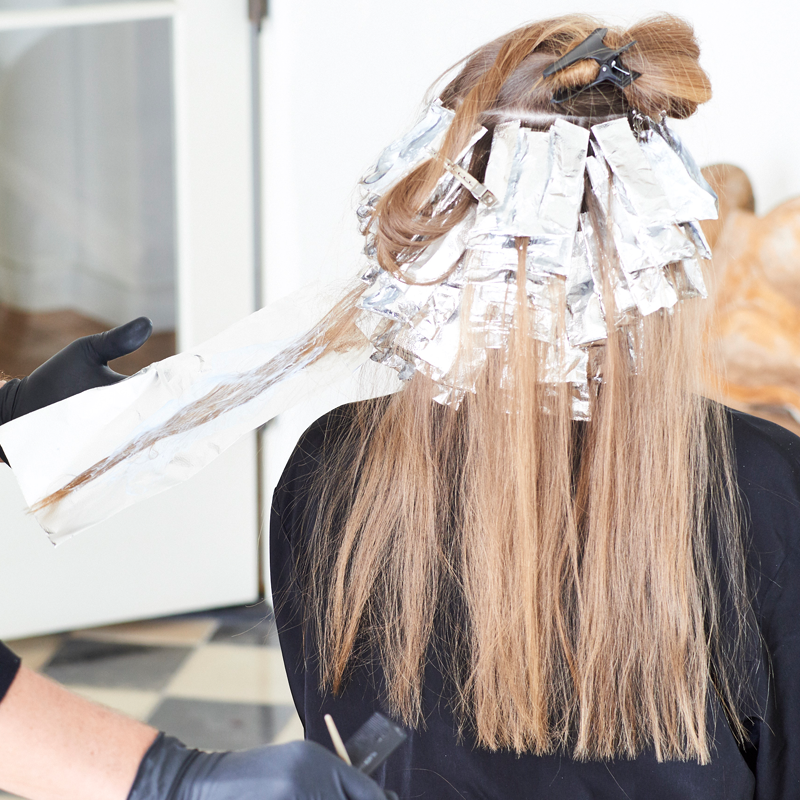
 10
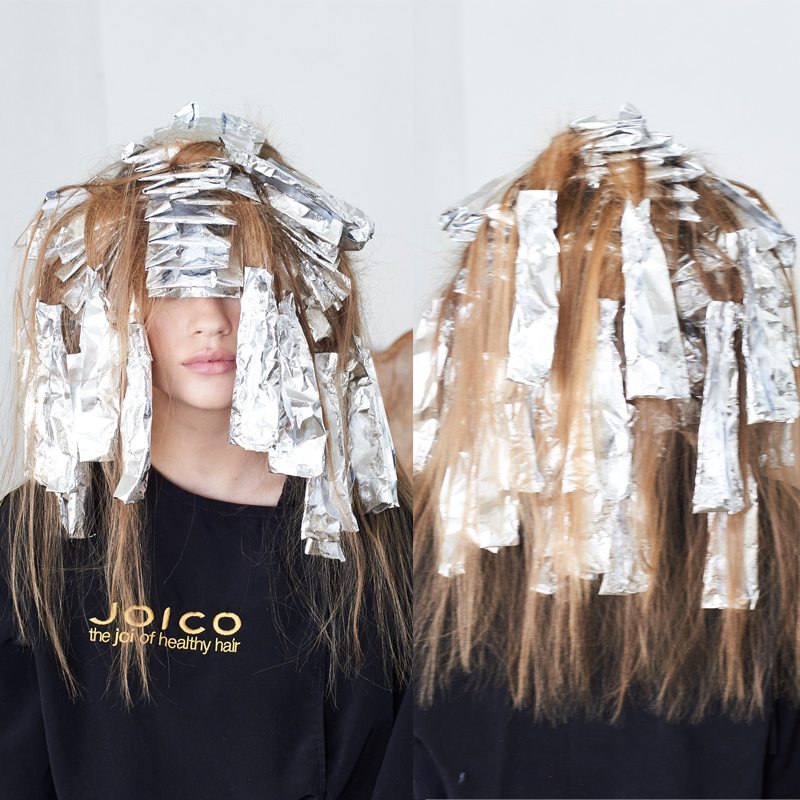
10Completed foilayage.
-
 11
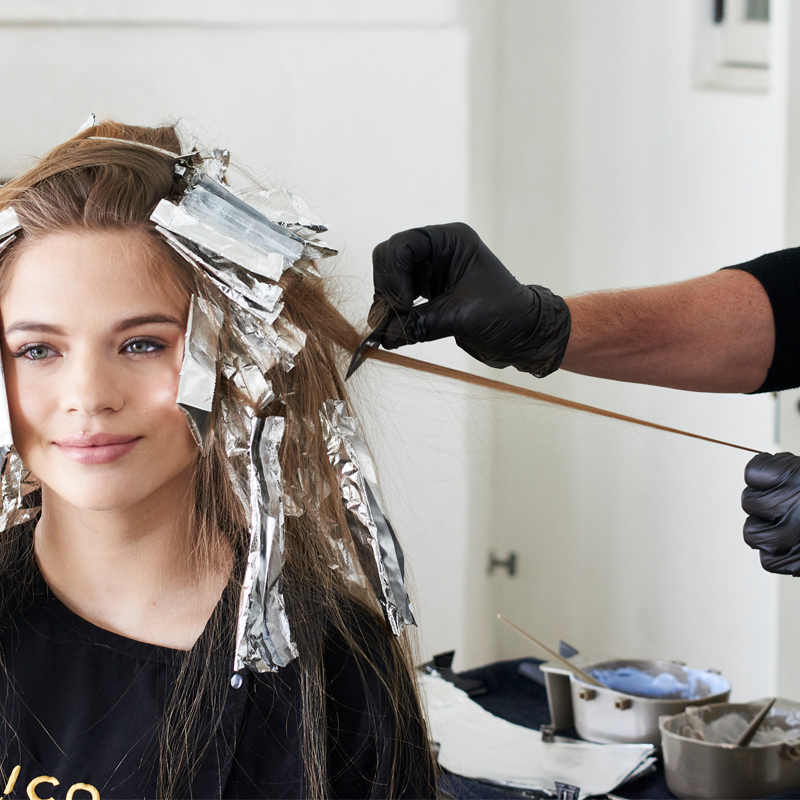
11Then, move to the top section of the horseshoe. Continue taking fine weaves and applying Formula A from scalp to ends in a bricklay pattern.
-
 12
12Continue this pattern until the entire back crown section is complete.
-
 13
13After the horseshoe section is complete, foilayage the ends using the same technique in Step 9.
Pro Tip: Determine foilayage sections by identifying where you want to see the most brightness.
-
 14
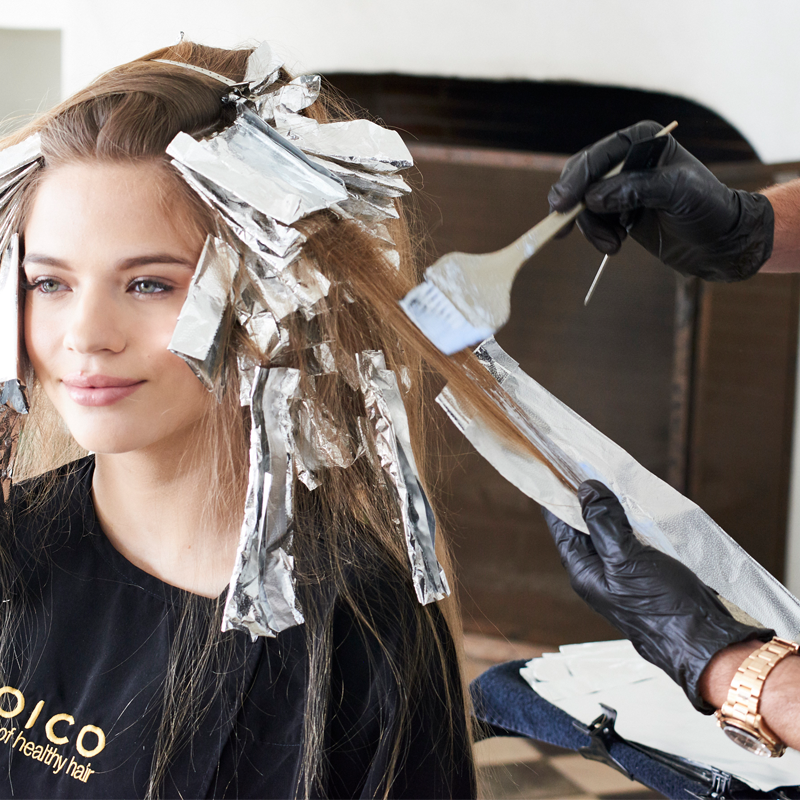
14Then, move to the front section. Leaving a fine veil of natural hair at the hairline, take a fine weave and apply Formula A from scalp to ends.
-
 15
15Continue this pattern applying Formula A and working up toward the parietal ridge.
-
 16
16Repeat on the opposite side.
-
 17
17Then, foilayage the ends by applying Formula B. Continue teasing the sections of hair left out of the foils, and feathering the lightener from mids to ends.
-
 18
18Repeat on the opposite side.
-
 19
19Then, working in the center-top section, take a horizontal weave and apply Formula A from scalp to ends.
-
 20
20Leaving a fine veil of hair between each section, continue taking fine weaves and applying Formula A from scalp to ends throughout the entire top section.
-
 21
21Using the foilayage technique, add dimension and brightness to the ends left out between foils.
-
 22
22Process for 30 to 35 minutes, rinse thoroughly and shampoo with Joico Blonde Life Brightening Shampoo. At the bowl, apply Formula C all over using an applicator bottle and process for 10 to 15 minutes, then rinse. Shampoo and condition with Joico Blonde Life Brightening Shampoo and Conditioner.
Pro Tip: Denis always ends color appointments with K-PAK Color Therapy Luster Lock Instant Shine & Repair Treatment for 5 minutes, then rinsing to lock in healthy haircolor.
-
 23
23Spray Joico K-PAK Color Therapy Luster Lock Multi-Perfector all over for gloss and color protection, blow-dry and style as desired.
More from
Joico
-
Balayage
One Step, Three-Layer Multidimensional Balayage
-
Balayage
Sunset Copper Balayage
-
Monthly Product Launch List
The Best Hair Launches Of March 2024
-
Hair Color
Blonde Life® SilverLight™ Lightening Powder
-
Bond Building
Defy Damage® IN A FLASH™
-
Da’Vine Joy Randolph’s Glamour Waves
-
Celebrity
Zendaya’s Classic Volume Bob
-
Celebrity
The Best Beauty Looks At The 2024 Oscars
-
Blonde
Building The Perfect “Summer Blonde”
-
Gray
Make Gray Hair Look & Feel Younger: 3 Tips Every Stylist Should Try
-
Haircare
KBOND20 Defy Damage Power Masque
-
BTC Events
BTC “On Tour” Nashville Recap: Everything You Missed
-
Monthly Product Launch List
The Best Hair & Beauty Launches Of November 2023
-
Haircare
Inner Joi™ Strengthen Shampoo
-
Conditioners
Inner Joi™ Strengthen Conditioner
-
Haircare
Inner Joi™ Strengthen Masque
-
Haircare
Joico Launches Vegan, Naturally-Derived Haircare Line, Inner Joi™
-
Blonde
How To Create A Natural Shadow Root Through Teasing
-
Blonde
“Fake” A Full Foil In 3 Steps: Here’s How
-
BTC Hair Trend Report
Your Guide To Fall & Winter 2023’s Hair Color Trends
-
Blonde
Honey Blonde Curls: 3 Strategic Placement Tips To Create Brightness
-
Hair Color
Bold Color Trends You Need To Know For 2024
-
BTC Events
AI, Mental Health & Social Media: 7 Business Tips You Can’t Live Without
-
Manufacturer
Joico Announces Jeannetta Walker-Rodgers as Global Technical Director
YOU MIGHT LIKE THIS
-
Blonde
Pearl Blonde With 3 Techniques
-
Blonde
Foilayage Blonde
-
Blonde
Sun-Kissed Babylights
-
Blonde
Cool-Toned Babylights
-
Blonde
Transformation: Icy Metallic in One Sitting
TRENDING NOW!
-
BTC Hair Trend Report
The Biggest Haircut Trends of 2024
-
Blonde
Conditioner Before Toner: Common Hair Myth Debunked
-
Monthly Product Launch List
11 New Game-Changing Hair Launches To Add To Your Arsenal
-
Copper
What Is The "Cowboy Copper" Hair Trend? Here's What It Really Means...
-
Frizz
Straighten & Smooth 2A, Fine-Medium Density Hair
-
Copper
Muted Bronze
-
Haircuts
SHAG 101: The Dos And Don'ts
-
BTC Hair Trend Report
WWYD: How Hairstylists Are Navigating Inflation

