Our Favorite Blowout Tips From 2022

12 Must-Know Tips For Flawless Blowouts
From ’90s-inspired looks to sweeping curtain bangs, the 2022 blowout craze is showing no signs of stopping. Clients are lining up for bombshell volume and bouncy layers that last, so it’s time to refresh your techniques for rollers, hot brushes and blow-dryers.
Here some of this year’s best tips from BTC Team Members and beyond for the perfect blowout every time:
Enroll in BTC University for unlimited access to pro styling courses!
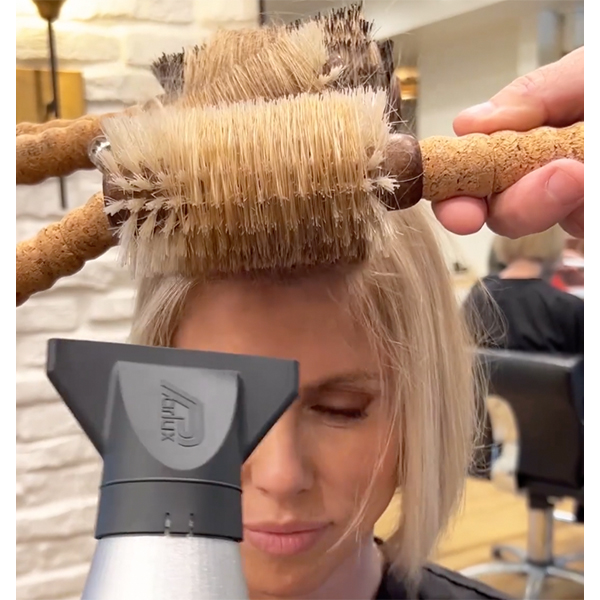
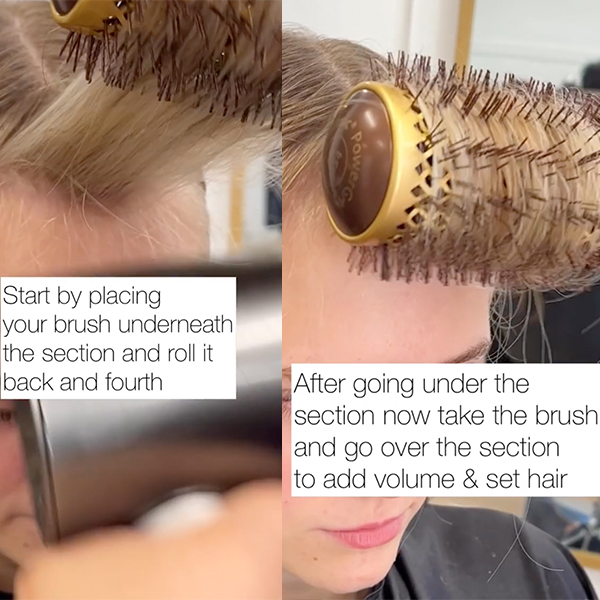
1. Fringe hack: Start your blowout at the front of the head.
If you’re not a fan of blowing out fringe, BTC Team Member Steph Brown (@vividsandbalayage) has a technique that makes working with the hairline much less intimidating:
- Start your blowout in the front of the head—it’s the section your clients will see the most!
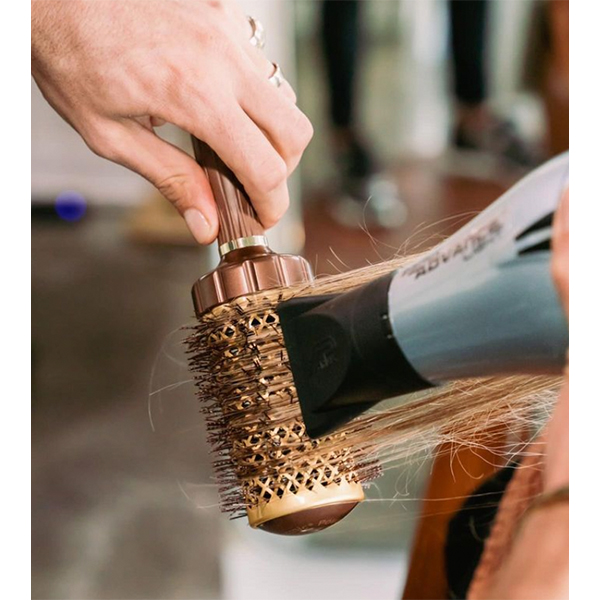
- Blow-dry the fringe in every direction, rolling your round brush back and forth to get a smoother result. Steph’s brush of choice: The NanoThermic® PowerGrip™ brush by Olivia Garden!
- Finish by running the brush over the section to set the hair and add more volume.
Check out Steph’s two-part technique in action:
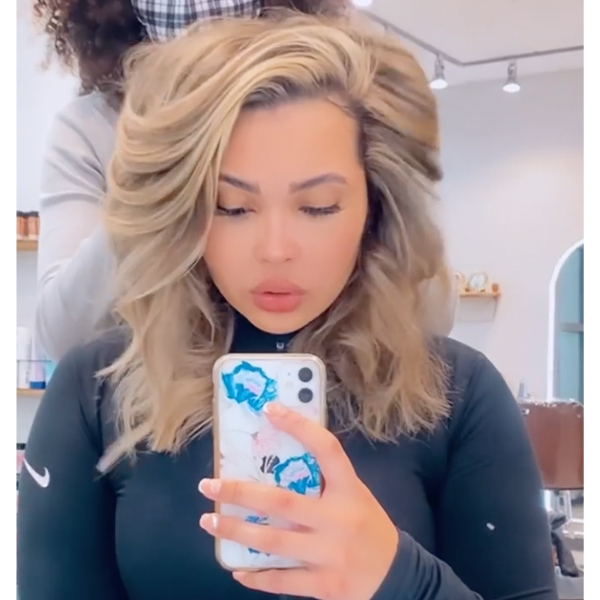
2. If your client’s hair just won’t curl, give this technique a try!
We’ve all had THAT client who wants mega volume, but can’t seem to hold a curl. Don’t worry—BTC Team Member @kelleyscanvas has a solution for both client and stylist. Here’s how she does it:
- Prep your client’s hair with Schwarzkopf Professional™ OSiS+ Flatliner for heat protection.
- Apply a cocktail of anti-frizz cream and mousse to wet hair. @kelleyscanvas prefers to use a mixture of Schwarzkopf Professional™ OSiS+ Tame Wild Smoothing Anti-Frizz Cream and Schwarzkopf Professional™ OSiS+ Topped Up Mousse.
- Once the hair is dry, apply a light, moveable spray like Schwarzkopf Professional™ OSiS+ Elastic Flexible Hold Hairspray with Schwarzkopf Professional™ OSiS+ Mess Up Matte Paste for a more piecey result.
Check out the ultra-curly results:
3. Remember to set the curl with a cool shot.
If you’re giving your client a blowout with a round brush, don’t forget to hit your cool shot and allow the brush to sit in the hair for five to 10 seconds after drying each section. Setting your brush will help create a more voluminous, longer-lasting hold!
Pro tip: For the back sections, dry in both directions for more volume at the root and smoother midlengths and ends.
4. Make your client’s blowout last with this hair revival hack.
A foolproof way to keep your blowout clientele coming back is to give them a style that lasts—and to give them tips on how to upkeep it themselves! BTC Team Member and Truss Professional Brand Specialist Sara Botsford (@sarabotsfordhair) revives day-old blowouts with this styling trick:
- Apply volumizing spray at the roots.
- Set the hair in hot rollers.
- Finish with a flexible hold hairspray of choice.
Watch how Sara refreshes Day 5 hair:
View this post on Instagram
5. How to add volume to fine hair.
Not only can blowouts add fullness to fine-haired clients, but they can also broaden your service menu and accentuate your cut and color services. Just follow Steph’s two steps to make sure your fine-haired clients don’t leave the salon looking flat:
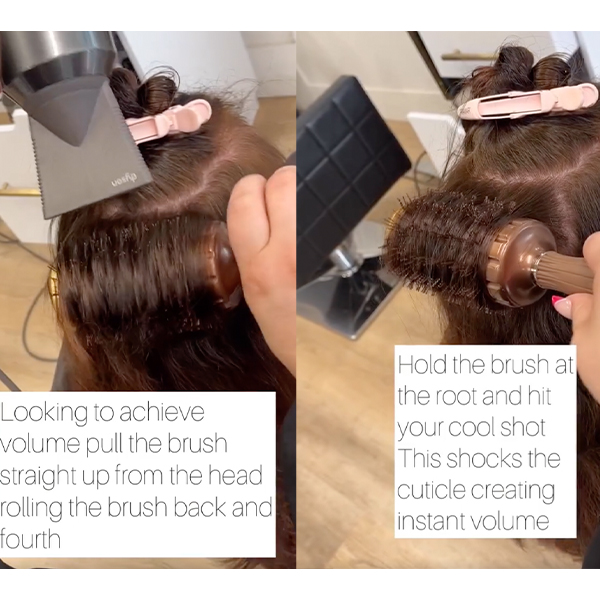
- Pull your round brush straight up from the head, rolling each section back and forth.
- Then, hold your brush right up against the root and hit your cool shot. This shocks the cuticle and creates instant volume.
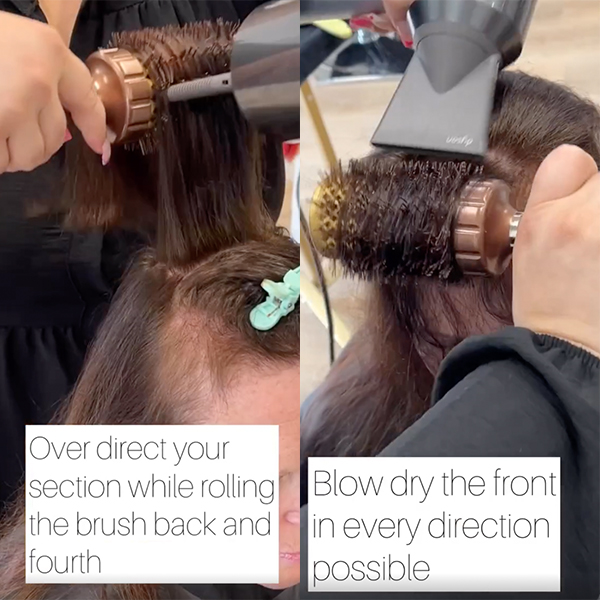
- Remember to overdirect your section while rolling the brush back and forth. Then allow to set for maximum volume.
- Blow-dry the front in every direction possible for the most bounce.
See Steph’s 4-step volumizing blowout:
6. Dealing with thick hair that’s prone to frizz? Try this!
Blowouts are meant to be soft and sleek. If your client has big hair dreams but tends to frizz, this tip from @kelleyscanvas will be a huge life-saver behind the chair. Just use a smoothing cream—like OSiS+ Tame Wild Smoothing Anti-Frizz Cream—before blowing out clients with thick or curly hair for an oh-so-smooth finish.
Take a look at @kelleyscanvas’ before and (much smoother) after blowout transformation:
7. The silk roll—why you should try it!
For clients whose thermal curls don’t last very long, silk press expert John George III (@johnwgeorge) does a silk roll to achieve the smoothness of a silk press—but with the roll of a set. “Because of the inclement weather (windy and rainy), a ballet bun was useful in preserving the curls,” explains John.
Click the video to watch John’s technique:
View this post on Instagram
Want more silk press education? Enroll in John’s BTC University class to learn his technique from start to finish. Check out a sneak peak below!
8. Perfect a flippy blowout by starting with the hairline.
If there ever was an ultimate cool-girl hairstyle, it’s Rachel Green-inspired layers from “Friends.” The goal: Contouring your client’s face by effortless accentuating their layered cut. Here’s how BTC Team Member Taylor Dellatorre (@taylordidmyhair) gets the look in just three steps:
- Blow-dry the hair until it’s about 70 to 80 percent dry.
- Start by blowing out the front hairline. This section is the hardest to smooth and naturally dries the quickest.
- In the back, take small sections, wrapping the hair around the brush. Make sure to rotate the hair towards the center while releasing. Keep in mind that the direction of your blowout helps accentuate the face frame!
See Taylor’s method for creating a flawless flippy blowout:
9. Rollers + round brush = ’90s supermodel volume
Combine your rollers and round brush techniques to pay homage to ’90s icons like Cindy Crawford and Cher in “Clueless.” Utah-based hairstylist Karen (@honeyhairbykare)’s secret:
- Roll the fringe section first, following with your blow-dryer. Make sure to roll all the way to the root, then hit your cool shot. Then hold the section in place with a roller.
- Next, follow the brush all the way down the sides. Roll the section and hit your cool shot. Then, unravel and cool shot again. Hold in place to let the curl set for extra bounce. Repeat with each subsequent section.
- Once each section is curled, remove the roller and part the fringe down the middle.
Watch how Karen creates ’90s-grade volume:
View this post on Instagram
10. Use angles to give your client’s curtain bangs a retro look:
Goldie Hawn, Stevie Nicks—these are the icons on your clients’ mood boards. One of the most requested styles of the year was ’70s-style, retro curtain bangs with plenty of volume. Follow Victoria Schrager (@victoria.hairart)‘s strategic method to make sure you deliver:
- Start by blowing the entire section straight down from the root, wrapping back and forth along the forehead. Don’t worry about the ends yet—this is just to get the roots in check!
- Split the bangs down the center and then in half.
- Hold your round brush at an angle, blowing the ends away from the face.
- Scrunch for added volume!
Follow Victoria’s step-by-step method:
11. Give frequent blowout guests some extra TLC.
According to BTC Team Member Lhonette Charles (@lhonettehair), too much of a good thing (a.k.a. these feel-good blowouts) will leave clients looking for some much-needed hair repair. Here’s how Lhonette keeps her clients’ hair healthy, avoids breakage and nourishes dry strands:
- Prep the hair with a heat protectant.
- Section the hair properly to evenly disperse heat.
- Use tools that properly diffuse heat.
- Limit clients to one or two blowouts per month.
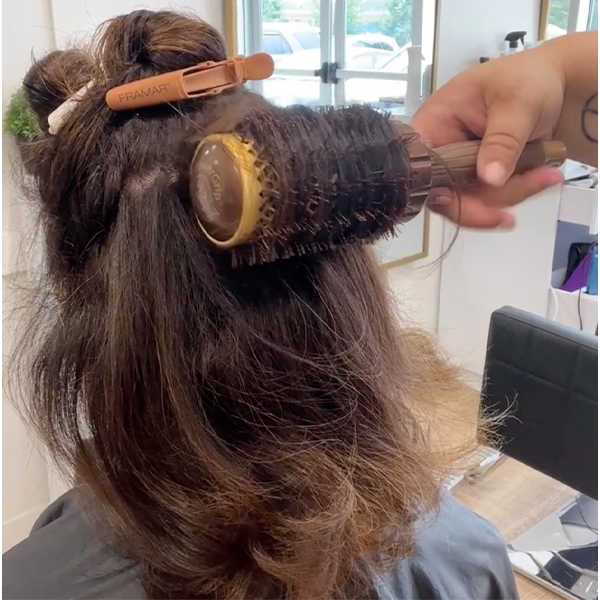
12. Get volume even when you’re on the clock.
When there’s no time for waves but your client still wants volume, try this round brush hack by ARC™ Scissors Team Member Chris Jones (@chrisjones_hair):
- Prep the hair with Volumizing Styler and Frizz Block by Virtue®.
- Take a section of the crown that’s about the same size as your brush. Overdirect the section toward the face, rolling it back. Lock it in by simply giving the brush a little turn when it’s right against the scalp.
- Repeat with two other brushes until you get to the front of the hairline. If you don’t have three different brushes, just cool shot each section before moving to the next one.
Pro tip: For added volume, replace each brush with a velcro roller and let them sit for a little longer.
Click the video to tune in to Chris’ technique!
View this post on Instagram
Want more blowout tips, tricks and techniques? Check out pro styling tutorials at BTC-U!