@staygold: Choosing the Right Fade For Every Client

The @staygold31 Fade: 3 Things to Do Every Time
There is nothing we love more than a clean, fresh fade (honestly, who doesn’t?). But if you’re struggling to achieve seamless blends or your fades are resulting in cuts that are TOO short, you’re not alone.
To help your fading fears, we tapped #ONESHOT Winner and BaBylissPRO® Ambassador Sofie Pok (@staygold31) teach her signature skin fade technique on BTC University. There are three things she ALWAYS does when fading, and we’re sharing them below.
Keep scrolling to learn Sofie’s go-to consultation questions, her first step for EVERY fade and how she customizes every cut for her client’s head shape. Below, Sofie shared her go-to consultation questions to ask AND which type of haircut they correlate to.
BTC-U Members have UNLIMITED access to Sofie’s 90-minute class! Not a Member? Become one now and get access to over 150 tutorials on cutting, color and styling!
Requested Haircut: Tapered
Must-Ask Question: “Do you still want to see your arches?”
“To me, the terms ‘Taper’ and ‘Fade’ are honestly reference points when deciding on a haircut,” Sofie explains. “They aren’t necessarily a type of cut that somebody is getting.” If your client is requesting a tapered cut, they most likely still want a strong back hairline and to keep everything connected.
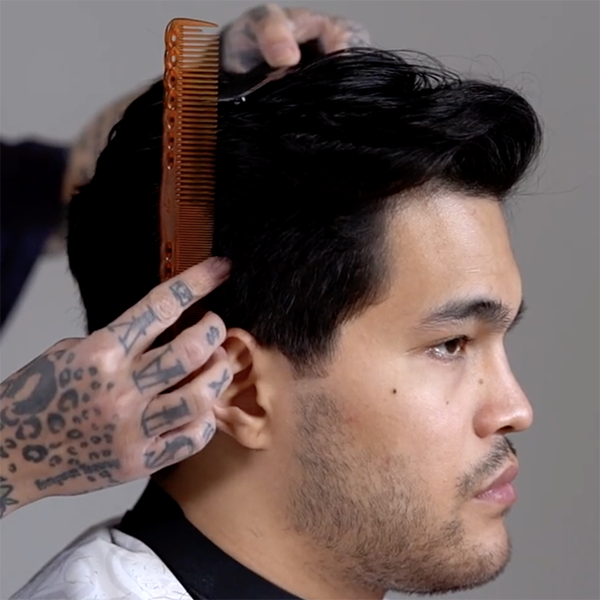
Use your comb to show the client where on his hairline he would like the skin line to be. Sofie prefers to keep her tapers in front of the ear, for a more modern, edgy style. Here’s a quick cheat sheet:
- Low taper: Maintains a strong arch while keeping the blended area restricted to the bottom of the sideburn.
- Medium taper: Softer arch with the blended area moving into the bottom of the arch.
- High taper: Also known as “The Military Fade” where the arch is completely blended out.
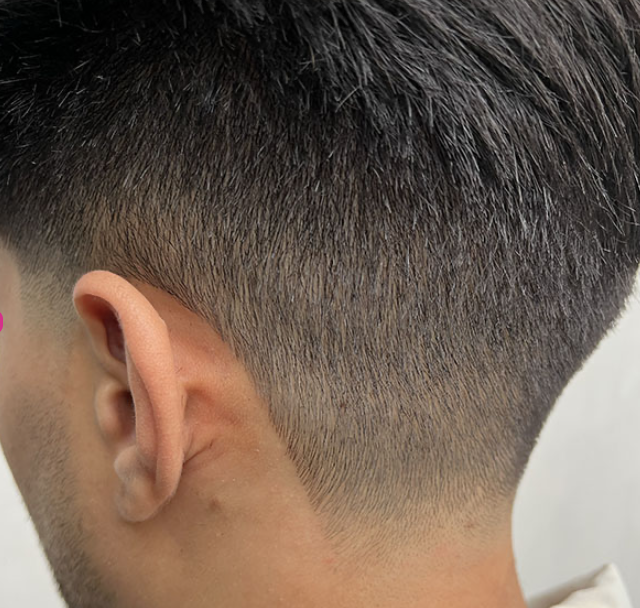
Click through the slideshow for a visual of each kind of taper
Request Haircut: Fade
Must-Ask Question: “Do you want a skin fade?”
This request means the client is looking to remove all of the frame (the hairline at the back and sides) and blend everything up. So, when tracing your client’s skin line with a comb, your reference will go through the ear.
Bonus Haircut: Drop Fade
Perfect for: Clients with uneven/flat occipital bones
A hybrid version of a taper cut and a fade, a drop fade rounds underneath the occipital bone. So how high should a drop fade go? Sofie recommends keeping a drop fade in the low-to-medium area. Why? We’ll let her explain:
“This way if your client doesn’t have the best head shape, like a flatter occipital area for example, you don’t want to accentuate that with a high fade.” In fact, the hair left at the occipital area will create a rounded shape for you
Establish the shape FIRST
Ever find yourself blending further up than you intended when fading? You’re not alone. “One of the mistakes I made when I first started was starting my fade from the bottom,” explains Sofie. “Then, I would blend all the way up and I would lose the shape that I wanted to leave my clients with,” she adds.
Sofie’s advice: Build the shape on top FIRST, and then blend up to it. This will avoid cutting the hair too short and losing the desired shape all together. Sofie uses two combs to determine the right endpoint for your client’s fade. Here’s how:
- Place one horizontally across the apex. This is the tallest part of the client’s head.
- Place a second comb vertically to find the widest part of the head.
- Where the two combs cross is where the top shape begins. Everything will be faded up to that point on the head.
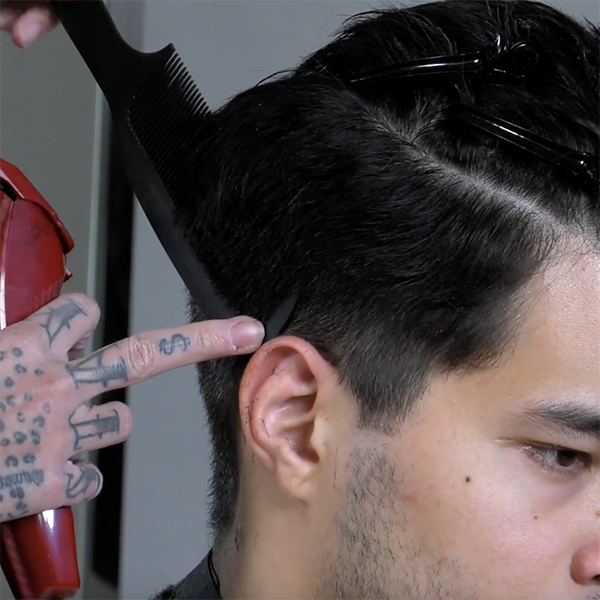
Create an even canvas with diagonal clipper-over-comb
“One of the most challenging things about barbering is that there’s no perfect head shapes out there,” advises Sofie. “You’re essentially trying to create a seamless blend on a [canvas] that has a lot of imperfections like, density, hair growth pattern, etc.”
The only way to maintain an even surface when blending is to CREATE an even surface to begin with. That’s why Sofie uses a clipper-over-comb technique taking diagonal subsections when working. Why? “It gives me more control when blending and limits the amount of inconsistencies if I was holding my comb vertically or horizontally, which can cause choppy lines,” she explains.
Here’s how:
- Hold the comb diagonally with the front completely flesh to the scalp.
- Then, angle the comb diagonally so the back is completely off the scalp.
This technique really creates a smooth, even surface to the hair for you to continue blending and fading, no matter what kind of bone structure the client may have underneath.
Slide to see an up close before and after (is there any other way to view a fade?)