Articles > BTC ON TOUR > 8 Must-Know Color, Cutting & Business Tips For Your Salon
Last updated: April 03, 2023

8 Must-Know Color, Cutting & Business Tips For Your Salon

btc-on-tour
close formula

8 Essential Tips From Dallas “On Tour” 2023

The first stop of 2023’s BTC “On Tour” brought exclusive tips from the industry’s pros to center stage. (Thank you, Dallas!) But if you weren’t able to see some of our favorite artists IRL, don’t worry. We’re bringing the education to you with this list of tips and tricks for color, cutting, social media and more!


Keep scrolling for the inside scoop—plus a livestream link that lets you rewatch the show anywhere, anytime.


Click here to gain access to pro education with our Dallas “On Tour” livestream.


1. Substitute a color melt with a power veil.

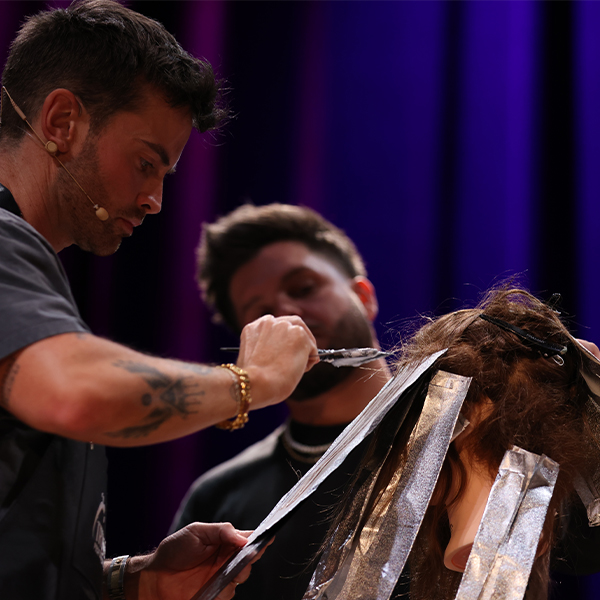
Schwarzkopf Professional® Artistic Team Member Liz Haven (@lizhaven) shared her secret gradient balayage with customized tones for any level. Her signature work is topped by a “power veil,” which is created by intentional saturation and overdirection. The best part? No color melt is necessary, skimming precious minutes from your appointment time.


Start by sectioning the hair into quadrants, then foil each at a diagonal back. This will result in teardrop-shaped dimension. When you reach the top section, follow these steps to create a power veil:


  1. Create a shallow diagonal back with three sections. This should stretch from recession to recession, in line with the natural part.
  2. Foil mimicking the hairline, then pivot to kiss the previous leftover section.
  3. Skip about a quarter of an inch and foil your next section at a more shallow angle. Make sure your foils meet in the interior; this is how you create dimension.


liz-haven-gradient-balayage


Want the inside scoop on this season’s hottest trends? Click here for unlimited access to BTC’s official Trend Report!


2. Money-making bronde services to try.

There are far more blonding specialists than brunette experts, so knowing how to apply today’s trends on dark-haired clients will take your service menu to the next level. In the words of Schwarzkopf Professional Digital Artistic Team Member Carlos Rojas (@colorbycarlos), “Bronding is HOT” and it can be a total money-maker in your salon when paired with trend-friendly techniques.


For instance, Carlos uses a time-efficient, diamond-shaped foil pattern that:


  1. Creates warmth without brassiness. This is essential for brunette clients.
  2. Foil for internal depth versus topical. This adds dimension that pops when curled for a more lived-in look.


Watch Carlos’ entire technique in action here!

carlos-rojas-dallas-salon


Want more bronding education from Carlos? Click here to enroll in his BTC University-exclusive course on creating perfect, dimension bronde hair color.


3. Balanced men’s cuts on oblong face shapes: Here’s how!

Victory Barber & Brand™ Owner Matty Conrad (@mattyconrad) shares his technique for perfecting cuts on tricky oblong face shapes. (We’ll give you a hint: It’s NOT a high-and-tight fade!)


Here’s Matty’s advice:

An oblong face shape is long and little wider toward the bottom than it is on top. The goal when cutting for an oblong face shape is creating balance. In other words: Preserve some of the weight on top and create blended “build-up” in the corners of the head (what Matty affectionately calls “koala bear ears” 🐨). Here’s how it’s done:


  1. To find your outline, stack your clipper comb at the widest point of the head at a straight-vertical angle. Rough the shape of your desired cut with shears.
  2. Use your go-to texturizer (Matty uses ARC™ Scissors 10/10 Reversible Texturizer) to polish your outline into the final result. Using shears for this part will only result in a higher, narrower ridge rather than a seamless shape.


matty-conrad-victory-barbers


Pro tip: Not every client is great at describing what they want during consultation. Here’s a trick from Mark Bustos (@markbustos) with Rossano Ferretti: During consultation, ask your client to adjust their hair with their hands to show you what they want it to do.

mark-bustos-charity


Missed the show? Click here for our complete Dallas “On Tour” photo gallery!


4. Creating lived-in blonde on textured hair? Use a reverse money piece.

If there’s one thing Kenra Professional team member Kendra Alia (@iamkendraalia) wants stylists to incorporate when creating lived-in blondes on naturally curly hair, it’s a reverse money piece. Why? Curls swell, and too much lightener around the hairline will cause all the sections you foiled to remain hidden. 


Instead, Kendra recommends dropping her money piece section up and back from the parietal to the ear. The result: Brightness around the face (even after foils swell!) that can be seen through any curl pattern. 


Pro tip: When creating lived-in looks, stay true to the inspirational look and make sure you’re leaving a solid ratio of hair outside of the foil.


5. Create weightless bobs with a subtle undercut.

Have you ever wondered what the secret is to a “floaty,” weightless bob? ARC™ Scissors Team Member Chris Jones (@chrisjones_hair) has the answer: An undercut. That might sound intimidating—especially for clients who don’t like the idea of a partially shaved head—but Chris’ version is only a slight disconnection. 


Here’s how it’s done: In the nape, create disconnection one to two and a half inches from the hairline. The target length (a.k.a. the visible length) will mask the disconnect leaving plenty of movement.


chris-jones-bob


Want to try Chris’ technique for yourself? Click here to shop his go-to ARC Scissors 10/10 Reversible Texturizer and more.


6. PSA: You don’t need a ton of followers to be successful.

Whether you’ve been in the industry for five years or twenty-five years, kickstarting your professional social media journey can be super intimidating. BTC Team Member and Schwarzkopf Professional® Ambassador Brendnetta Ashley (@edgybgirl) has some advice:


  1. Don’t compare yourself to others. Let your followers come naturally and let your content stay true to yourself.
  2. Celebrate each milestone. Reached 50 followers? Celebrate. Reached 1,000 followers? Time for a toast!
  3. Use Instagram to book clients. Brendnetta also likes doing a free video consultation via Instagram to make sure it’s a good fit. 
  4. Be honest in your DMs and never say a flat out “no.” Most of the time, clients will DM again later if you tell them you’re not accepting them only because you’re booked full at the moment.
  5. Keep a content calendar to stay on top of your posting schedule. Brendnetta also recommends having a designated day when you don’t post to alleviate stress and prevent burnout. 


Listen to our pros discuss ALL the dos and don’ts of social media success.


social-media-for-hairdressers


7. Whether you’re a small town stylist or a celeb stylist, stay humble.

What if we told you long-time friends and industry icons Justin Anderson (@justinanderson) and Mary Rector (@marybehindthechair) sat down for an honest heart-to-heart about Justin’s journey as a celebrity hairdresser, his favorite clients, proudest moments and more…including some key advice for fellow stylists.


“Even when I got to the place where I was a “celebrity colorist,” they were always surprised that I was still humble. I never showed up with an attitude or an ego,” Justin shares. “I showed up to everything really early no matter what kind of celebrity it was. I always treated it like the most important job in the world.” (Yes, this is same guy who did Miley Cyrus‘, Margot Robbie‘s and Jennifer Aniston’s hair.)


Staying humble is essential to not losing the reason we’re in the industry in the first place: To help our clients feel beautiful. 


justin-anderson-celeb-stylist


To watch Mary’s full interview with Justin Anderson and more, visit our Dallas “On Tour” livestream on BTC-U!


8. Mix and match your extensions for a natural-looking result.

If there’s one thing clients will never stop asking for, it’s long, flowing locks. Extensions always deliver, but achieving a natural-looking result can be a little more complicated. After all, you don’t want someone looking at your client and saying, “I like your extensions.”


To give her clients the most natural look possible, Hotheads® Master Educator Belinda Benham (@hairby_belinda) mixes both her extension type and shade. Here’s her must-know tips for using the new luxury blonde collection, LUSH, by Hotheads®:


  1. No one has ONE shade of hair. Add different shades of the same color family for natural dimension.
  2. Use different types of extensions for thickness and shape. Belinda opts for a combination of weft, hand-tied and tape-in extensions.
  3. A good rule of thumb is using two rows of sew-in extensions and filling in gaps with tape-ins. The two types of extensions can work together to create natural-looking fullness without weighted spots.


Pro tip: Tape-ins need to be at least one fourth of an inch away from the hairline so the client won’t feel them. Watch all of Belinda’s extension secrets here!


Thank you to our sponsors: Schwarzkopf Professional®, Kenra Professional, Rossano Ferretti, Hotheads®, ARC™ Scissors, Victory Barber & Brand™, BTC University, dpHUE®, Truss Professional, Moroccanoil®, Alfaparf Milano and Minerva Beauty.