
3 Hair Painting Problems + How To Fix Them

3 Painting Mistakes That Are Affecting Your Balayage & How To Fix Them
There is nothing more satisfying than lifting a freshly painted section to find it spotless underneath. But hair painting skills don’t come easy, and every colorist has faced a problem (or three) when perfecting their surface painting technique.
So when L’ANZA Global Color Ambassador Sally Lemmo (@clevelandhairboss) shared her hair painting secrets at the L’ANZA B.I.G. Event in Las Vegas, we took notes! Keep scrolling for three common surface painting issues and Sally’s quick fixes for each!
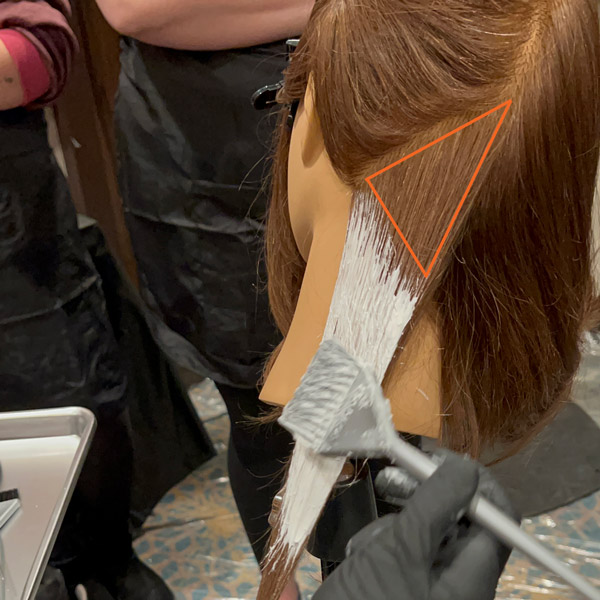
Problem: There’s little to no dimension
Solution: Use opposing placement to protect internal dimension
Triangle sectioning is the go-to strategy for creating depth when surface painting. But if the final result is still more ombré than dimensional, the problem could be in the lightener placement.
Sally’s key to protecting dimension: opposing partings. “Start with a diagonal forward parting to create a triangular section. Then, paint on a diagonal back to create an additional triangle. Using these opposing partings creates beautiful coverage, dimension and movement,” she explains.
Related: Hair Painting Sectioning Tips For The Ultimate Blend
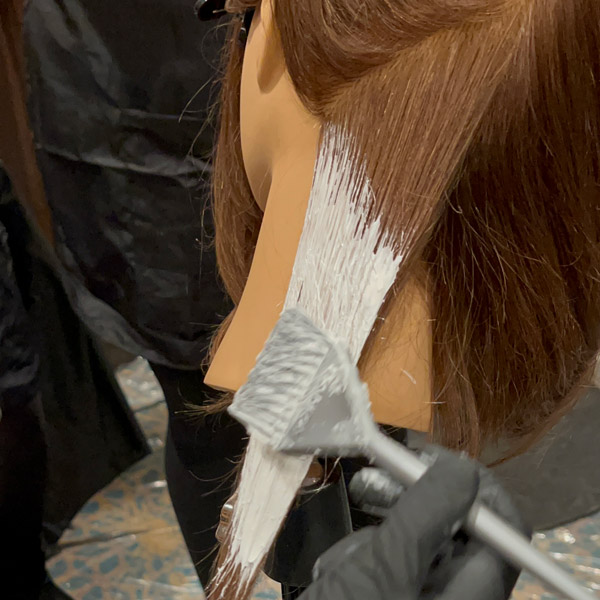
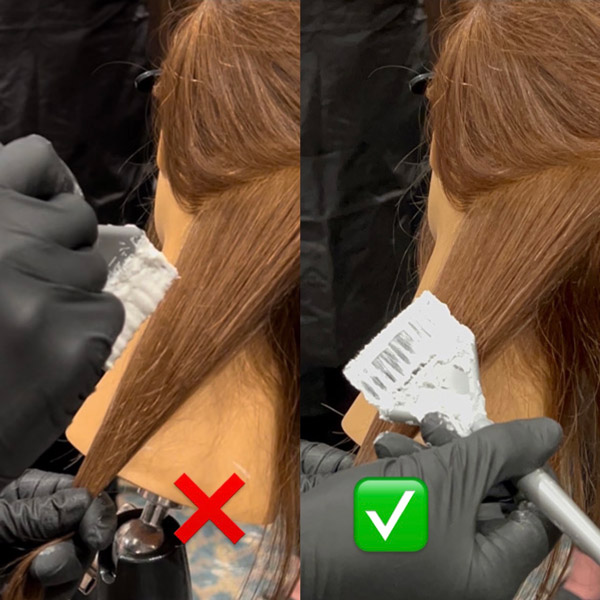
Problem: Lightener bleeds through section when painting
Solution: Hold brush parallel to avoid pushing through
Bleach bleeds can take a painted section from satisfying to splotchy FAST. To keep the underside clean (without compromising saturation), Sally holds her brush parallel to the surface when painting.
“Using the side of the brush instead of the edge helps keep the decolorizer on the surface of the section. As soon as the brush is perpendicular, you run the risk of pushing the product through,” she explains.
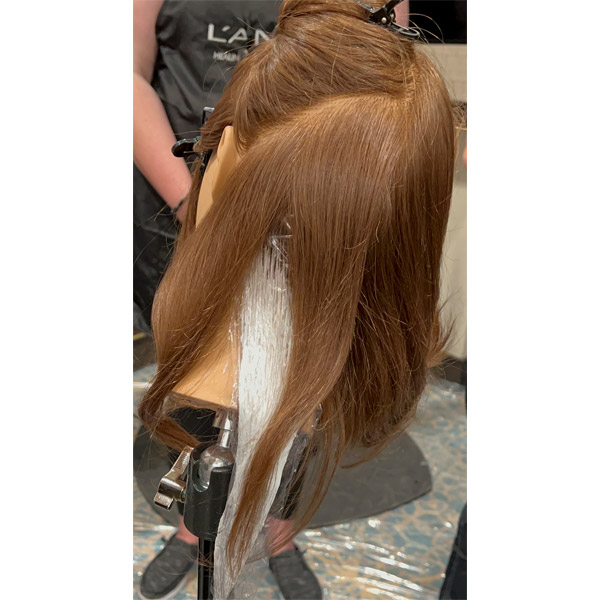
Problem: Unwanted warmth & uneven lift
Solution: Use the peace sign rule to control section size
Banding, unwanted warmth and splotchy lift could be signs of an oversized section. “Sections that are too wide pull the hair outside of it’s natural fall,” Sally explains. “The peace sign rule helps keep the section within the natural fall, giving us control over the placement, saturation and lift.”
Here’s how it works:
- Make a peace sign with your index and middle finger.
- Place your middle finger at the center hairline. Then, set your index finger down. The width of the peace sign is the optimal size for a manageable section.
- Maintaining that width, continue moving the peace sign around the head noting each new section and the natural fall of the hair.
Want more from Sally? Click here for her toning tips for neutralizing warmth!
More from
L'ANZA Healing Haircare
-
BTC Hair Trend Report
Warm, Dimensional Red
-
Color Melt
Winter Bronde Melts: 5 Blending Hacks You Need To Know
-
Gifts
MONTHLY LAUNCH LIST: HOLIDAY 2021
-
New Appointments
L’ANZA Appoints Ludovic Beckers As international Artistic Director
-
Toning 101: Dealing With Yellow, Orange and Red Tones
-
Blonde
5 Foiling Tips To Transition Summer Blondes Into Fall
-
Glossing/ Toning
2 Tips For An Easy Root Smudge Application
-
Blonde
6 Foiling Tips For Bright, Summer Blondes
-
Business
3 CBD Express Add-On Services To Boost Your Ticket
-
Blonde
Watch: Foil Placement Tips For Winter Blondes
-
Blonde
13 ’90s-Inspired Chunky Money Piece Formulas
-
Facebook Lives
Watch: 3 Client-Friendly Styling Tips
-
Mousse
Healing Style Foundation Mousse
-
Conditioners
L’ANZA Wellness CBD REVIVE Shampoo & Conditioner
-
Haircare
L’ANZA Wellness CBD SOOTHING Serum
-
Haircare
Your Client’s Guide To Summer Hair Damage Repair
-
Haircare
Healing Blonde Blonde Rescue
-
Gel
Healing Style Mega Gel
-
BTC Events
BTC “On Tour” New York City 2020
-
Facebook Lives
Video How-To: Shadow Boxing Technique
-
Blonde
Shadow Boxing: Learn This Technique for Rooty Dimension
-
Demi-Permanent Color
LIQUIDS
-
BTC Events
BTC “On Tour” Nashville—Here’s How We Closed Out Our 2019 Tour
-
BTC Events
BTC “On Tour” Nashville

