
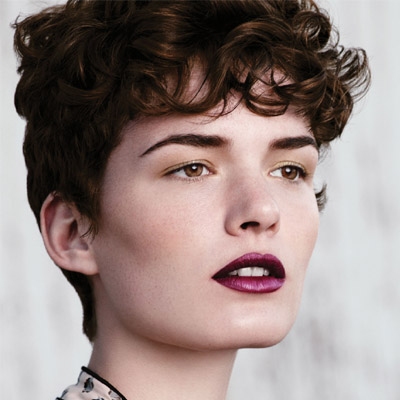
Timbered Waves from Aveda


Timbered Waves from Aveda
HOW-TO STEPS 
-
 1
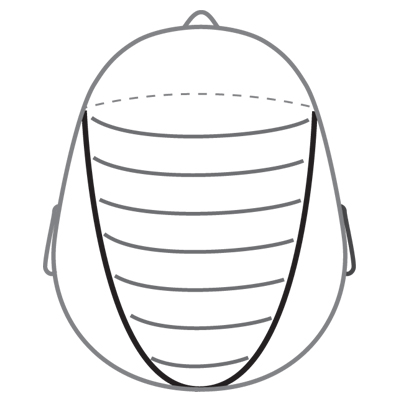
1Create a triangular section as illustrated. Beginning in the back, take a vertical subsection. Cut the section on the inside of the fingers, creating a line that follows the natural curve of the head. Using a graduated technique, cut the hair to the desired length. Take the next section on a slight diagonal, and overdirect it to the previous section.
-
 2
2Work from the center back to the recession point. As work progresses toward the sides, elevate each subsection slightly, removing more weight through the parietal ridge but leaving the hair soft at the hairline. Continue in this manner until this area is complete. Rotate the hand position, and repeat on the opposite side.
-
 3
3In the front, create a new guide by creating curved, horizontal subsections. Direct the first subsection downward onto the face with slight elevation. Angle the fingertips away from the face to create maximum length in the center of the fringe, and cut a curved line that tapers toward the sides of the head but remains disconnected. Continue taking curved, horizontal subsections, overdirecting them to the previous sections and elevating each one a bit higher as work progresses toward the back of the head. (When using a higher elevation through the top of the head, work on top of the fingers. When using a lower elevation through the sides, work on the inside of the fingers.) Rotate the hand position and repeat on the opposite side. Connect both sides through the top of the head, and round off any corners. Blow-dry and the refine the haircut using a twist-cut technique through the top and sides.
-
YOU MIGHT LIKE THIS
-
Blonde

Platinum Perfection and Creative Texture
-
Hair Color
Pastel Ponies from Aveda
-
Hair
Roughed Up Braid from Aveda
-
Hair Color
Violette from Aveda
-
Natural Glow Makeup at Novis by Aveda
TRENDING NOW!
-
BTC Hair Trend Report
The Biggest Haircut Trends of 2024
-
Blonde
Conditioner Before Toner: Common Hair Myth Debunked
-
Monthly Product Launch List
11 New Game-Changing Hair Launches To Add To Your Arsenal
-
Copper
What Is The "Cowboy Copper" Hair Trend? Here's What It Really Means...
-
Copper
Muted Bronze
-
Haircuts
SHAG 101: The Dos And Don'ts
-
Frizz
Straighten & Smooth 2A, Fine-Medium Density Hair
-
Business
Don't Fall Victim To Hair Industry Greenwashing—Read This First

