
Textured Copper Crop from Pivot Point International

Advertisement
Advertisement
Advertisement
Textured Copper Crop from Pivot Point International
HOW-TO STEPS 
-
 1
1Our moden’s hair has grown out and lost its shape. She would like a shorter, more defined style that can be worn with various style options.
-
 2
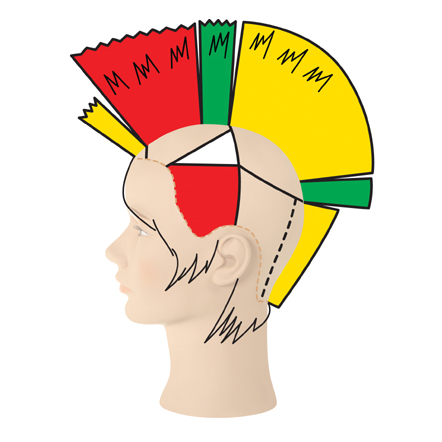
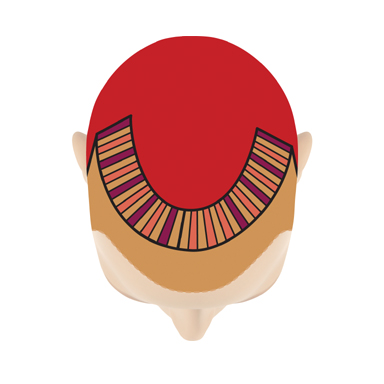
2Planar sculpting in the crown overlaps back exterior lengths of medium graduation with increase layers on the side. Sculpt the interior in planar form and the right fringe in graduation.
See the next page for another graphic.
-
 3
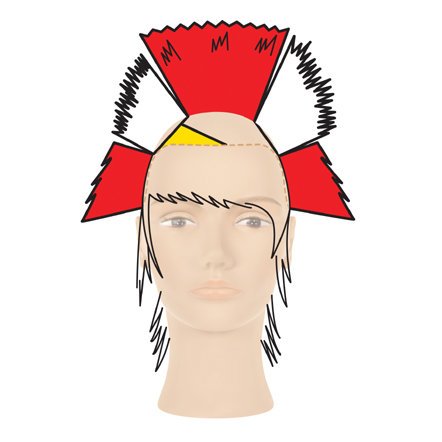
3Planar sculpting in the crown overlaps back exterior lengths of medium graduation with increase layers on the side. Sculpt the interior in planar form and the right fringe in graduation.
-
 4
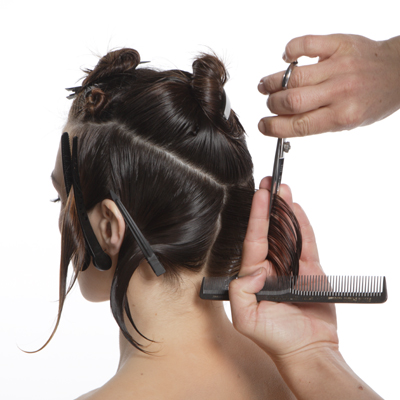
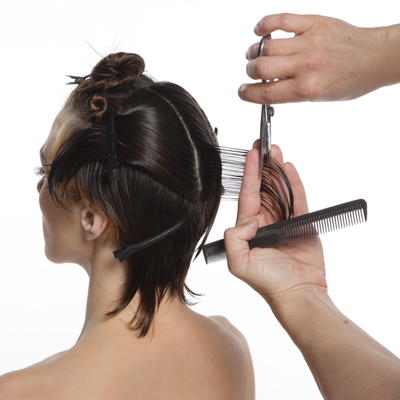
4In the back exterior, take a center vertical parting. Use directional distribution, high projection and a parallel finger position. Sculpt to establish a mobile design line. Work toward the corner of the nape on the left side creating a stationary design line.
-
 5
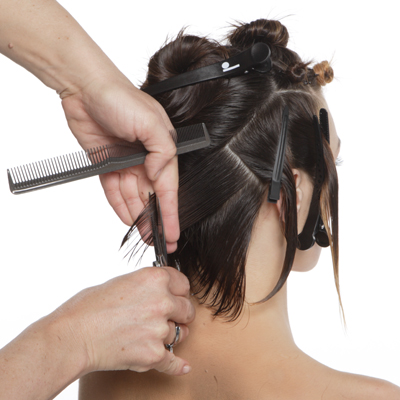
5Return to the center back. Sculpt to the corner of the nape. Then distribute subsequent partings back to the stationary design line.
-
 6
6Take a vertical parting over the ear on the left side. Project straight out, position your fingers nonparallel and slide cut. Repeat on the right side.
-
 7
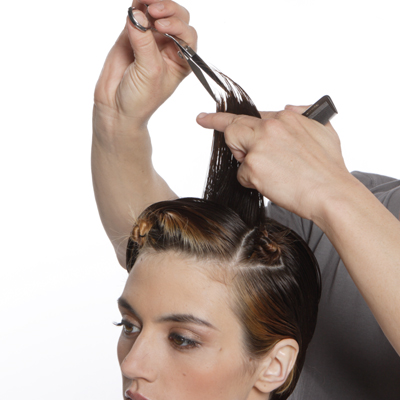
7Release the crown and take a center vertical parting. Distribute straight out, position your fingers vertically and sculpt. Use this parting as a mobile design line. Work to the sectioning line on the left and repeat on the right side.
-
 8
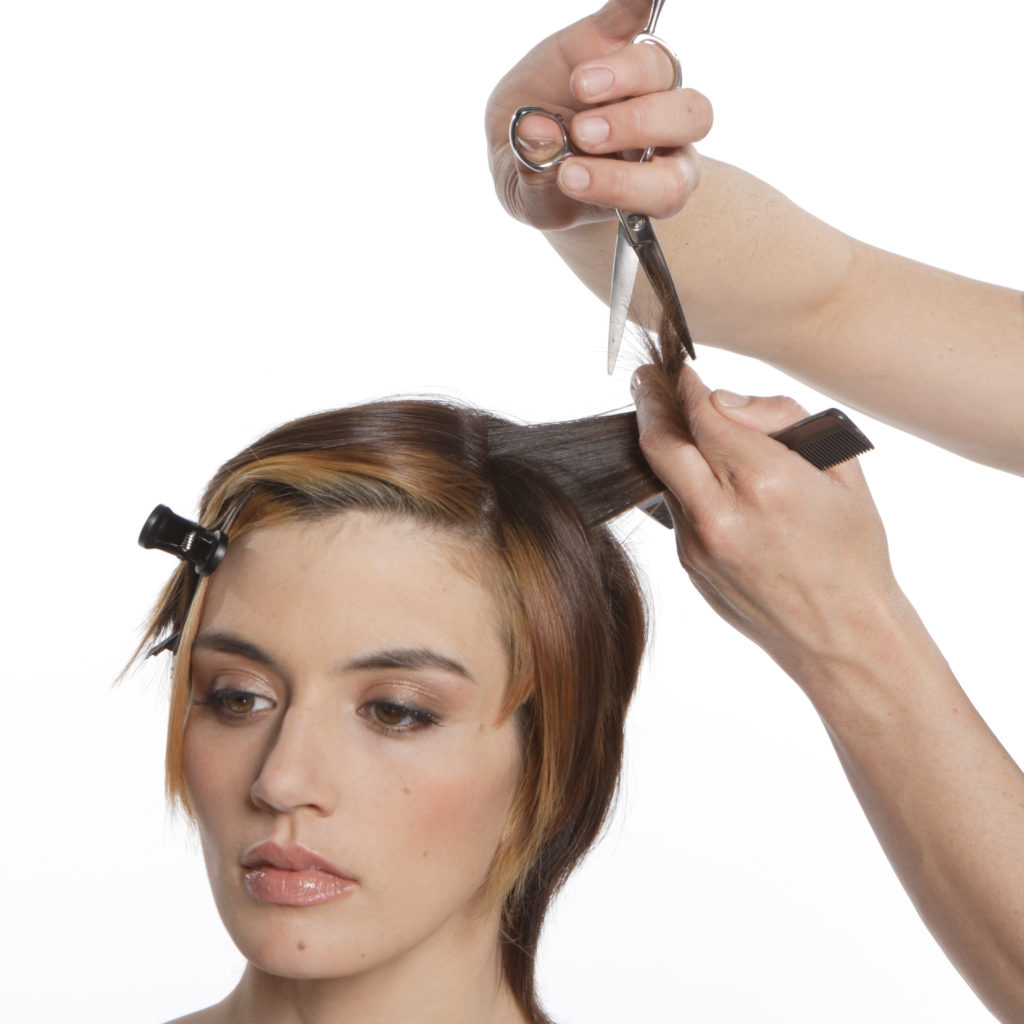
8Take a horizontal parting at the back of the front interior section. Project straight up and notch a horizontal line. Work toward the front with a mobile design line.
-
 9
9Air form the hair. Project the triangular section at the crest at 90 degrees. Use a deep notching technique on both sides to blend exterior and interior lengths.
-
 10
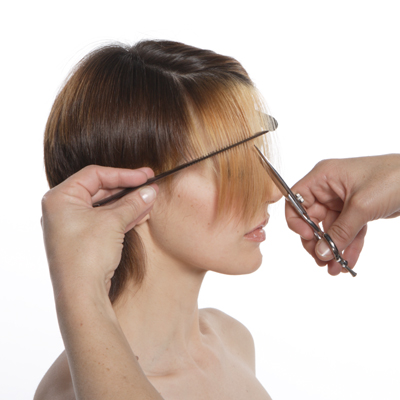
10Move to the small section at the front hairline. Use comb control and the notching technique to create a slight, curved front perimeter.
-
 11
11Use a curved section positioned in front of the apex area and subdivided slightly off center. Subdivide the front and back of the curved section to in front of the ears on either side.
-
 12
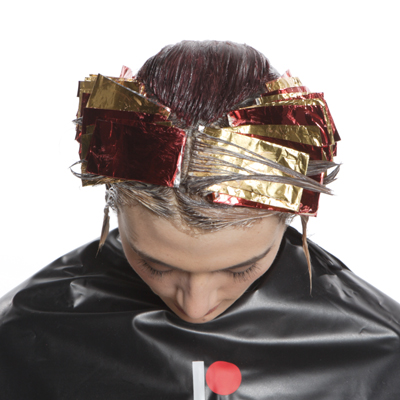
12Alternate slices with a Level 5 mahogany red, a natural slice, and a Level 6 copper gold. Apply a Level 6 red in the crown and back section. Apply a Level 7 natural gold permanent color with 20-volume (6%) developer from base to ends in the front and in between the foils. Process, rinse, shampoo and condition prior to styling.
-
 13
13When styled sleek, it’s a chin-grazing crop with a collection of warm tones for visual flair.
-
 14
14Or, your client can go to the extreme by creating a pompador-like coif!
Credits
Artist | Vic Piccolotto | Pivot Point International
Makeup | Sharon Casey | ArtistsbyTimothyPriano.com
Fashion Stylist | Sam Sok | ArtistsbyTimothyPriano.com
Fashion Stylist | Patric Chauvez | ArtistsbyTimothyPriano.com
Fashion Photography | Lisa Sciascia | sciascia.com
Senior Photographer/Videographer | David PlacekSee another step-by-step from Pivot Point: Curly Crop Cut and Color
YOU MIGHT LIKE THIS
-
Hair
Two-Toned Crop from Pivot Point
-
Hair
Curly Crop Cut and Color from Pivot Point International
-
Hair
Short Multi-Tonal Brunette Cut and Color from Pivot Point
-
Hair Color

How-To: Platinum Pink Shadow
-
Barbering
Medium-Length Men’s Razor Cut
TRENDING NOW!
-
BTC Hair Trend Report
The Biggest Haircut Trends of 2024
-
Copper
What Is The "Cowboy Copper" Hair Trend? Here's What It Really Means...
-
Bobs
How to Avoid a Bulky Bob: 4 Techniques To Try
-
Uncategorized
TikTok's Viral "Scandinavian Hairline" Is Actually Not New...
-
Hair Color
WWYD: How To Stop Your 6N From Turning Orange
-
BTC Hair Trend Report
Quiet Luxury Blonde: The "Old Money" Trend Explained
-
Glossing/ Toning
How To Achieve "Glass Hair": Smart Hacks From Hairdressers
-
Curly
Long Layers: 10 Pro Tips + Common Cutting Mistakes

