
Pivot Point’s InnovationKelli • Mini-Tech

Advertisement
Advertisement
Advertisement
Pivot Point’s InnovationKelli • Mini-Tech
HOW-TO STEPS 
-
 1
1Kelli’s hairstyle was cutting edge. But it has grown out to be undefined and disproportionate. Her new design will be much stronger in shape with a fashion-forward feeing that suits her look and personality.
-
 2
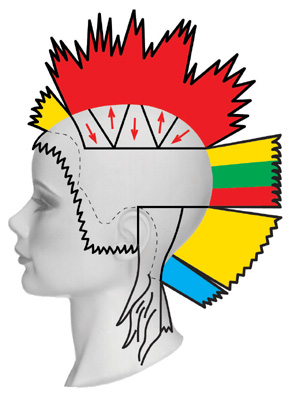
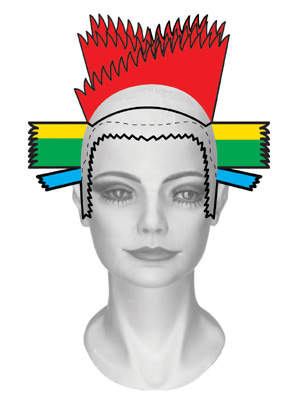
2The nape consists of graduation over a solid perimeter at the center, with longer freeform lengths at either side. Planar sculpting through the crest area results in a combination of increase, uniform, and graduated lengths.
-
 3
3The interior consists of increase layers with alternate directions of increase, contrasting with a short, graduated fringe.
-
 4
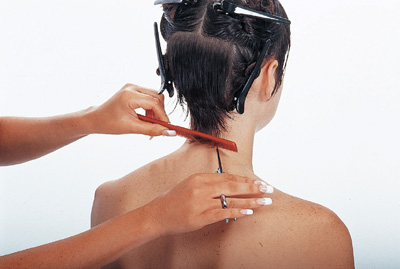
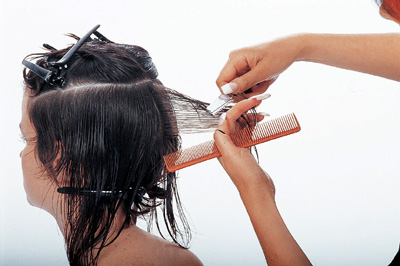
4Section from the apex to the tip of each ear and horizontally from the tip of each ear across the lower crown. Begin in the center nape with a vertical parting. Use medium-high projection with a corresponding finger position and sculpt with the notching technique. Using a mobile design line, direct each parting toward the back creating a diagonal plane as you work from the center to one side. Repeat on the other side.
-
 5
5Refine the perimeter of the section horizontally using the notching technique and the comb to control the hair.
-
 6
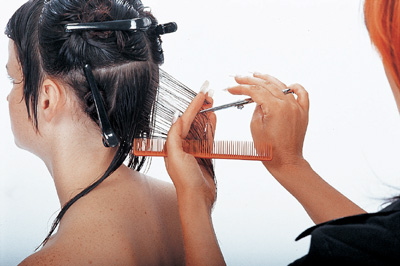
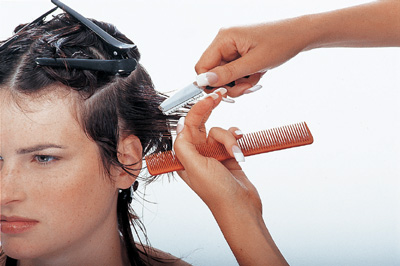
6Next, subsection horizontally at the upper crest, extending to the front hairline. At the center back, take a vertical parting, project straight out and use a vertical finger position. Sculpt with the razor etching technique using a length guide from below.
-
 7
7Work from the center toward one side. Use a mobile design line and the same technique as you work to the front hairline. Then work from the center back toward the opposite side.
-
 8
8Use comb control and natural distribution with the notching technique to create a horizontal line at the side. Repeat on the other side.
-
 9
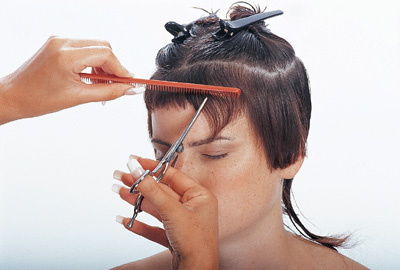
9Move to the interior and release a 1″ (2.5 cm) section parallel to the front hairline, extending into the side sections. Air form this section in natural distribution. Begin sculpting at the center, using comb control and the notching technique to sculpt a horizontal line. Next, angle the comb slightly as you work toward the sides, creating a concave line.
Finish this section by freehand notching into the fringe to refine the texture and lengths.
-
 10
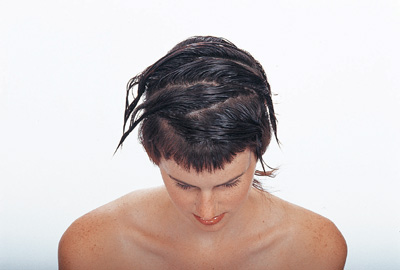
10Subsection the remaining interior lengths with a large zigzag parting, creating five narrow triangular sections.
-
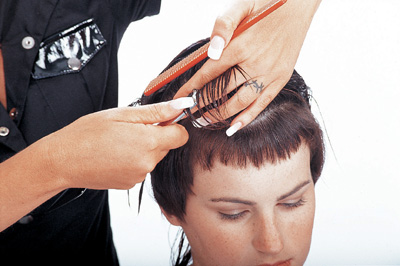 11
11Begin at the front triangle, projecting straight up and shifting slightly toward the point. Angle your fingers to increase the length toward the wide end of the triangle. Sculpt with the razor peeling technique.
Then, move to the next triangular section and work in the opposite direction, shifting toward the point and angling your fingers again for an increase toward the wide end. Repeat as you work toward the back of the interior. Continue to alternate directions from one triangle to the next.
-
 12
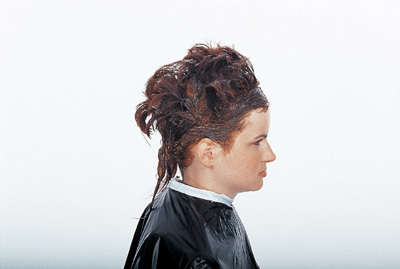
12Apply a level 5, gold demi-permanent color with developer to the entire head at the base and from base to ends along the perimeter, including the front hairline. Exclude the longer lengths on the left side of the nape.
Within a crescent-shaped area that extends from above the right eye, apply powder lightener with 30 volume (9%) developer from midstrand to ends on random sections and to the longer lengths on the left side of the nape. Then apply the demi-permanent formula to the remainder of the ends. Process, rinse, shampoo and condition prior to styling.
-
 13
13Credits:
Hair Sculpture – Yolly ten Koppel, Pivot Point the Netherlands
Makeup – Lori Neapolitan
Fashion Styling – Kristy Piunti
Photography Credits – David PlacekInnovation features both a Style Book and a Technical Manual including Kelli plus seven additional step-by-steps. Click here to purchase Pivot Point’s Innovation!
YOU MIGHT LIKE THIS
-
Hair
Pivot Point’s Inspirations
-
Hair
Pivot Point International “Lauren” Mini-Tech
-
Hair
Pivot Point International “Tinlei” Mini-Tech
-
Hair
Pivot Point International “Kitty” Mini-Tech
-
Hair
Midlength Layered Cut from Pivot Point
TRENDING NOW!
-
BTC Hair Trend Report
The Biggest Haircut Trends of 2024
-
Blonde
Conditioner Before Toner: Common Hair Myth Debunked
-
Monthly Product Launch List
11 New Game-Changing Hair Launches To Add To Your Arsenal
-
Copper
What Is The "Cowboy Copper" Hair Trend? Here's What It Really Means...
-
Copper
Muted Bronze
-
Haircuts
SHAG 101: The Dos And Don'ts
-
Frizz
Straighten & Smooth 2A, Fine-Medium Density Hair
-
Business
Don't Fall Victim To Hair Industry Greenwashing—Read This First

