
How-To: Pinup Glam Blonde and Long Layer Cutting

Advertisement
Advertisement
Advertisement
How-To: Pinup Glam Blonde and Long Layer Cutting
COLOR FORMULAS 
HOW-TO STEPS
-
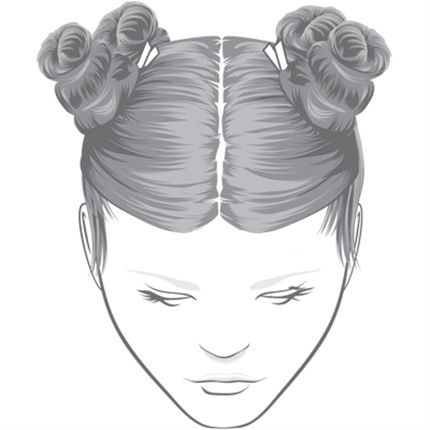
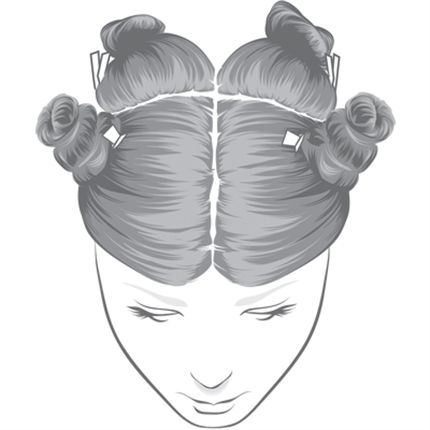
 1
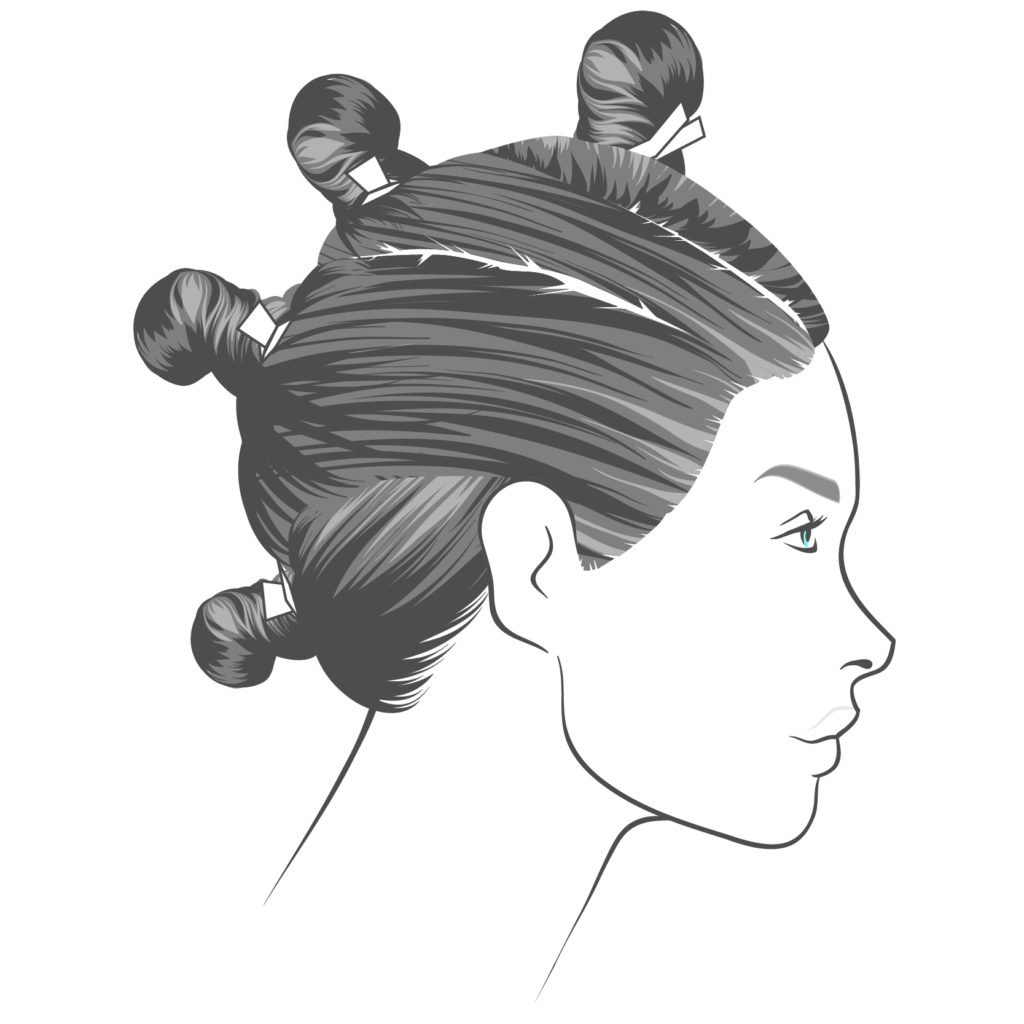
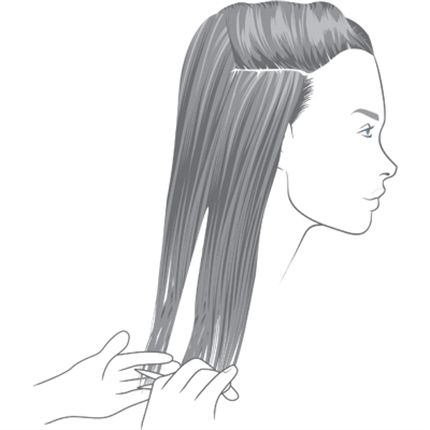
1Place four subsections throughout the head. The sections should be two inches apart and on a diagonal placement.
-
 2
2Secure the four sections with a J-knot down the center of the head.
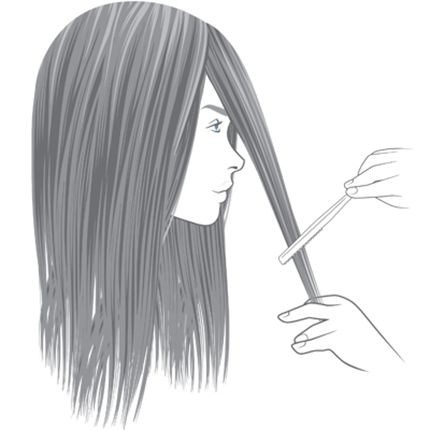
-
 3
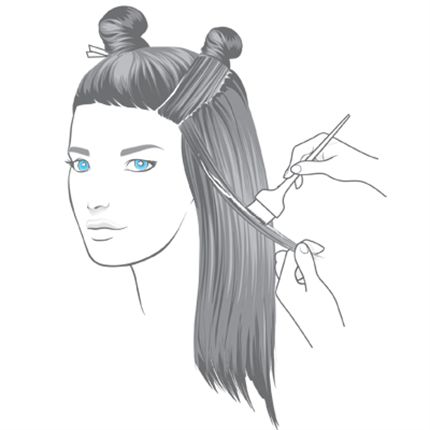
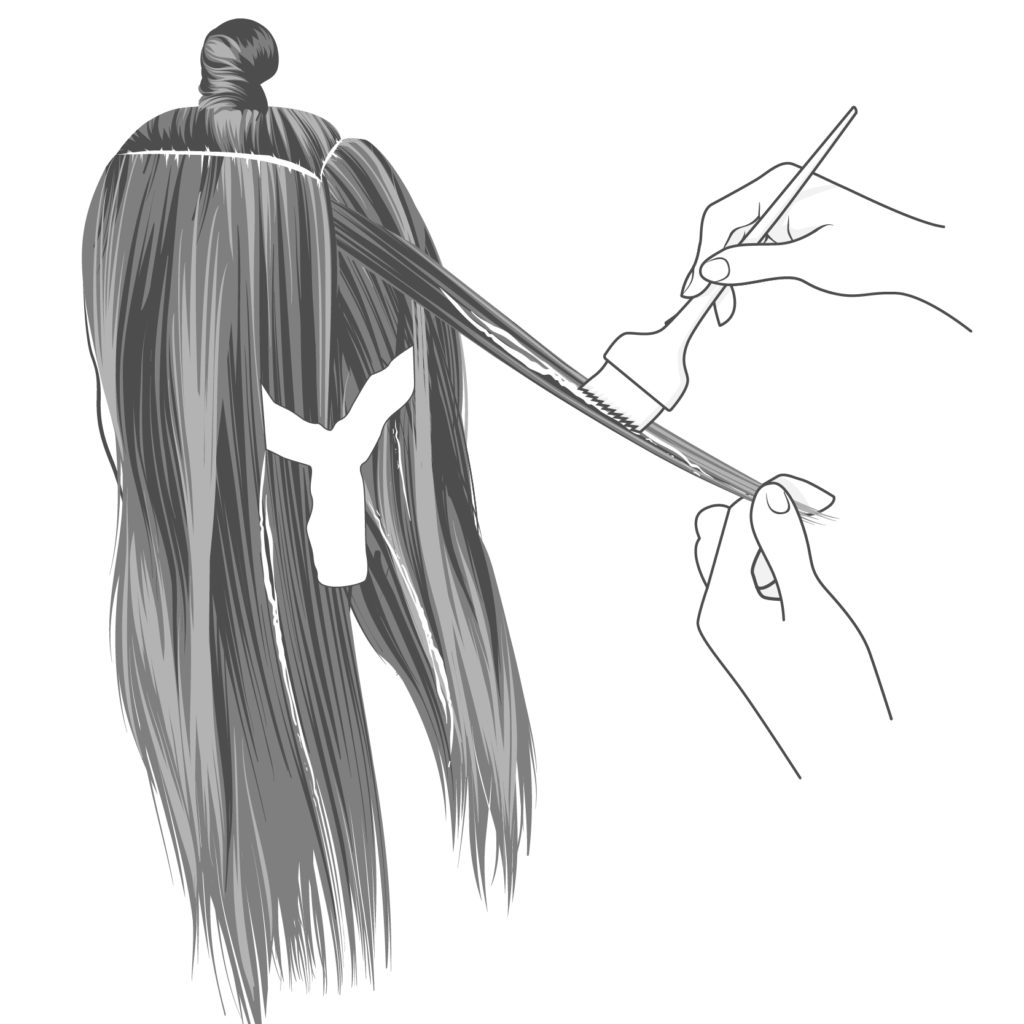
3Start at the bottom of the nape. Drop out the entire section and begin color placement. Take small sections from the hairline and gently paint on the color. To prevent lines of demarcation, side-brush while working your way up the area closest to the new growth.
-
 4
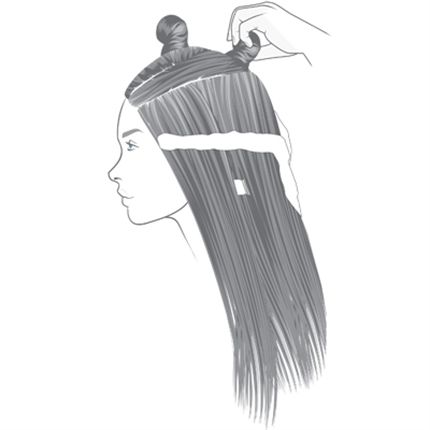
4Before moving to the next section, place cotton on the hair in a V-shaped pattern. The cotton protects the next section from laying on the color and causing bleed marks or spottiness.
-
 5
5Move to the next section and repeat the same process from the section above.
-
 6
6Once all sections have been completed, gently side-brush the hairline for brightness around the hairline.
-
 7
7Gently wrap the hair with plastic to keep it from drying out. Place your client in a draft-free area and allow hair to process to the desired level. Then, shampoo and tone to the perfect color.
-
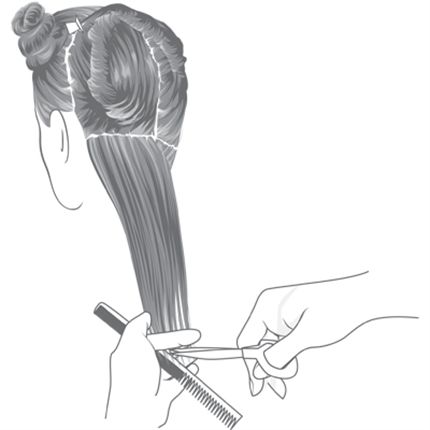
 8
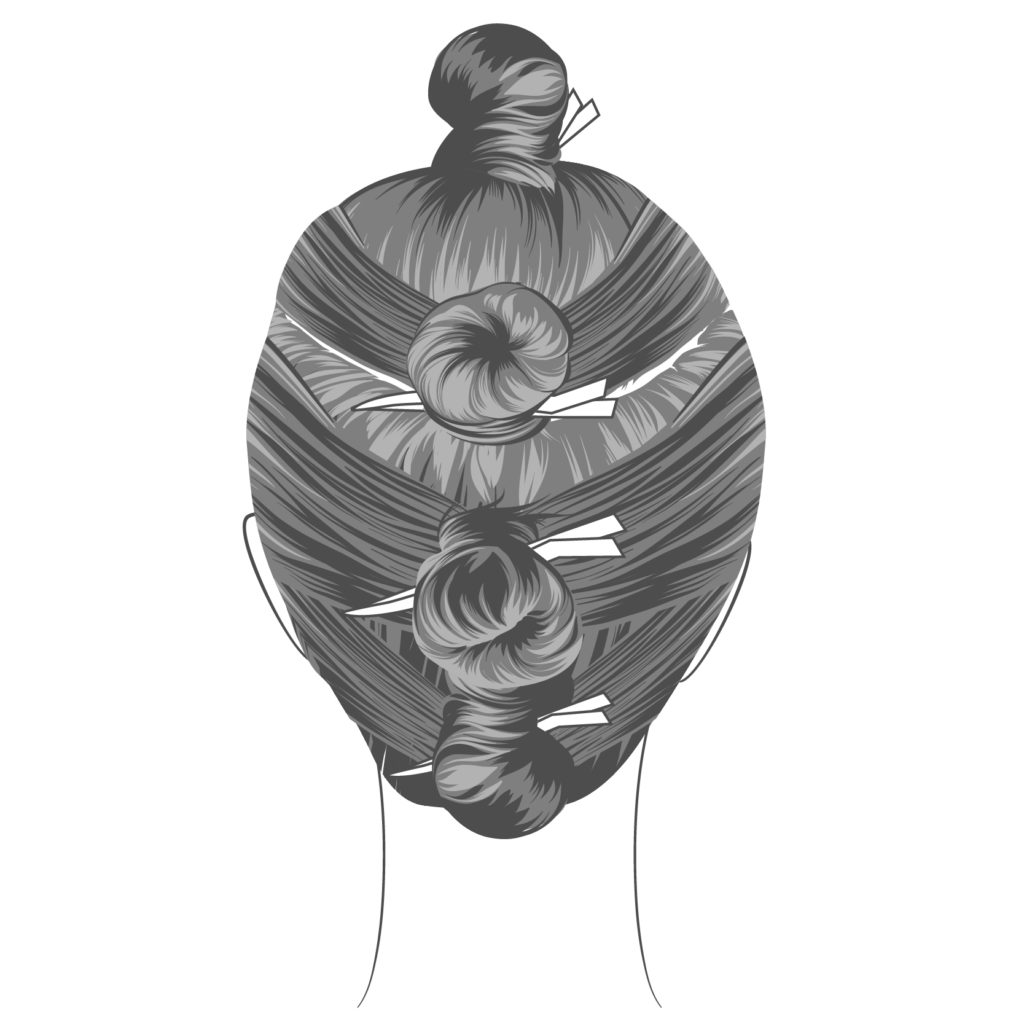
8Create four clean sub-sections and secure each sub-section into a J-knot.
-
 9
9Drop down back two sections, and sub section 1-inch sections to maximize control. Adjust to the desired length using zero elevation. Continue through the back sections.
-
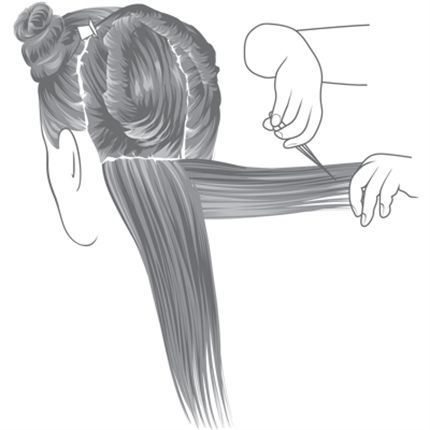
 10
10Sub-section the back two sections once the perimeter line is complete. For more movement and less bulk, take 1-inch vertical sections and slide-cut from the center. Use a traveling guide from the center of the cut to behind the ear. Repeat on the opposite side.
-
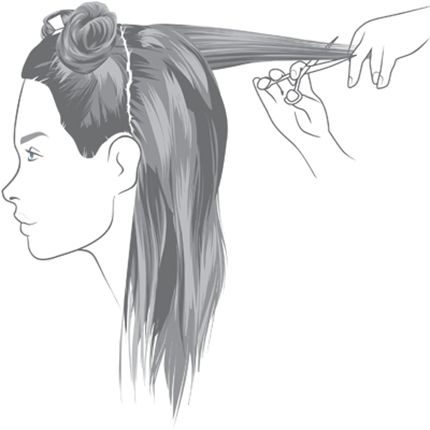
 11
11To create interior layering, repeat the sub-sections in the back, but this time take vertical sections, and slide cut from under using a C-shape formation. Continue throughout using a traveling guide.
-
 12
12With the back complete, move to the side sections and repeat the same steps. If you are working with fine hair, slide cutting on the top and bottom of the hair may not be needed. Make sure the hair around the face is not too sparse due to over-cutting.
-
 13
13Add texture as needed by gently working a feather razor through the hair. Start two inches from the perimeter line, and surface plain vertically to remove unwanted weight. Use a razor only to enhance the cut based on hair type. Keep a safe razoring distance from new growth to minimize width and unflattering flyaways.
-
 14
14To create softness around the face, over direct the hair to the right and gently slide your razor from midlengths to ends. Repeat on the other side for versatility.
Do you like what you see?! There are plenty more artistic and technical training (did we mention it is paid training?!) with mentoring opportunities when you build your career with The Salon by InStyle. Another HUGE benefit of joining the Salon team ARE the benefits! When you go full-time, you get a storewide associate discount, medical, dental, paid time off and a 401K. And, if you need anymore convincing, they give you up to $1000 bonuses based on performance—so basically, you get paid extra for doing what you love!
Interested in building a career with The Salon by InStyle inside JCPenney? For more info, visit www.jobs.jcp.com.
Check out our behind-the-scenes Trend Book photo shoot album on Facebook!
YOU MIGHT LIKE THIS
-
Hair Color
Short and Shattered from The Salon by InStyle
-
Brunette
Pinwheel Color Melt
-
Curls
How-To: Soft Blush Curls
-
Smoothing
How-To: Pinup Smooth
-
Curls
How-To: Bouncy Curls With Fringe
TRENDING NOW!
-
BTC Hair Trend Report
The Biggest Haircut Trends of 2024
-
Blonde
Conditioner Before Toner: Common Hair Myth Debunked
-
Monthly Product Launch List
11 New Game-Changing Hair Launches To Add To Your Arsenal
-
Copper
What Is The "Cowboy Copper" Hair Trend? Here's What It Really Means...
-
Frizz
Straighten & Smooth 2A, Fine-Medium Density Hair
-
Copper
Muted Bronze
-
Haircuts
SHAG 101: The Dos And Don'ts
-
BTC Hair Trend Report
WWYD: How Hairstylists Are Navigating Inflation

