
Paul Mitchell Hat Back Step-by-Step

Advertisement
Paul Mitchell Hat Back Step-by-Step
HOW-TO STEPS 
-
 1
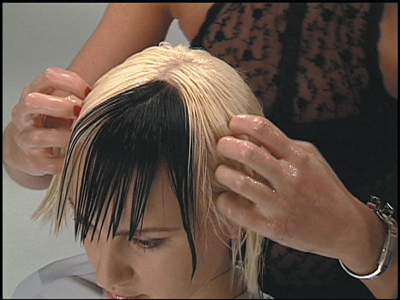
1Combine Super Sculpt™ and Super Skinny® Serum to provide control, foundation and memory. Apply and comb through for even distribution of the product.
-
 2
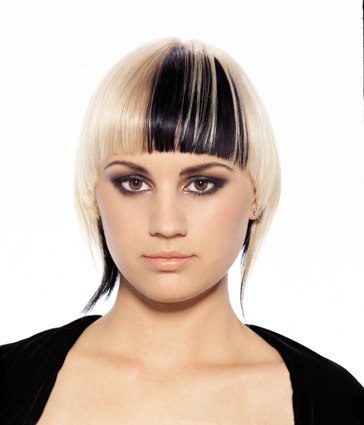
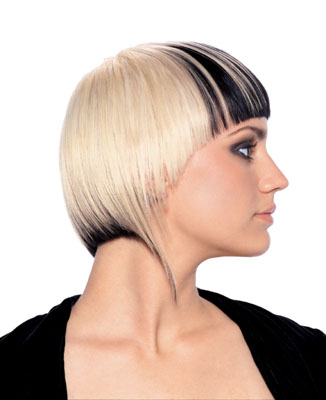
2This hair design features one of Paul Mitchell’s tried and true, award-winning styling products, Super Sculpt™. These artists celebrate 25 years of style with this NEW design and show us how to mix up and style up the right products for this fashionable ’do. Here’s the 411 on how to achieve this look.
Products used:
Super Sculpt™
Super Skinny® Serum
Gloss Drops®
Tools used:
413 Sculpting Brush
Paul Mitchell® The Smoothing Iron
Blow dryer with nozzle -
 3
3Credits:
Hair: Robert Cromeans, Takashi Kitamura, DJ Muldoon; Photographer: Albert Sanchez; Wardrobe: Tamara Rappa; Make-up Artist: Taylor BabaianFor more information please log on to: www.paulmitchell.com
-
 4
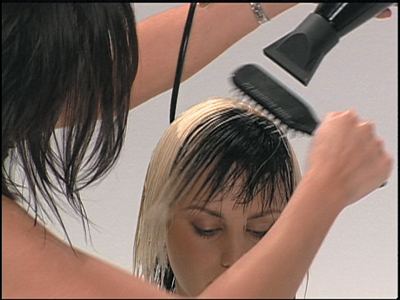
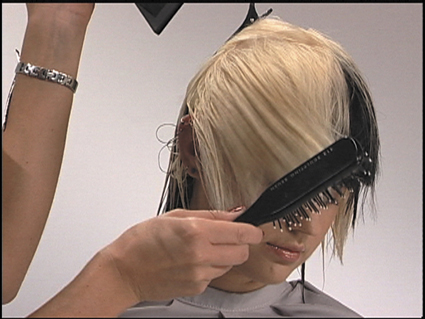
4Begin blow-dry at the fringe area. Brush with 413 Sculpting Brush toward face and clip the rest of hair away using the Paul Mitchell® clip. Use the ‘truck and trailer’ method with small sections and slightly bevel the ends by rolling the brush.
-
 5
5Continue adding hair from the crown area and dry toward the face. Continue around the head shape until complete.
-
 6
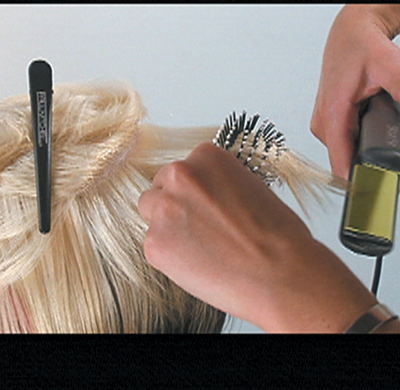
6Apply Gloss Drops® as needed for control and shine. Detail the design with Gloss Drops® and Paul Mitchell® The Smoothing Iron.
YOU MIGHT LIKE THIS
-
Barbering
How To Make His Fine Hair Look Fuller
-
Haircuts
How-To: Brad Pitt
-
Hair
Paul Mitchell Pony Up For Fall Technique
-
Hair
Christophe Chevillard for Paul Mitchell “Stitch and Set” How-To
-
Blonde
Full Spectrum Blonde from John Paul Mitchell Systems
TRENDING NOW!
-
BTC Hair Trend Report
The Biggest Haircut Trends of 2024
-
Blonde
Conditioner Before Toner: Common Hair Myth Debunked
-
Monthly Product Launch List
11 New Game-Changing Hair Launches To Add To Your Arsenal
-
Copper
What Is The "Cowboy Copper" Hair Trend? Here's What It Really Means...
-
Copper
Muted Bronze
-
Haircuts
SHAG 101: The Dos And Don'ts
-
Frizz
Straighten & Smooth 2A, Fine-Medium Density Hair
-
Curly
Long Layers: 10 Pro Tips + Common Cutting Mistakes

