
Mosaic Part 2: Cut and Color from Farouk

Advertisement
Advertisement
Advertisement
Advertisement
Mosaic Part 2: Cut and Color from Farouk
HOW-TO STEPS 
-
 1
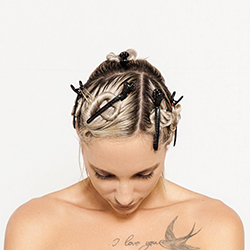
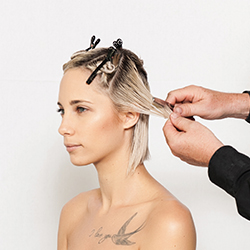
1Start with a side part at the left, and section a triangle from the highest point of the head to the corners of the eyebrow.
-
 2
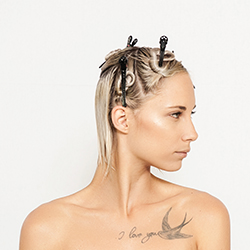
2Section a second triangle on the left from the highest point of the head to the highest point of the ear.
-
 3
3Section a triangle on the right side above the ear matching the other side.
-
 4
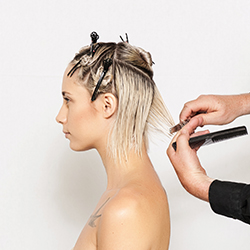
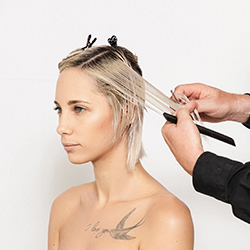
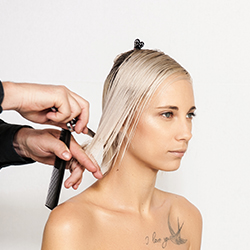
4Start in the nape area in the center part with a medium graduation, positioning your fingers diagonally and sculpt with a razor parallel to your fingers.
-
 5
5Use the center guide as a stationary guideline and distribute all the hair to this point.
-
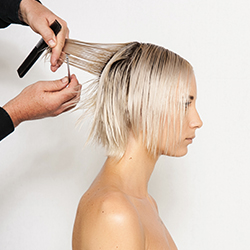
 6
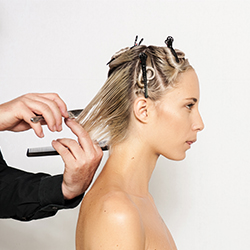
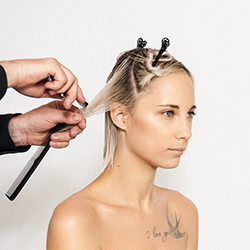
6Release the section above the ear and distribute the hair perpendicularly, using the pinching technique with a razor.
-
 7
7The next triangle is distributed perpendicularly and cut with a razor parallel to the parting.
-
 8
8Mirror the pinching technique on the other side.
-
 9
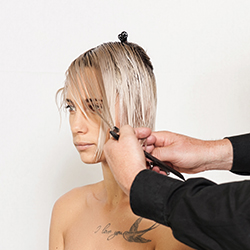
9Comb the large triangle at the front in the opposite styling direction and wrap the hair around the forehead toward the sides. Use the arching technique to sculpt the fringe with the razor in a soft arching motion to the left.
-
 10
10Connect the fringe with the sides diagonally forward.
-
 11
11Connect the triangle from the crown area to the graduated nape area with a razor. Distribute the hair in vertical partings from the nape to the crown with a stationary design line.
-
 12
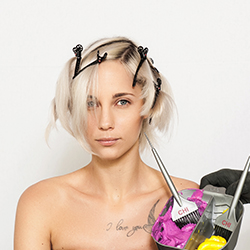
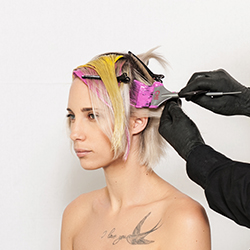
12Color is applied to hair that has been previously lightened using CHI Blondest Blonde, following manufacturer’s directions for desired lift.
Section the head in seven large triangles similar to the sculpting sections. Mix 1 oz. CHI Ionic Permanent Shine Hair Color 11I + 1 inch 1N + 1 oz. CHI Ionic Color Generator 10-volume developer and apply both the CHI Chromashine Pastel Pink and Pastel Yellow.
-
 13
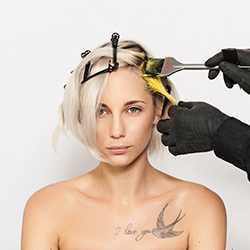
13Start at the triangle at the temple area and isolate a small line. Color the rest of this section with CHI Chromashine Pastel Yellow.
-
 14
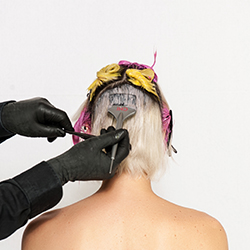
14Alternate this technique in the other triangles by applying CHI Chromashine Pastel Yellow and Pastel Pink.
-
 15
15The nape area and isolated areas between the different shades are colored with 1 oz. of CHI Ionic Permanent Shine Hair Color 11I + 1 inch 1N + 1 oz. CHI Ionic Color Generator 10-volume developer.
-
 16
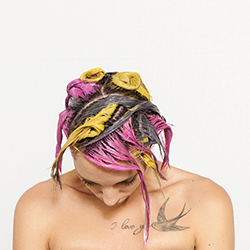
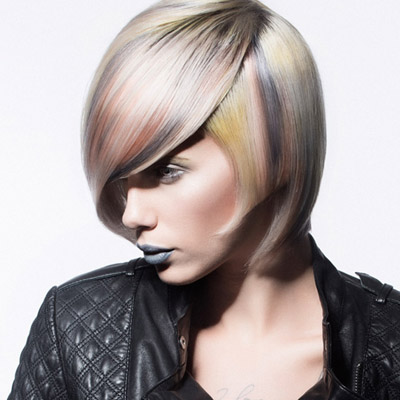
16Full head application demonstrates the different color placements.
-
YOU MIGHT LIKE THIS
-
Hair Color
Mosaic Part 3: Cut and Color from Farouk
-
Hair
Mosaic Part 1: Cut and Color from Farouk
-
Hair Color
Vixen Cut and Color from Farouk Systems
-
Hair
Voluminous DURA Waves by CHI for Farouk Systems
-
Hair Color
Darling Cut and Color from Farouk Systems
TRENDING NOW!
-
BTC Hair Trend Report
The Biggest Haircut Trends of 2024
-
Blonde
Conditioner Before Toner: Common Hair Myth Debunked
-
Monthly Product Launch List
11 New Game-Changing Hair Launches To Add To Your Arsenal
-
Copper
What Is The "Cowboy Copper" Hair Trend? Here's What It Really Means...
-
Frizz
Straighten & Smooth 2A, Fine-Medium Density Hair
-
Copper
Muted Bronze
-
Haircuts
SHAG 101: The Dos And Don'ts
-
BTC Hair Trend Report
WWYD: How Hairstylists Are Navigating Inflation

