
Modern Shag Cut and Color from Pivot Point International

Advertisement
Advertisement
Advertisement
Modern Shag Cut and Color from Pivot Point International
HOW-TO STEPS 
-
 1
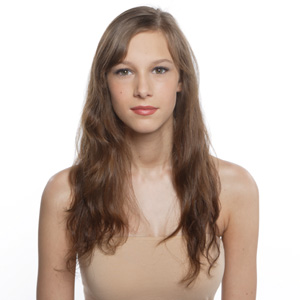
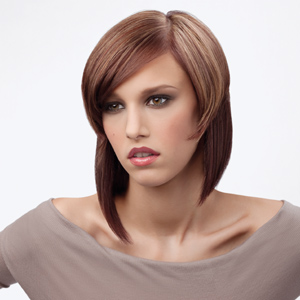
1Our model, Victoria, is ready for a new modern style and a dramatic change. She wants to add shape and body to her lifeless long hair.
-
 2
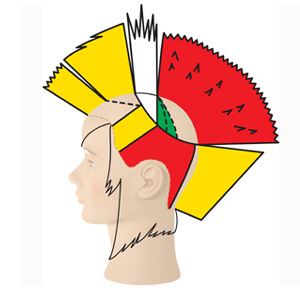
2Medium graduation is sculpted in the back with overlapping increase layers in the crown. The upper sides and top are sculpted with medium graduation. The remaining side lengths are increase layered.
Click on to see another structure graphic.
-
 3
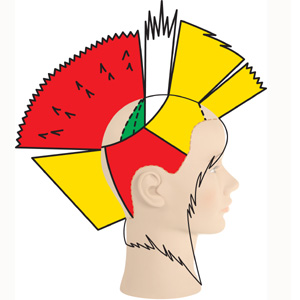
3Medium graduation is sculpted in the back with overlapping increase layers in the crown. The upper sides and top are sculpted with medium graduation. The remaining side lengths are increase layered.
Click on to see cutting instructions!
-
 4
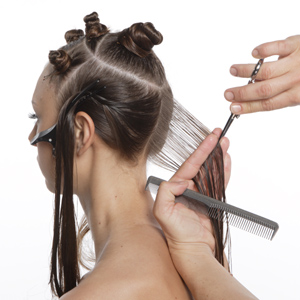
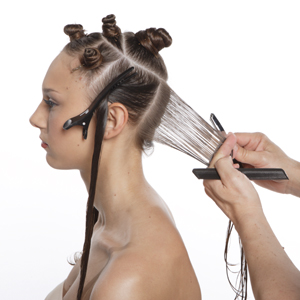
4In the center nape, use vertical partings and medium projection. Position your fingers along a medium line of inclination and sculpt parallel. Work from the center to the left, then to the right.
-
 5
5Return to the left side and take a slight diagonal parting. Use perpendicular distribution with medium projection. Use the previously sculpted parting as a stationary design line and razor etch. Repeat on the other side.
-
 6
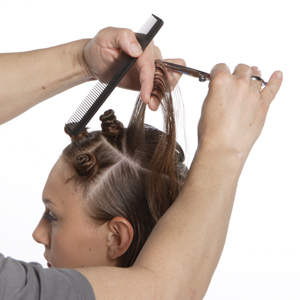
6Release a pivotal parting at the left side sectioning line in the crown. Distribute and project the hair at 90 degrees, position your fingers parallel to the curve of the head and notch.
-
 7
7Move to the left interior parting and take a diagonal-forward parting parallel to the sectioning line. Use a length guide from the crown with perpendicular distribution, high projection and a parallel finger position. Razor etch a stationary design line.
-
 8
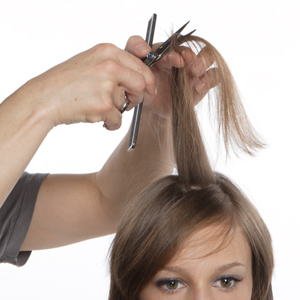
8Air form the hair. Take horizontal partings in the top, distribute the length approximately 90 degrees and point-cut to visually blend.
-
 9
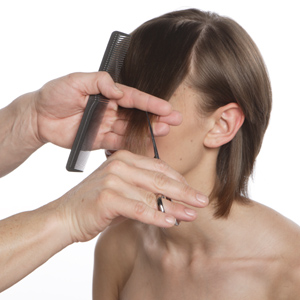
9Release a thick diagonal-left parting in the fringe. Distribute with low projection and notch parallel to the parting.
-
 10
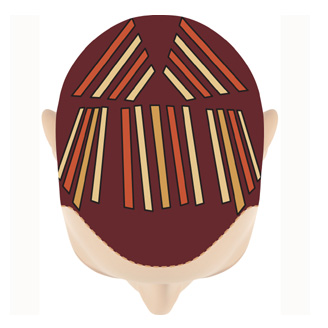
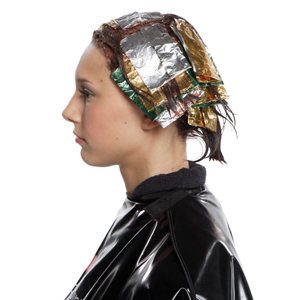
10Alternate natural hair with diagonal slices of Level 12 violet-blonde, Level 6 copper gold and Level 8 blonde through the sides and top. In the back interior, use slightly thicker slices alternating natural hair with Level 6 copper gold and Level 8 blonde.
-
 11
11Apply a Level 6 copper-mahogany to remaining lengths and between foils. Process, rinse, shampoo and condition prior to styling.
-
 12
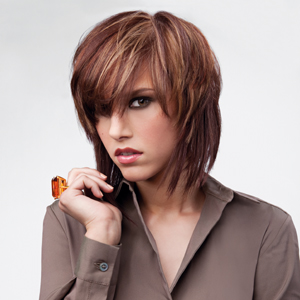
12Styling Option 1
Use texturizing products to create a piece-y look.
-
 13
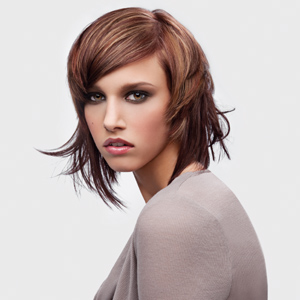
13Styling Option 2
Use gels and pomades to create a sleek top and sculpted ends.
-
 14
14Styling Option 3
Or use your thermal protectant, a smoothing product and a flat iron to create a chic, sleek look!
YOU MIGHT LIKE THIS
-
Blonde

BTC EXCLUSIVE: L’Oreal Professionnel’s Blonde “It” Girl for Summer 2015
-
Brunette
BTC EXCLUSIVE: L’Oreal Professionnel’s Brunette “It” Girl for Summer 2015
-
Clipper/Trimmer
How-To: Textured Shag
-
Fringe
Modern, Chic Shag
-
Haircuts
Straight Shag
TRENDING NOW!
-
BTC Hair Trend Report
The Biggest Haircut Trends of 2024
-
Copper
What Is The "Cowboy Copper" Hair Trend? Here's What It Really Means...
-
Blowouts
Bombshell Blowouts: 4 Ways To Create Lift With Longevity
-
Curly
Long Layers: 10 Pro Tips + Common Cutting Mistakes
-
Frizz
Straighten & Smooth 2A, Fine-Medium Density Hair
-
Ask A BTC Expert
5 Foil Tips & Tricks From @the.blonde.chronicles
-
Copper
Muted Bronze
-
Haircuts
SHAG 101: The Dos And Don'ts

