
Mod Stacked Pixie
Mod Stacked Pixie
Products Used
VIDEO 
HOW-TO STEPS
-
 1
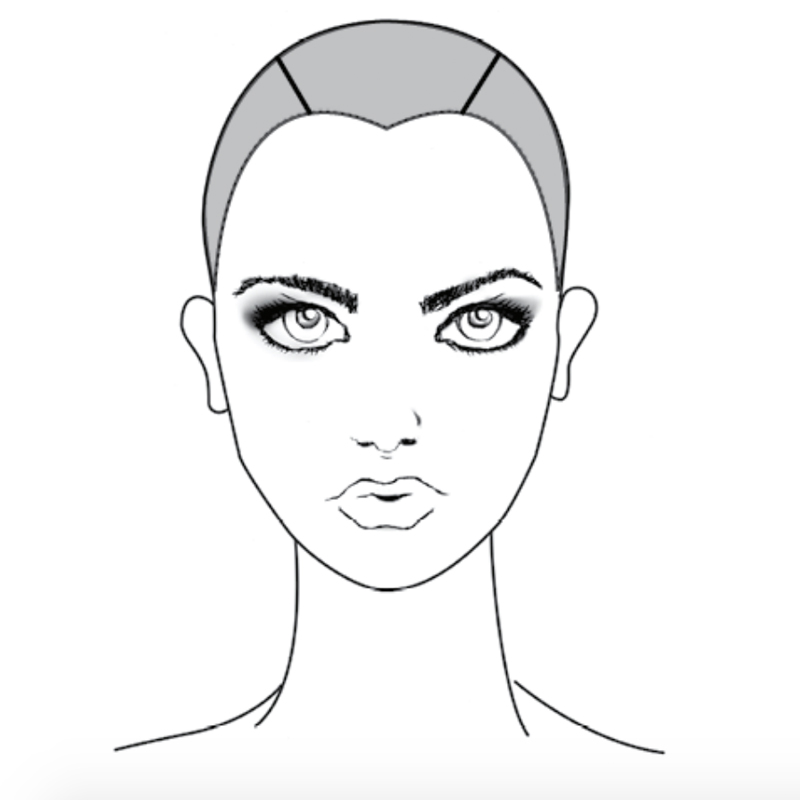
1Part off a narrow horseshoe on top of the head and clip away. From the back of the horseshoe, create a diagonal line down to the back of the ear on each side.
-
 2
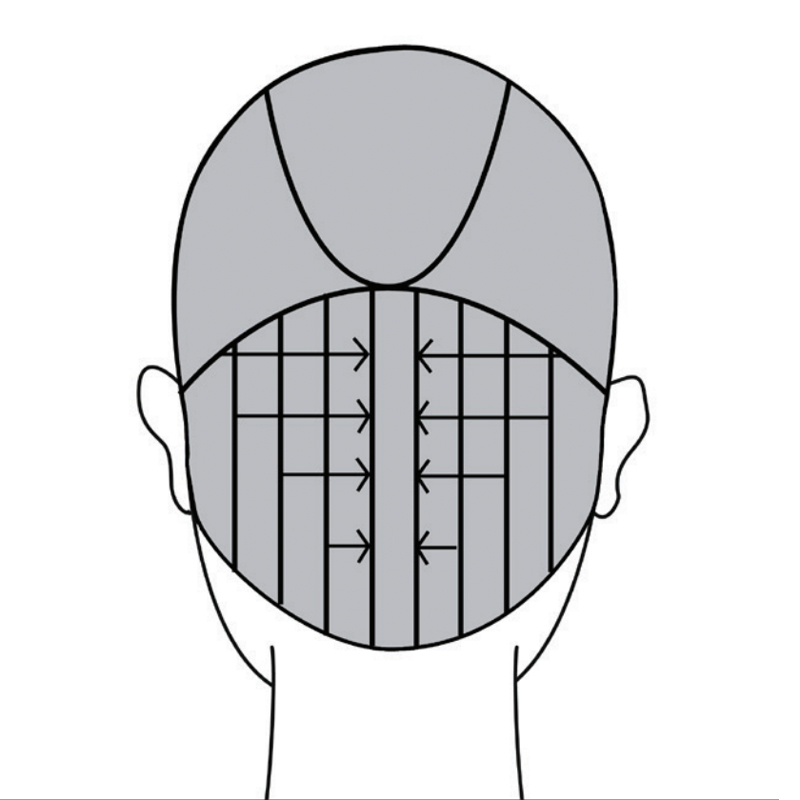
2In the nape section, take ½ inch out and cut a stationary guide at the desired length parallel to the parting line. Continue working through each side by over-directing ½-inch vertical subsections to the stationary guide.
-
 3
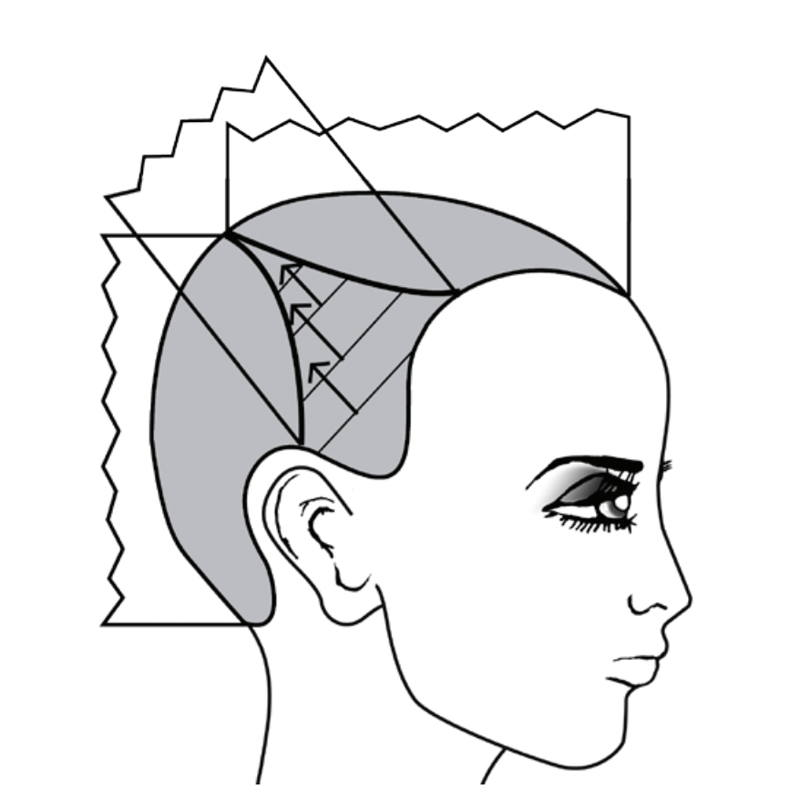
3Begin each side section in the back corner by creating a guide from the top of the nape section. Working in ½-inch diagonal back subsections, use a traveling guide, overdirecting to the previous subsection and cutting parallel to each parting line. Detail the perimeter and hairline to create the desired shape.
-
 4
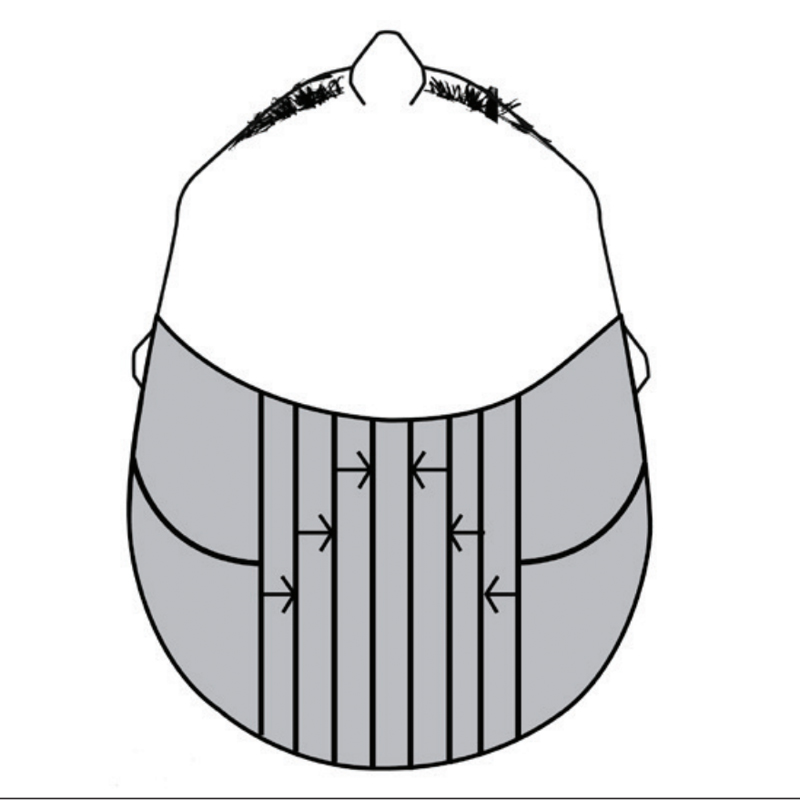
4In the crown, begin by taking ½-inch subsections in the center of the horseshoe. Cut parallel to the parting to create your new guide at the desired length (disconnected from the underneath section). Overdirect to the previous subsection. Continue working through the first side before moving to the next. Customize the cut based on the client’s desired end result by detailing the perimeter at the desired length and texturizing. Style with Kenra Professional Classic Clay 17.
-
 5
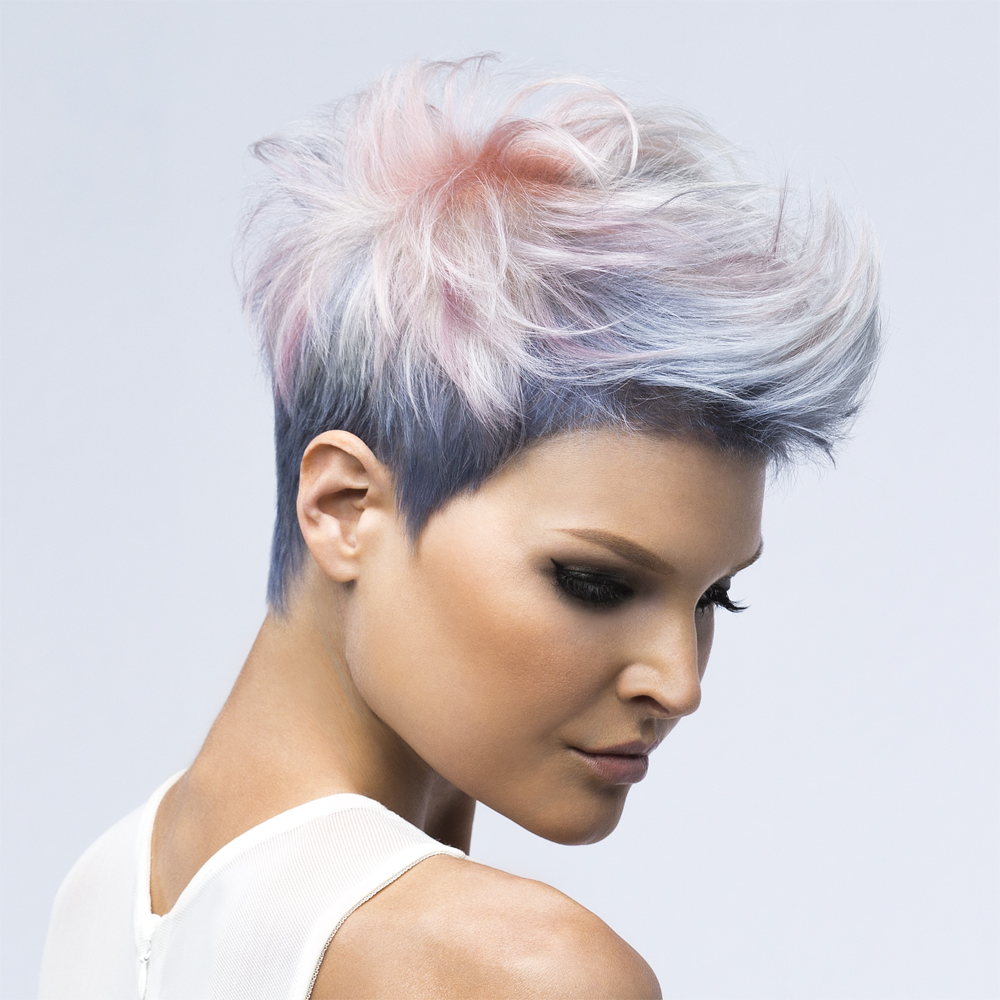
5Finished look.
More from
Kenra Professional
-
Dry-Cutting
Bang Breakdown: How To Cut 2024’s Top Fringe Trends
-
Dry-Cutting
2024 Fringe Guide: How To Consult, Cut & Style Trendy Bangs
-
Facebook Lives
Ponylights: How To Brighten The Hairline in Less Than 20 Foils
-
BTC Hair Trend Report
Quiet Luxury Blonde: The “Old Money” Trend Explained
-
Hair Color
Bold Color Trends You Need To Know For 2024
-
Balayage
3 Steps To Make A Bronde Hairline Pop
-
Blonde
6 Blonding Techniques To Save Your Client’s Hair
-
Blonde
HOW-TO: CUSTOM TEASYLIGHTS WITHOUT THE TEASE
-
BTC Hair Trend Report
Your Complete Guide To Color Blocking
-
Haircuts
How To Cut Layers WITHOUT Losing Length
-
Bobs
6 GENIUS CUTTING HACKS WE STOLE FROM INSTAGRAM
-
Frizz
Moisturizing Oil
-
Barbering
5 Genius Blonding, Color + Cutting Cheats To Try Now
-
Accessories
2022 Styling Trends To Know: Blowouts, Money Piece Braids + Hair Rollers
-
BTC Events
#thebtcshow 2021
-
BTC Events
Connection Center at #thebtcshow 2021
-
Beachwaves
Boho Bridal Crown Braid
-
Texture
Volumizing Spray Clay 15
-
Balayage
4 Tricks For Foilayage + Shadow Roots
-
Balayage
How To Cover Grays & Open Air Balayage At The Same Time
-
Blonde
Filling The Hair? Don’t Skip These 4 Steps!
-
Corrective Color
Curly Color Correction: Brassy Blorange To Smoky Silver
-
Balayage
Problems With Open Air Balayage? Read This!
-
Manufacturer
Henkel Launches Beauty Care United
YOU MIGHT LIKE THIS
-
Haircuts
Disconnected Pixie
-
Haircuts
Razor-Cut Pixie
-
Haircuts
Transformation: Edgy Pixie + Fringe
-
Hair
Blonde Pixie Styling How-To by Rodney Cutler for ULTA
-
Hair
Short, Edgy Pixie From ProRituals
TRENDING NOW!
-
BTC Hair Trend Report
The Biggest Haircut Trends of 2024
-
Blonde
Conditioner Before Toner: Common Hair Myth Debunked
-
Monthly Product Launch List
11 New Game-Changing Hair Launches To Add To Your Arsenal
-
Copper
What Is The "Cowboy Copper" Hair Trend? Here's What It Really Means...
-
Frizz
Straighten & Smooth 2A, Fine-Medium Density Hair
-
Copper
Muted Bronze
-
Haircuts
SHAG 101: The Dos And Don'ts
-
BTC Hair Trend Report
WWYD: How Hairstylists Are Navigating Inflation

