
Last updated: July 18, 2019
Installing TruMatch Tape-In Extensions
Installing TruMatch Tape-In Extensions
VIDEO 
HOW-TO STEPS
-

 1
1Before
-
 2
2Take a radial section to separate the back from the front, then take a horizontal section from the recession to the radial, 2 inches above the ear.
-
 3
3Take a very thin section below the horizontal section.
-
 4
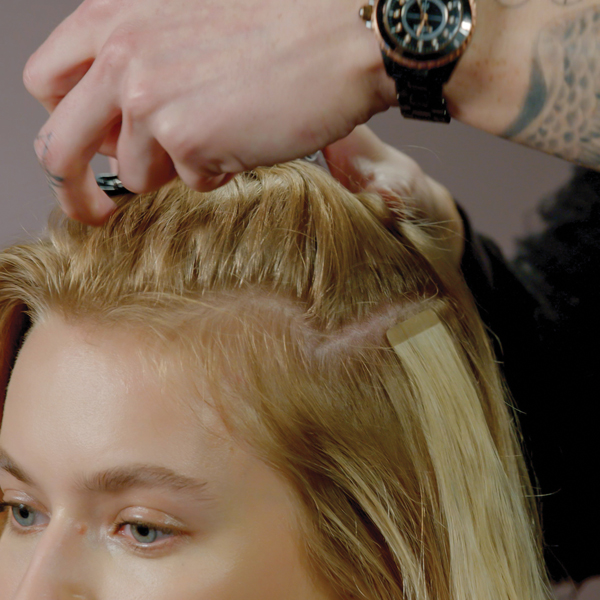
4Pick up the TRUMATCH extension, remove the tape and place it as close to the root as possible, underneath the thin section.
-
 5
5Add a second extension on top of the thin section, pressing together the tape to seal. This keeps the extensions looking natural, with no bumps in the root area. Be sure to install extensions at least 1 ½ inches away from the hairline to avoid seeing the tape when the hair is pushed back.
-
 6
6Continue taking horizontal sections every ½ inch, repeating the same technique.
-


More from
TruMatch
-
Braids
@hairandmakeupbysteph’s Crown Braid
-
Braids
6 Party-Ready Styles To Kick Off 2018
-
Hair Extensions
WATCH: Tape-In Extension Application
-
#thebtcshow Austin 2017
The Behind The Chair Show 2017: Day 3
-
Beachwaves
Waves, Braids And Bobs: 5 How-Tos To Try This Summer
-
Braids
Beachy, Five-Strand Braid
-
Hair Extensions
Vintage Waves With Extensions
-
Hair Extensions
BTC Exclusive! TRUMATCH Hair Extensions
YOU MIGHT LIKE THIS
-
Hair Extensions
Vintage Waves With Extensions
-
Color Melt
Metallic Melt + Tape-In Extensions
-
Braids
Beachy, Five-Strand Braid
-
Braids
@hairandmakeupbysteph’s Crown Braid
-
Hair Color

Tape-In Extensions: Iridescent Lavender + Shadow Root
TRENDING NOW!
-
BTC Hair Trend Report
The Biggest Haircut Trends of 2024
-
Blonde
Conditioner Before Toner: Common Hair Myth Debunked
-
Monthly Product Launch List
11 New Game-Changing Hair Launches To Add To Your Arsenal
-
Copper
What Is The "Cowboy Copper" Hair Trend? Here's What It Really Means...
-
Frizz
Straighten & Smooth 2A, Fine-Medium Density Hair
-
Copper
Muted Bronze
-
Haircuts
SHAG 101: The Dos And Don'ts
-
BTC Hair Trend Report
WWYD: How Hairstylists Are Navigating Inflation

