
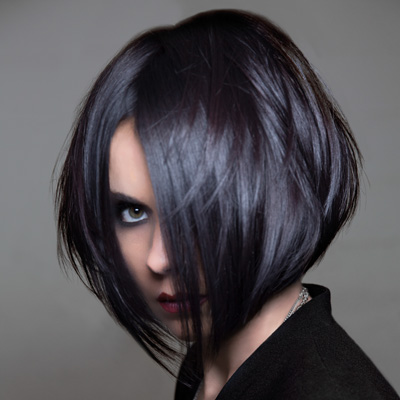
Plum Bob
Plum Bob
This classic length, A-line, undercut bob has it all—it’s chic, simple and timeless. Clients with fine hair love the way the cut makes their locks look instantly plumper, which means it should become a standard in every stylist’s haircut repertoire. Here, hybrideducation Guest Artist Tina Andersen demonstrates the fine points. And can we just say—this glorious, deep plum hue serves as the perfect punctuation?
Who Did It
Hair: Tina Andersen, Creative Director of Tim Hartley Education & Guest Artist for hybrideducation.co
Photography: Nandi Haidl

HOW-TO STEPS 
-
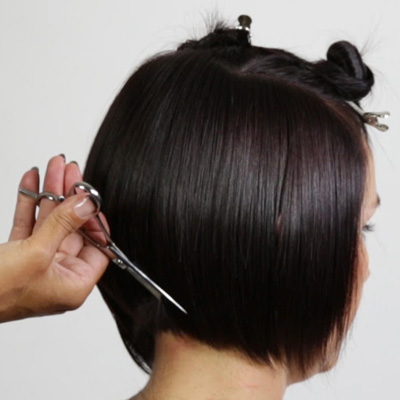
 1
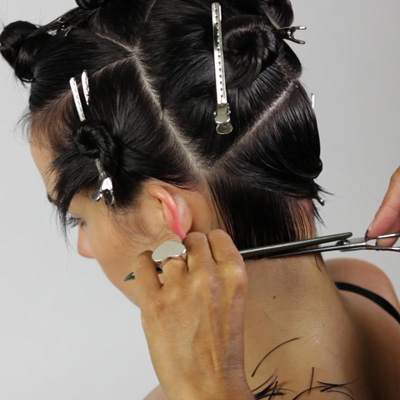
1In the nape area, create a diagonal section that angles slightly from the ear to the center back. Cut a one-length line that rounds upwards from the nape to just below the ear. Approach subsequent sections in the same way, utilizing diagonal sections, and continuing the same one-length line technique on both sides until the occipital bone is reached.
-
 2
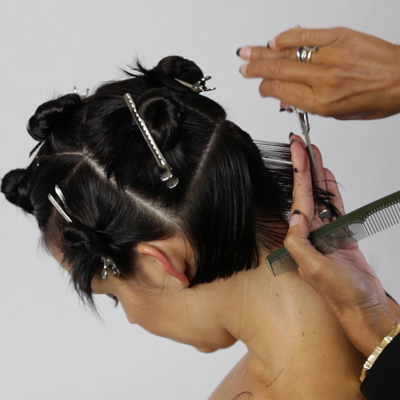
2Create a vertical section through the center back, elevating slightly. Cut a guideline inside the fingers. Take subsequent diagonal sections, overdirected slightly back, and cut using the initial guideline until the lengths behind the ear have been fully incorporated. Repeat on the opposite side. Blow-dry the hair below the occipital bone to natural fall.
-
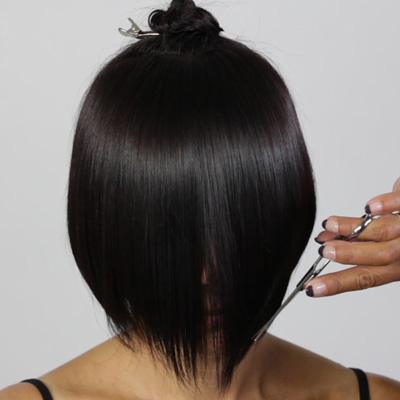
 3
3Refine the graduation by utilizing the same diagonal sections as before, elevating slightly, and point cutting into the hair using the tips of the scissors. Then refine the outlines through this area by using a combination of both point-cutting and slicing.
-
 4
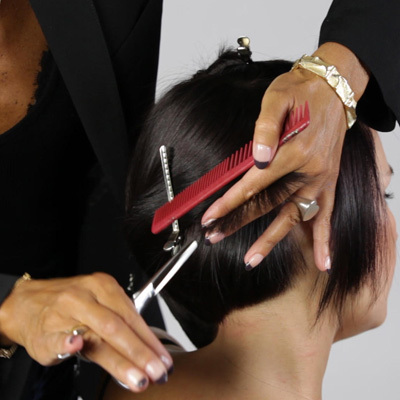
4Create a diagonal section through the center back between occipital and crown, and introduce a new guideline that is disconnected from the graduation below. Take subsequent diagonal sections, overdirecting slightly backwards, and cut following the guideline until the lengths behind the ear are reached. Repeat on the opposite side. Blow-dry the hair below the parietal ridge with consistent tension.
-
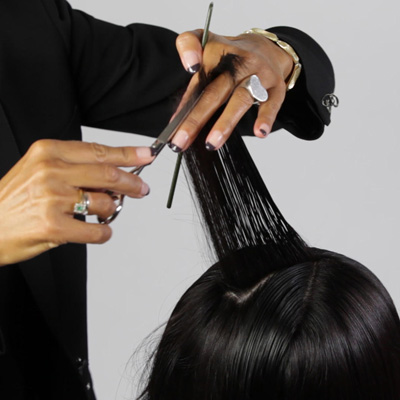
 5
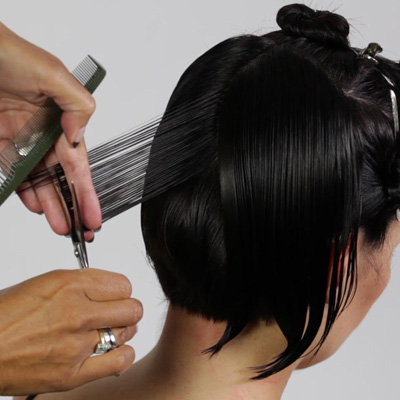
5Create a diagonal section from the front hairline that angles towards the nape. Elevate above 90 degrees, and point cut the ends aggressively, removing weight and creating a soft, broken outline. Continue in this manner until reaching the parietal ridge, then fluidly blend the disconnected lengths.
-
 6
6Gently slice through at the natural fall on both sides to create texture and movement. Work until the entire panel is technically and visually consistent.
-
 7
7Slice into the fringe at the natural fall in order to connect the previous lengths while creating the desired outline and weight removal. During this process, constantly assess the hair.
-
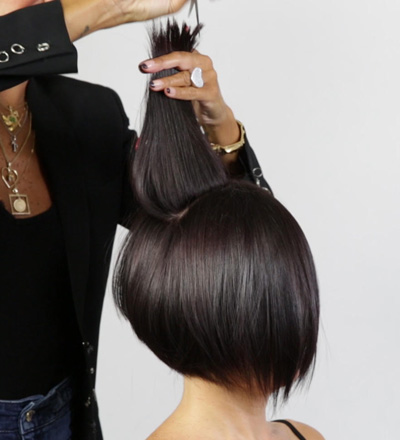
 8
8Create a vertical crown section through the center of the previously sectioned triangle area. Lift to 90 degrees and cut from shorter in the back to longer in the front, creating a concave layer that helps remove weight while maintaining length. Continue working in verticalsections, following the guide, until hair no longer reaches. Blow-dry this final panel.
-
 9
9Create horizontal sections above the parietal ridge, overdirect backwards, lift to 90 degrees from the head shape and point cut. This results will tie the disconnected areas together and ensure the haircut appears fully cohesive.
-
 10
10Plum Bob Haircut – Finished look
Perfect your bob & lob techniques! Check out these recommended articles:
YOU MIGHT LIKE THIS
-
Hair Color
Shades of Plum Brunette Ombré
-
Bobs
Full-Looking Bob On Fine, Thin Hair
-
Hair Color
Scarlet Merlot Waves from Wella Professionals
-
Blonde

Caramel Contour
-
Hair Color
Red, Red Wine Color Formula from TONIandGUY
TRENDING NOW!
-
Hair Color
WWYD: How To Stop Your 6N From Turning Orange
-
Glossing/ Toning
How To Achieve "Glass Hair": Smart Hacks From Hairdressers
-
BTC Hair Trend Report
The Biggest Haircut Trends of 2024
-
Bobs
How to Avoid a Bulky Bob: 4 Techniques To Try
-
BTC Hair Trend Report
WWYD: How Hairstylists Are Navigating Inflation
-
Curly
Long Layers: 10 Pro Tips + Common Cutting Mistakes
-
Copper
What Is The "Cowboy Copper" Hair Trend? Here's What It Really Means...
-
Blonde
Conditioner Before Toner: Common Hair Myth Debunked

