
Fuller-Looking Bob
Fuller-Looking Bob
Products Used
HOW-TO STEPS 
-

 1
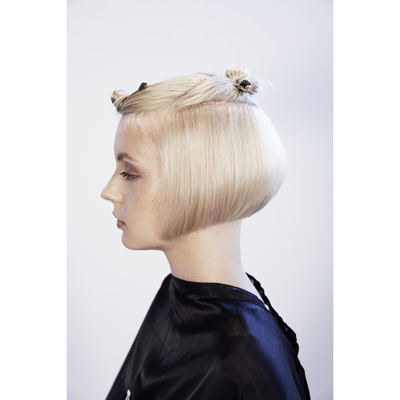
1The model has a grown-out, A-line bob. Prep the hair with ReGenesis by RevitaLash Cosmetics Thickening Shampoo and Thickening Conditioner.
-
 2
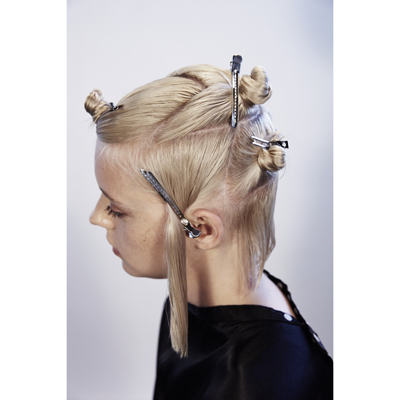
2Section a triangle at the front top section of the head from the temples to separate the fringe area. Section from the sides of the triangle into a horseshoe shape below the crown area.
-
 3
3Section vertically down to the top of the ear using a diagonal forward section, then section through the center back vertically and split this area horizontally at the top of the occipital bone.
-
 4
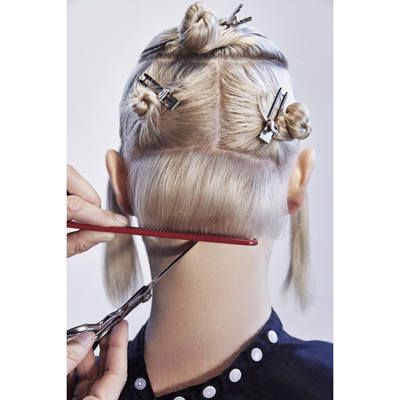
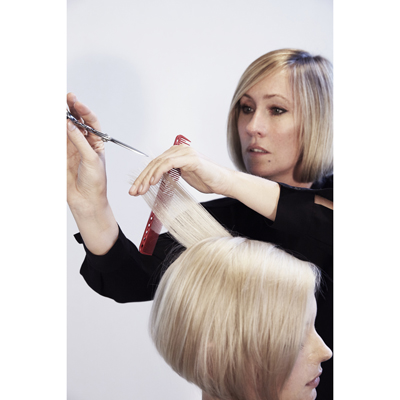
4Starting at the center back, take small, 1-centimeter, clean diagonal partings. Elevate each section to 45 degrees with your finger position parallel to your parting. This will begin to create your graduation.
-
 5
5Once the graduation is complete, blow-dry the hair into its natural fall. Then, using the points of your scissors, cut in a solid perimeter line.
-
 6
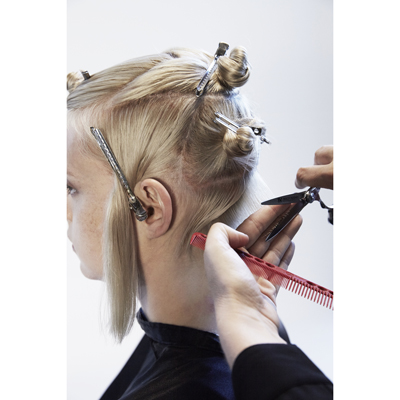
6Start the next section in the center back and use a square layering technique. Take 1-centimeter vertical partings and project the hair to 90 degrees from the horizontal line with your finger angled at 90 degrees. Continue to the back of the ears.
-
 7
7Release the side section and progress with 1-centimeter diagonal forward partings. Overdirect every consecutive section to the first one to a stationary guide at the point of reference at the top of the ear. Repeat on the opposite side.
-
 8
8Blow-dry the hair into its natural fall using a flat, Denman-style brush. Using the back perimeter line as your guide, continue cutting this solid line through the sides. Release the tension and cut the line, resting your blades against your comb to allow for ear protrusion.
-
 9
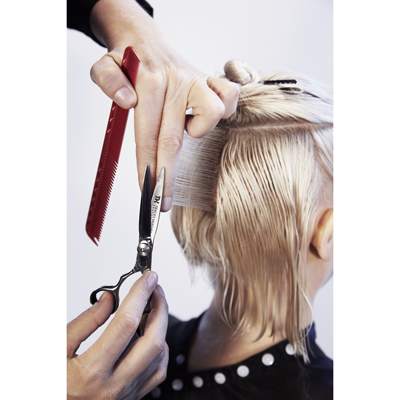
9Release the top sections and blow-dry. Take vertical partings and elevate 45 degrees above the horizontal line, with a finger angle of 90 degrees. Point-cut to soften the haircut and create movement.
-
 10
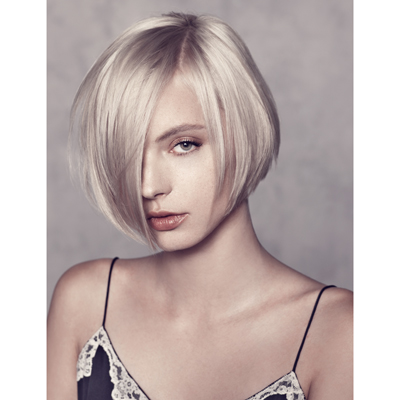
10Finished look
More from
Tracey Hughes
-
Best of 2017
2017 Is The Year Of The Bob—Here Are 5 How-Tos!
-
Best of 2017
2017 Blessed Us With These 10 Cutting How-Tos
-
Balayage
4 Color Formulas, 1 Celebrity Braid and Loads of Inspiration From Joico
-
Business
Communicate Like a Pro in These 4 Common Salon Situations
-
New Appointments
ReGenesis® by RevitaLash® Cosmetics Appoints New Global Creative Director
-
Haircuts
How-To: Masculine Cut For Fine and Thinning Men
-
News
BREAKING NEWS: 16th Annual Stylist Choice Award WINNERS ANNOUNCED
YOU MIGHT LIKE THIS
-
Barbering
How To Make His Fine Hair Look Fuller
-
Bobs
Stacked, Full Bob With Fringe
-
Blowouts
The Humidity-Defying Blowout
-
Hair
How-To: Cut Thinning Hair
-
Hair
Styling Tips for Fine, Thinning Hair
TRENDING NOW!
-
BTC Hair Trend Report
The Biggest Haircut Trends of 2024
-
Blonde
Conditioner Before Toner: Common Hair Myth Debunked
-
Monthly Product Launch List
11 New Game-Changing Hair Launches To Add To Your Arsenal
-
Copper
What Is The "Cowboy Copper" Hair Trend? Here's What It Really Means...
-
Frizz
Straighten & Smooth 2A, Fine-Medium Density Hair
-
Copper
Muted Bronze
-
Haircuts
SHAG 101: The Dos And Don'ts
-
BTC Hair Trend Report
WWYD: How Hairstylists Are Navigating Inflation

