e Salon “Extension” Step-by-Step


Step 1: Starting at the sides take a diagonal forward section, bring back to a vertical at the centre of the ear, and cut your guide in at 90 degrees, to your desired length. Follow this pattern all the way to the front over-directing back to a stationary guide at the centre of the ear.


Step 2: Continue working through Step 1.
Step 1 Repeat - Starting at the sides take a diagonal forward section, bring back to a vertical at the centre of the ear, and cut your guide in at 90 degrees, to your desired length. Follow this pattern all the way to the front over-directing back to a stationary guide at the centre of the ear.


Advertisement


Repeat Step 4 - Take a slight diagonal section from the parting to the right eye. Over-direct this section slightly toward the opposite eye and cut an asymmetric design line as the fringe. Continue back toward the crown area.


Advertisement


Follow the above steps on the opposite sides before starting Step 8 -
Step 8: Take vertical sections down the centre back, cutting the guide at 90-degrees from the head. Follow the head shape at 90 degrees cutting to desired length. Continue on both sides bringing everything back to the stationary 90-degree guide.


Continue Step 9


Continue Step 9

Advertisement


e Salon “Extension” Step-by-Step
The Extension step-by-step incorporates diagonal and 90-degree cutting techniques to produce this asymmetrical look with a strong fringe. This popular Australian team offers up the how-tos for an edgy, geometric style designed to please the adventurous client.
Check out é Salon’s latest “Vacuous” Collection
For more information about é Salon please visit www.esalon.com.au
Subscribe to behindthechair.com “On Paper” Magazine–4 Issues Only $29.95!
Next Issue: COLOR with Beth Minardi!
HOW-TO STEPS 
-

 1
1 -

 2
2Step 1: Starting at the sides take a diagonal forward section, bring back to a vertical at the centre of the ear, and cut your guide in at 90 degrees, to your desired length. Follow this pattern all the way to the front over-directing back to a stationary guide at the centre of the ear.
-

 3
3Step 2: Continue working through Step 1.
Step 1 Repeat – Starting at the sides take a diagonal forward section, bring back to a vertical at the centre of the ear, and cut your guide in at 90 degrees, to your desired length. Follow this pattern all the way to the front over-directing back to a stationary guide at the centre of the ear.
-

 4
4Having completed the side, now take a slight diagonal back section, and cut a solid perimeter to the skin, with no elevation or tension. The design line should be on a slight upward slope. Continue all the way to top of this section
-

 5
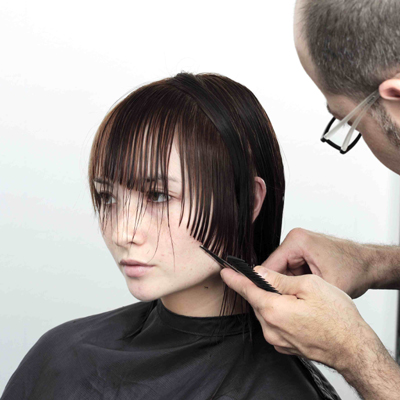
5Take a slight diagonal section from the parting to the right eye. Over-direct this section slightly toward the opposite eye and cut an asymmetric design line as the fringe. Continue back toward the crown area.
-

 6
6Repeat Step 4 – Take a slight diagonal section from the parting to the right eye. Over-direct this section slightly toward the opposite eye and cut an asymmetric design line as the fringe. Continue back toward the crown area.
-
 7
7Next, take diagonal back section on the left side and connect this area into the fringe. Continue up the side until you reach the top. You will have left a slight section between the side and the fringe to leave as an accent piece.
-

 8
8Example of fringe connection
-

 9
9Follow the above steps on the opposite sides before starting Step 8 –
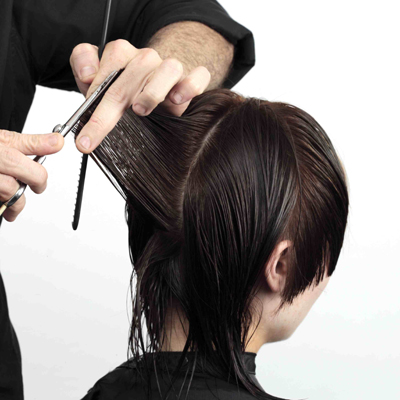
Step 8: Take vertical sections down the centre back, cutting the guide at 90-degrees from the head. Follow the head shape at 90 degrees cutting to desired length. Continue on both sides bringing everything back to the stationary 90-degree guide.
-
 10
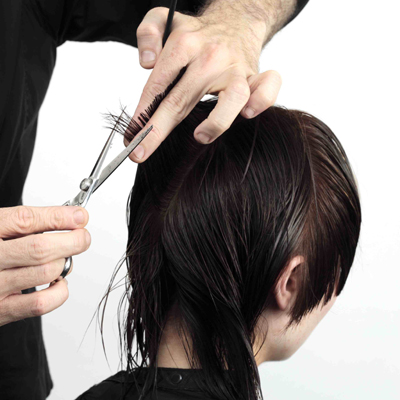
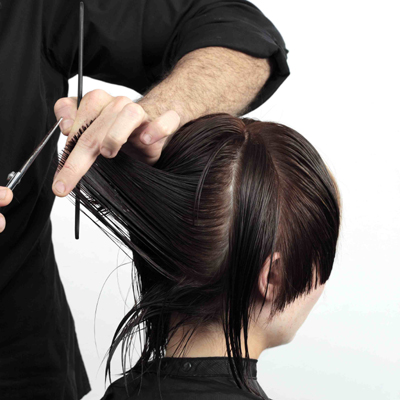
10Continue taking vertical sections down the centre back, cutting at 90-degrees from the head. Follow the head shape at 90 degrees cutting to the desired length. Continue on both sides bringing everything back to the stationary 90-degree guide.
-
 11
11Continue Step 9
-
 12
12Continue Step 9
-
 13
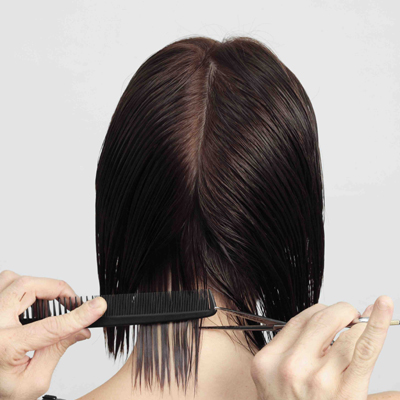
13Take the base line, cutting directly on the skin allowing for natural head curve. Follow this until you have no more hair in our sections.
-
 14
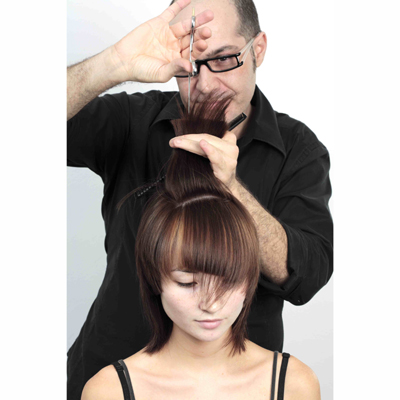
14Rework sections initially took and deep point and texturise in order to personalise the haircut and eliminate any excess weight.
-
 15
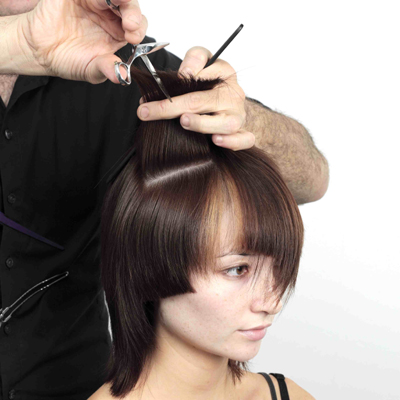
15Rework sections initially took and deep point and texturise in order to personalise the haircut and eliminate any excess weight.
-

 16
16We finish applying TIGI S-Factor Dream Drops and L’Oreal Professionnel Serie Expert Liss Control before blow drying.
YOU MIGHT LIKE THIS
-
Hair
diPietro Todd Academy Extension Technical
-
Hair
GL Apps Extensions from Great Lengths
-
Hair Extensions
Tape-In Extensions: How-To
-
Hair Extensions
How-To: U-Tip Extensions
-
Hair Color
Transformation: Metallic Rose Ombré


TRENDING NOW!
-
BTC Hair Trend Report
The Biggest Haircut Trends of 2024
-
Blonde
Conditioner Before Toner: Common Hair Myth Debunked
-
Monthly Product Launch List
11 New Game-Changing Hair Launches To Add To Your Arsenal
-
Copper
What Is The "Cowboy Copper" Hair Trend? Here's What It Really Means...
-
Frizz
Straighten & Smooth 2A, Fine-Medium Density Hair
-
Copper
Muted Bronze
-
Haircuts
SHAG 101: The Dos And Don'ts
-
BTC Hair Trend Report
WWYD: How Hairstylists Are Navigating Inflation


