
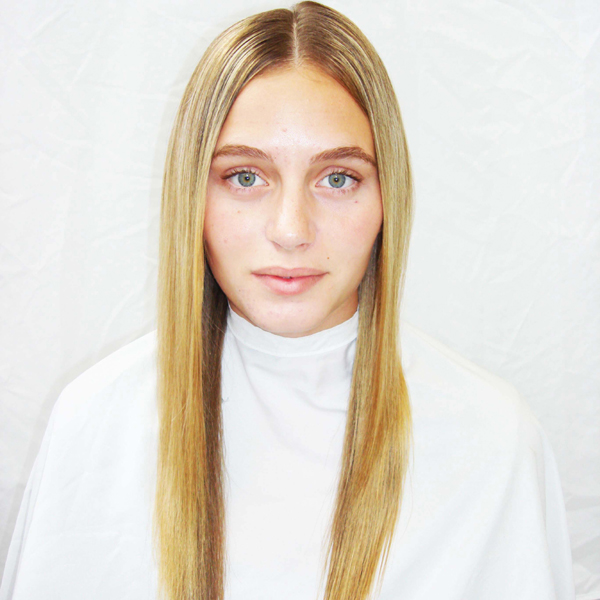
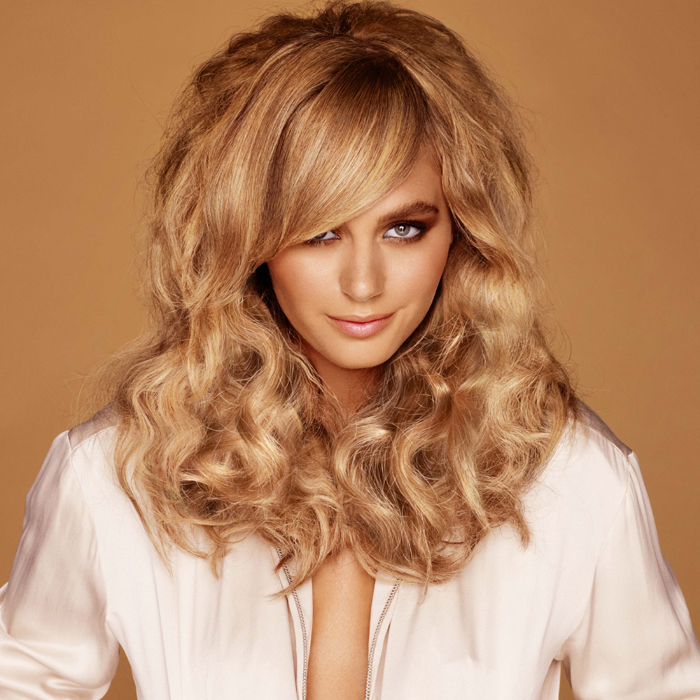
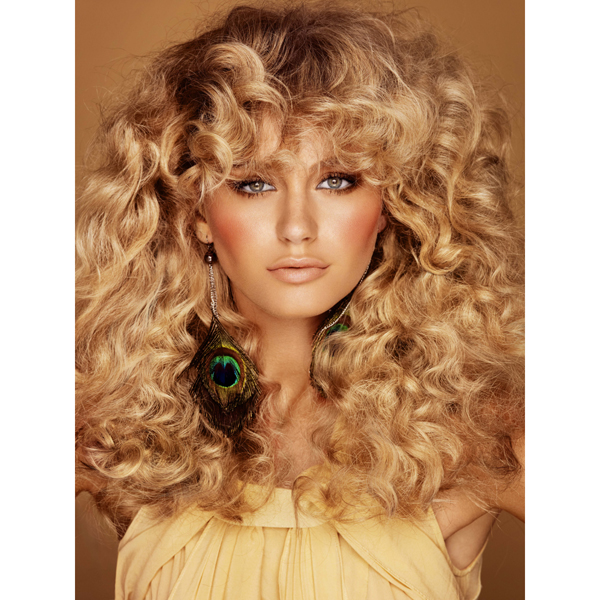
Cool and Caramel Blended Blonde Color How-To

Advertisement
Advertisement
Advertisement
Cool and Caramel Blended Blonde Color How-To
HOW-TO STEPS 
-
 1
1Wella Colour Formula Suggestions:
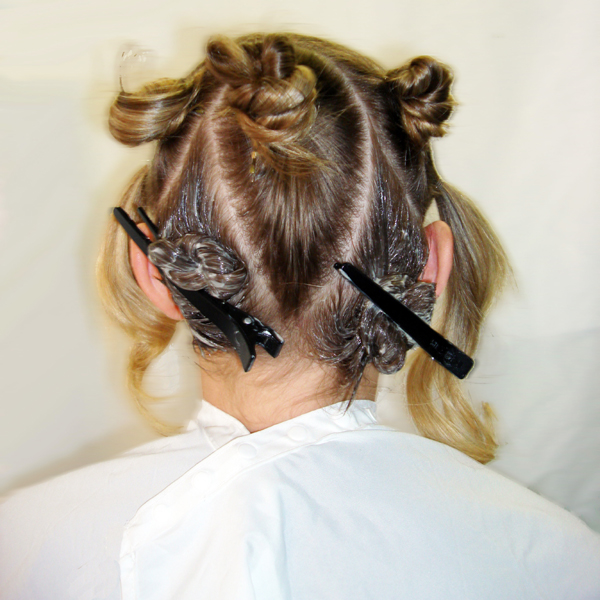
A. Koleston Perfect Special Blonde12/22 + 9% Welloxon Perfect
B. Blondor Soft Cream + 9% Welloxon Perfect
C. Blondor Multi Powder + 6% Welloxon Perfect
D. Koleston Perfect Special Blonde12/61 + 12% Welloxon Perfect -
 2
2Use Formula A on left and right back areas.
-
 3
3Protect these areas with meche or foil to prepare for next section.
-
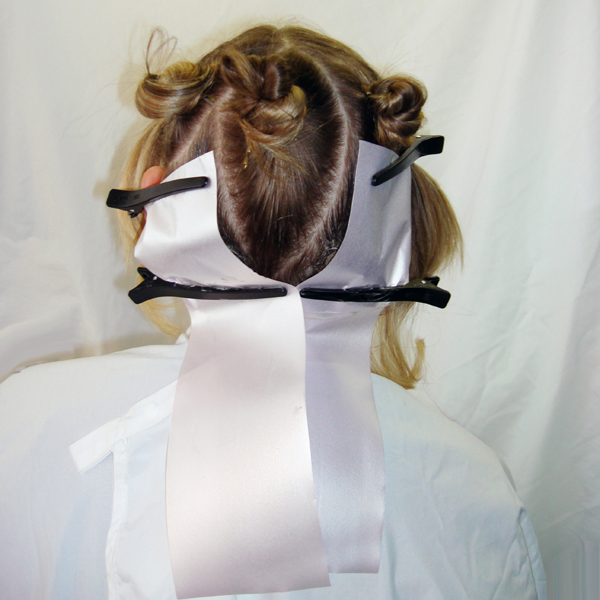
 4
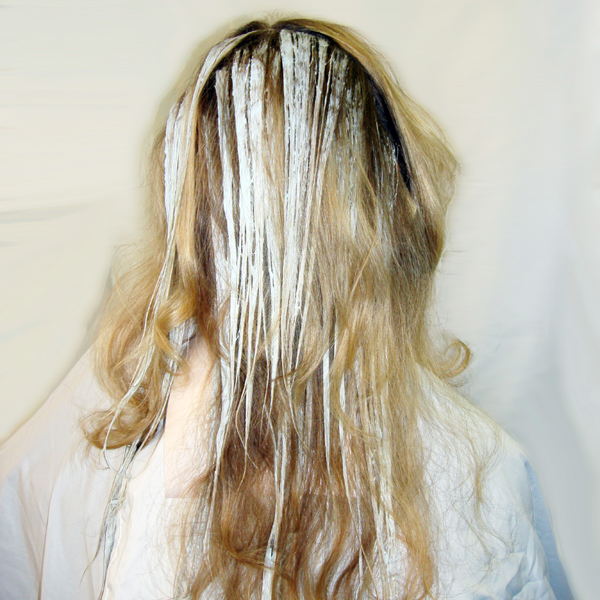
4Starting at the bottom of the middle back area section use Formula B with a balayage technique. Take large weaves on a color board as if you were foiling. Use color brush vertically near regrowth area for a soft blend with no line created.
-
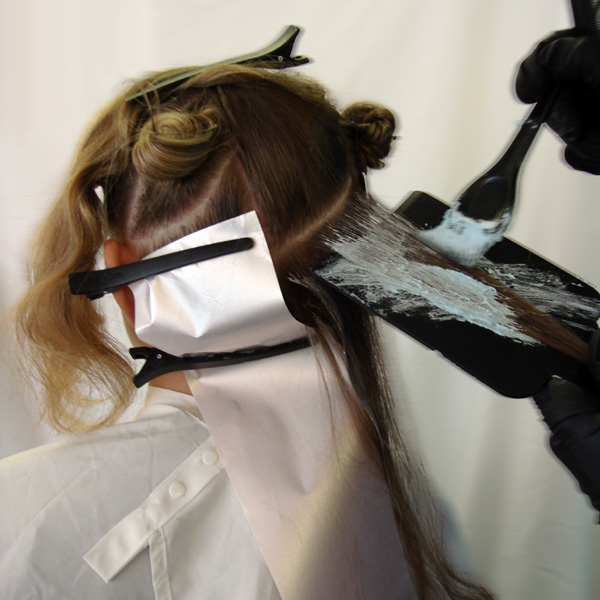
 5
5Gently pull board up and out to let section fall naturally so as not to disturb the hair underneath. Continue working up leaving a section out between each balayage section.
-
 6
6Once the middle area is complete then use the same technique on the areas above the above ear areas on each side.
-
 7
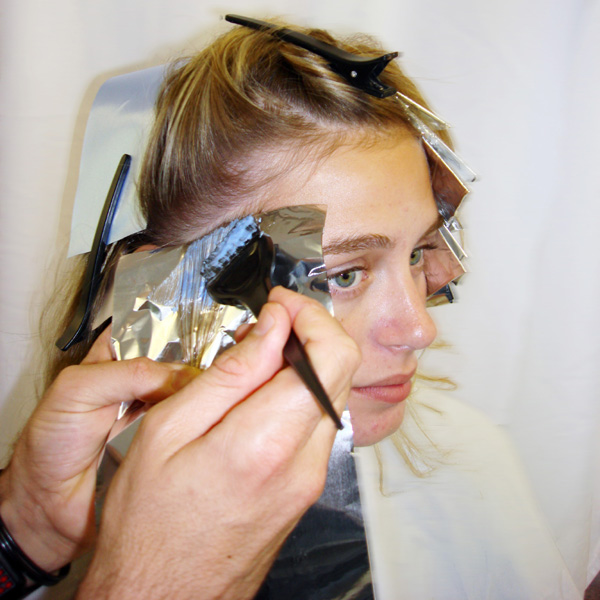
7On two remaining front areas use a traditional foil weave technique working up on diagonal until reaching crown alternating between Formulas C and D.
-
 8
8TIP: To bring more blonde into the top section, balayage Formula B in between every 2nd foil.
-
 9
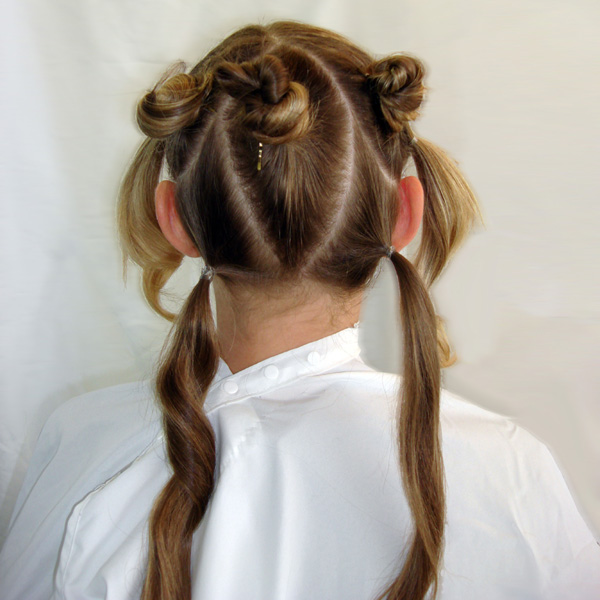
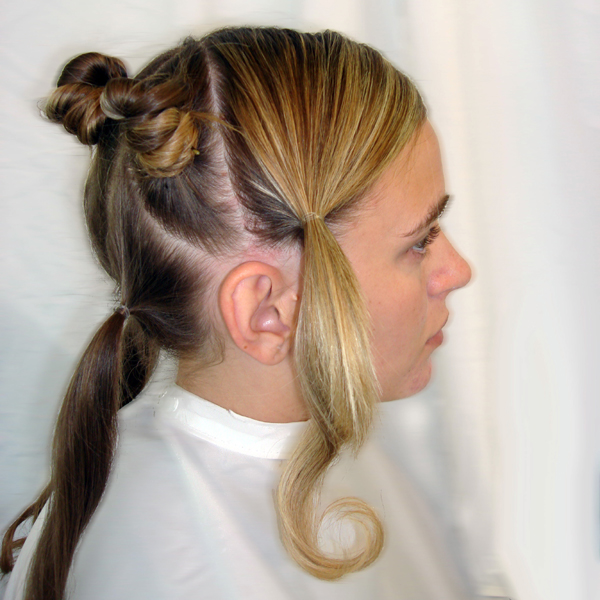
93 x Back Areas
Left, Middle, Right -
 10
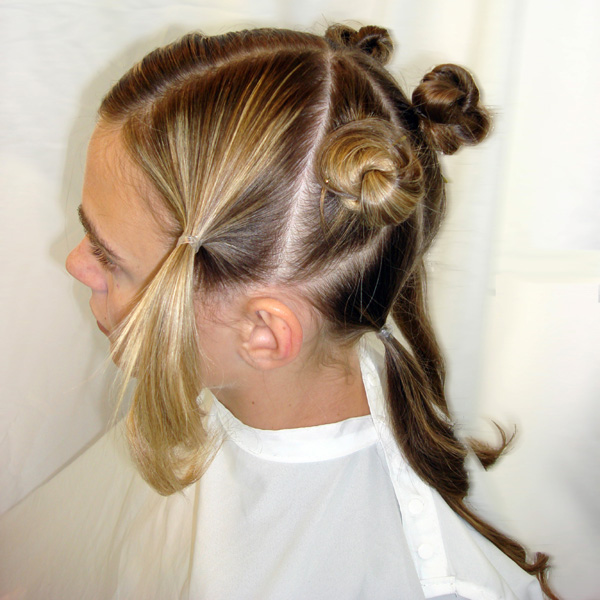
101 x Above Ear Area
1x Front Right Area -
 11
111 x Above Ear Area
1x Front Left Area -
 12
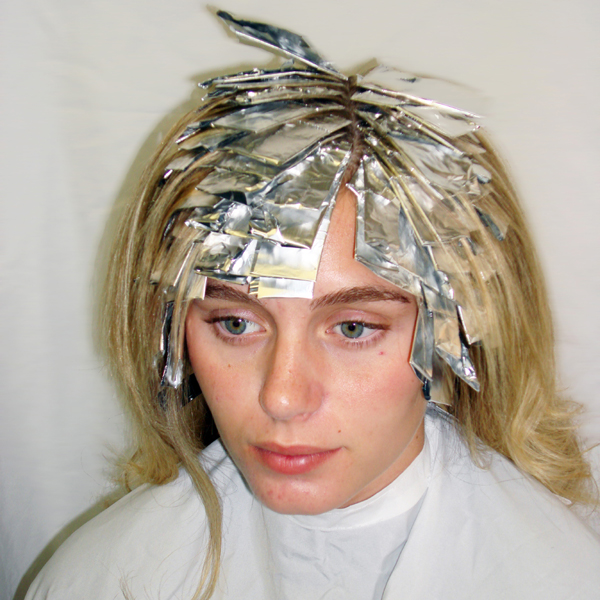
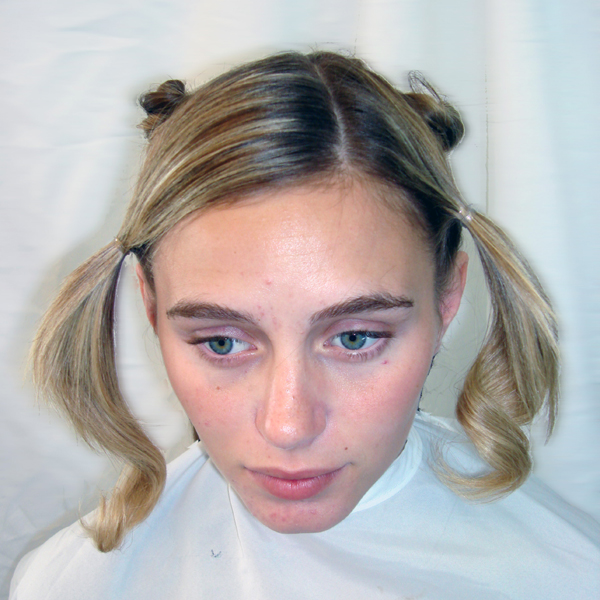
12Front view of Partline
Note: Change heavier and lighter side depending on style parting desired -
 13
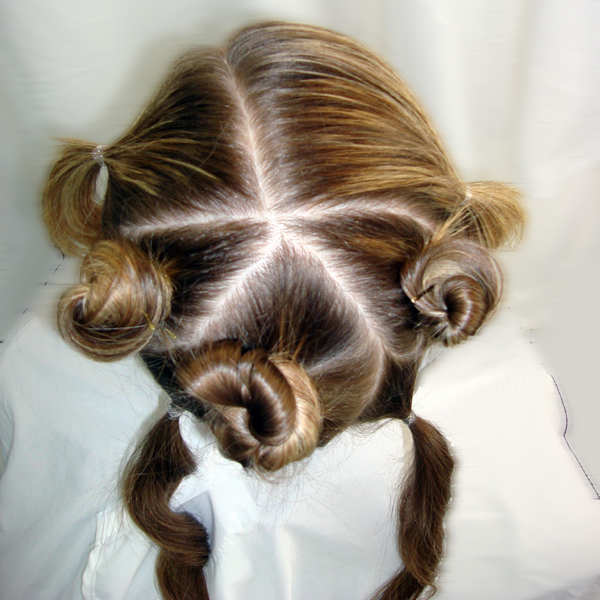
13Top view showing all areas meeting at crown
-
 14
14 -
 15
15
YOU MIGHT LIKE THIS
-
Balayage

How-To: Dimensional Caramel-ayage
-
Blonde
Caramel Contour
-
Balayage
Guy Tang’s Caramel Babylights
-
Balayage
Beige Balayage
-
Balayage
Flawless Blonde Balayage Blend
TRENDING NOW!
-
Hair Color
WWYD: How To Stop Your 6N From Turning Orange
-
Glossing/ Toning
How To Achieve "Glass Hair": Smart Hacks From Hairdressers
-
BTC Hair Trend Report
The Biggest Haircut Trends of 2024
-
Bobs
How to Avoid a Bulky Bob: 4 Techniques To Try
-
BTC Hair Trend Report
WWYD: How Hairstylists Are Navigating Inflation
-
Curly
Long Layers: 10 Pro Tips + Common Cutting Mistakes
-
Copper
What Is The "Cowboy Copper" Hair Trend? Here's What It Really Means...
-
Blonde
Conditioner Before Toner: Common Hair Myth Debunked

