
This content is sponsored.
Last updated: May 13, 2022
Chemical-Free Money Piece? Here’s How!
GET THE HOW-TO


Advertisement
Advertisement
Chemical-Free Money Piece? Here’s How!
Products Used
HOW-TO STEPS 
-
 1
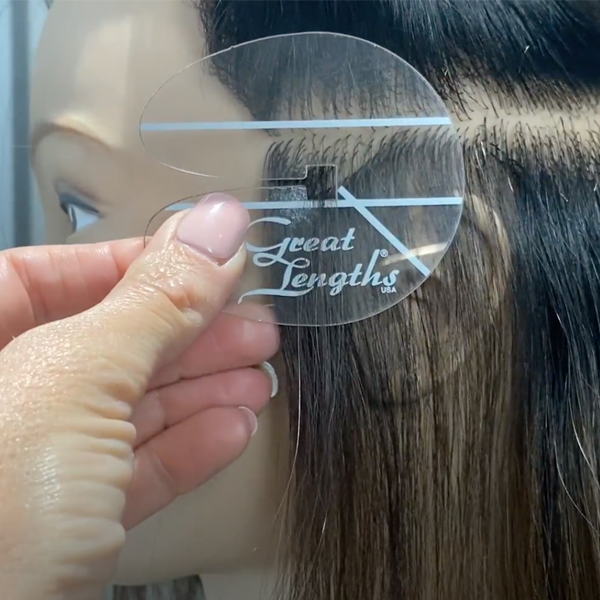
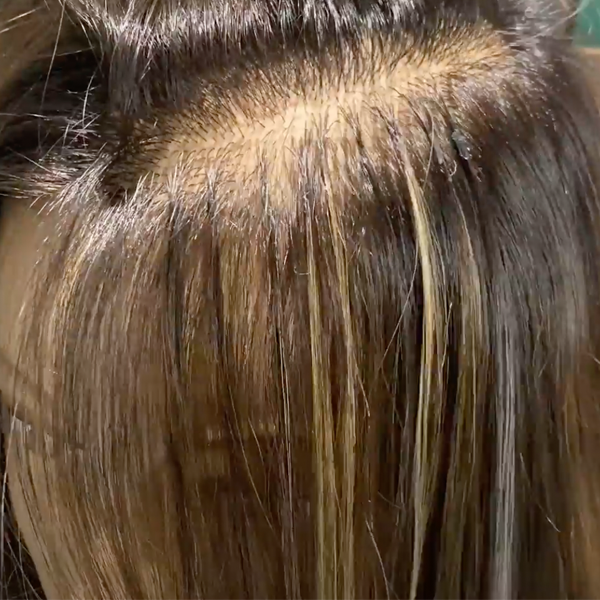
1Section off hair above the ear. Get as close to the hairline as possible, while still leaving coverage in case the client wears their hair up. Pull the selected hair through the applicator and clip it to the hair to hold.
-
 2
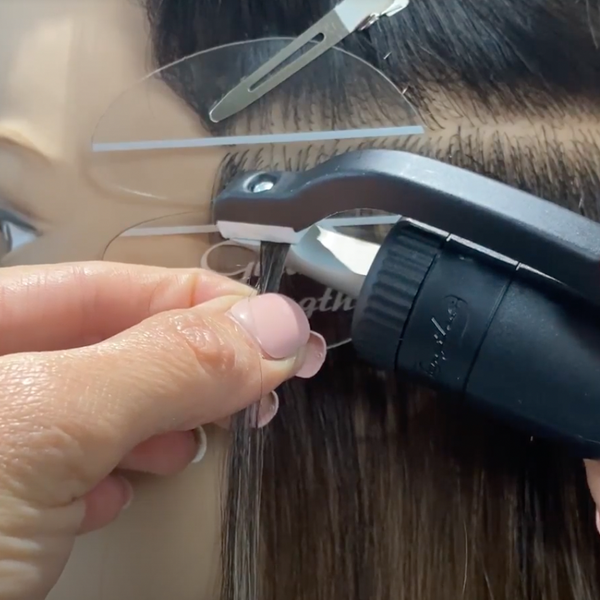
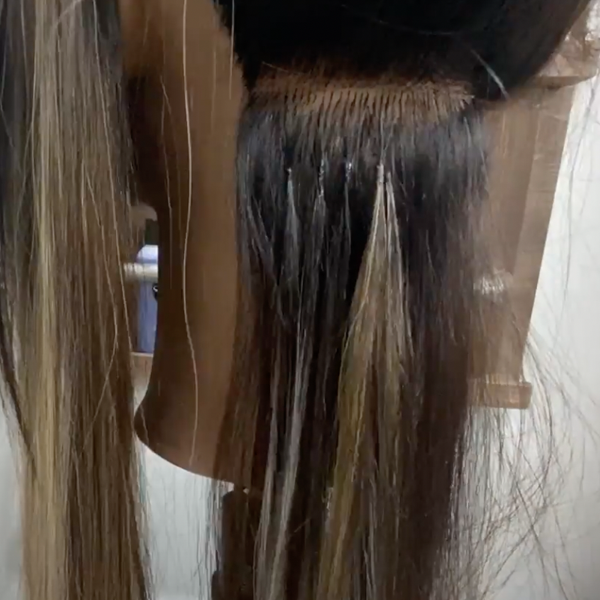
2Place the Great Lengths GL Pre-Bonded extension on the hair and bond together using the Great Lengths GL Ultrasonic Touch or GL 3200 Thermal.
-
 3
3After applying two bonds, pull the hair up to make sure there’s enough hair left out at the perimeter to blend the extensions into the hair. Continue moving up the head.
Pro Tip: Apply the extensions exactly where you’d place color during a balayage service for the same result, minus the lightener.
-
 4
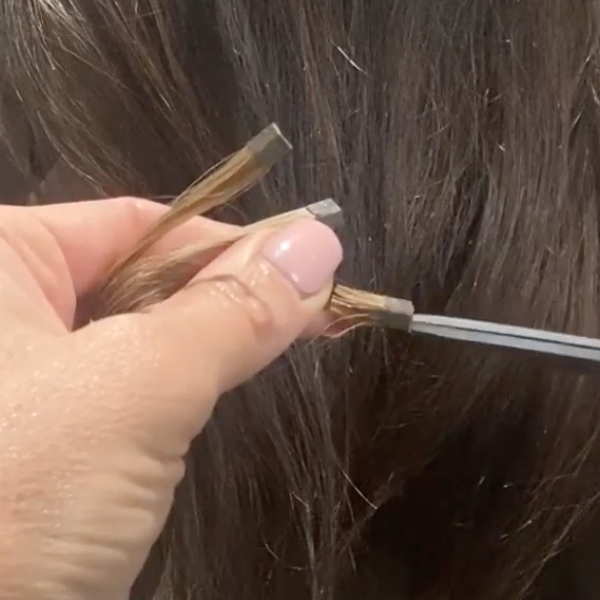
4Once the part line is reached, start using “micro bonds,” GL Pre-Bonded extensions cut into a tiny pieces, to match the extensions to the density of the client’s hairline. When placing the extension, make sure to take into account the hair’s natural fall to avoid added stress on the hair. GL Pre-Bonded extensions can be cut into mini, micro and custom bonds to fit the client’s hair density.
-
 5
5Choose a root color that matches the client’s base when applying extensions by the part or hairline to blend. If you don’t have a two-toned extension in stock, pre-blend to create your own by fusing two separate extension shades together before applying to the hair. Pre-blending gives the client a more dimensional look while matching the base for a seamless blend.
-
 6
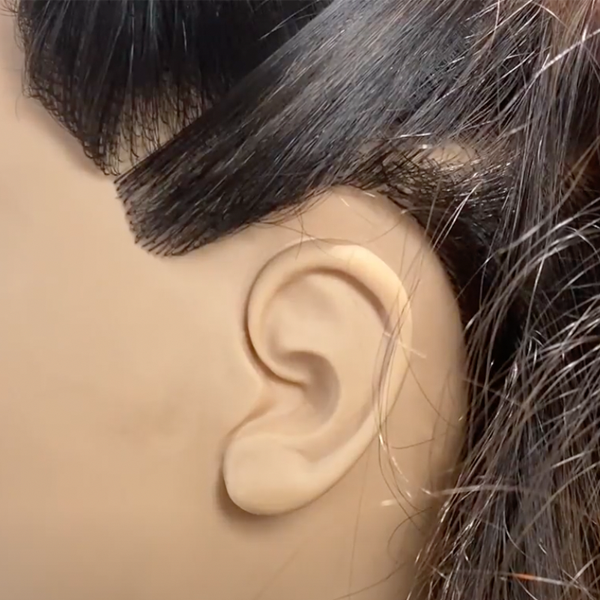
6Once you finish applying extensions at the face frame and on the sides, move to the nape. Start placing extensions about three rows up in the back.
-
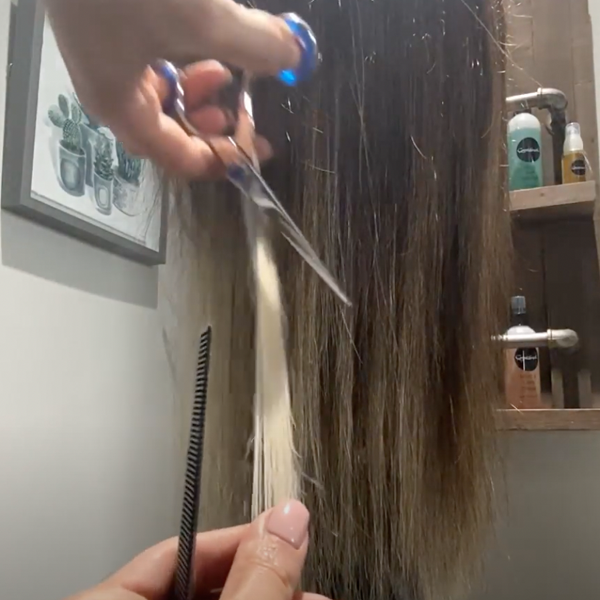
 7
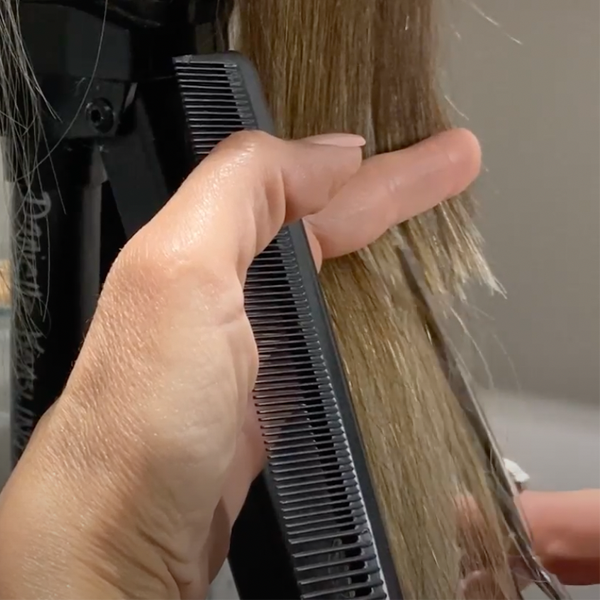
7After the nape is finished, point cut the extensions to blend in with the hair. Point cutting helps maintain fullness and softens the ends, while creating a strong perimeter.
Pro Tip: The deeper the point cut, the softer and more texturized the hair will be. The softer the point cut, the stronger the line.
-
 8
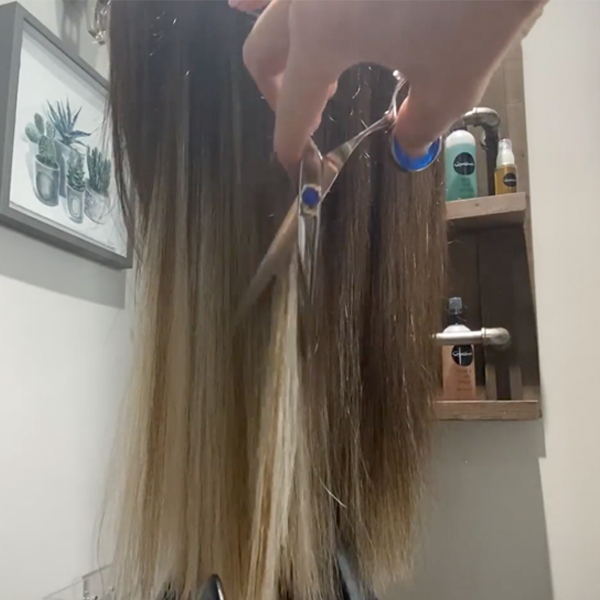
8To blend the top layer to the perimeter, switch to a slide cutting technique. Look at the hair and see where it needs to be blended for a seamless transition. Continue slide cutting until all the layers are blended.
-
 9
9Finish the face frame by over directing back towards the nape and slide cutting to take out any excess length.
-
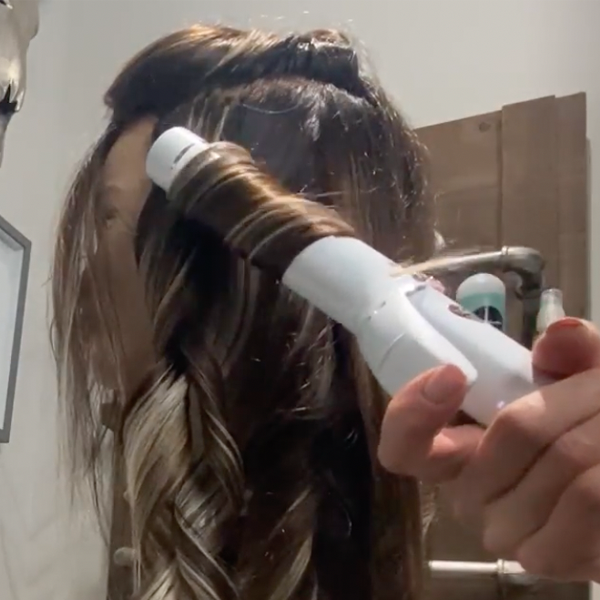 10
10Apply Great Lengths Heat Protecting Spray and comb through for even distribution. Use a 1 ¼-inch curling iron to curl the hair in alternating directions for a natural beach waved look.
Pro Tip: When sectioning, use triangle parts so the hair overlaps as it falls to create a less blocky curl pattern.
-
 11
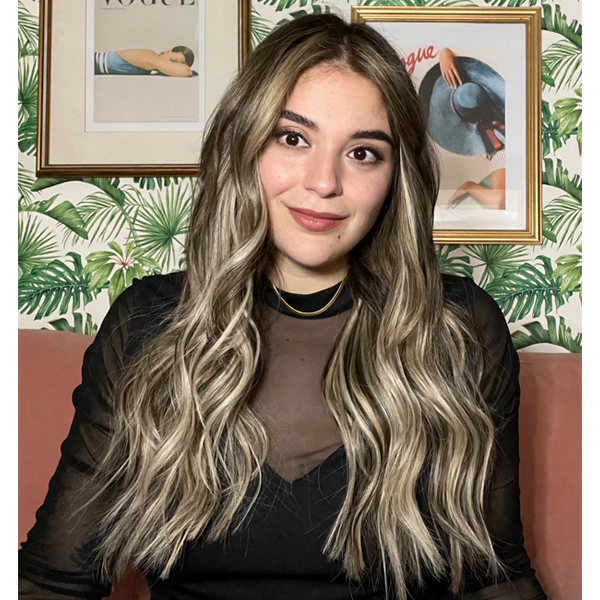
11Finished Look
Check Out The Before & After!

This content is sponsored.
More from
Great Lengths
-
Hair Extensions
6 Tips For The Flat Iron Waves Clients Want
-
BTC Hair Trend Report
VANESSA HUDGENS’ BRAIDED SPIKY BUN AT THE 2023 MET GALA
-
BTC Hair Trend Report
ASHLEY GRAHAM’S FLIPPED-OUT BOB AT THE 2023 MET GALA
-
BTC Hair Trend Report
Lily James’ Met Gala Twisted Bun + Piecey Fringe
-
Extension Application
3 Secrets For Invisible Extensions (Even On Ponytails!)
-
New Appointments
Great Lengths USA Appoints Justine Marjan As Brand Ambassador
-
Celebrity
Met Gala 2021: See The Best Celebrity Hair & Beauty Looks!
-
Celebrity
Jennifer Lopez’s Western-Inspired Ponytail
-
Blonde
Hilary Duff’s Creamy Blonde
-
Facebook Lives
Make More Money With This Extension Tip!
-
Hair Extensions
GL Pre-Bonded
-
Hair Extensions
GL TAPES+
-
News
Nine Zero One Salon Celebrates 10-Year Anniversary
-
Hair Extensions
4 Tape-In Extension Styling Must-Dos
-
Hair Extensions
6 Tape-In Extension Mistakes And How To Fix Them
-
Hair Color
Watch: Tape-In Extension Application For Chemical-Free Color
-
Best of 2018
The Extension Education You Need Before 2018 Ends
-
Hair Extensions
Asymmetrical-Twisted Updo
-
Braids
Video How-To: Tape-In Extension Application, Blending & Romantic Braid Styling
-
Hair Color
Coloring Tape-In Extensions: 3 Questions And Answers
-
Hair Extensions
5 Before-And-After Extensions Transformations You Have To See
-
Hair Extensions
Tape-In Extensions: 5 Things You Can’t Forget
-
#THEBTCSHOW 2018
Co-Lab Styling at #thebtcshow 2018
-
Hair Extensions
Tape-In Extensions: 4 Tips For The Most Undetectable Finish
YOU MIGHT LIKE THIS
-
Hair Extensions
Blonde Dimension Extension Application
-
Hair
GL Apps Extensions from Great Lengths
-
Hair Extensions
Vintage Waves With Extensions
-
Hair Extensions
Asymmetrical-Twisted Updo
-
Hair
Dreamy, Red Carpet Locks from Hairdreams
TRENDING NOW!
-
BTC Hair Trend Report
The Biggest Haircut Trends of 2024
-
Blonde
Conditioner Before Toner: Common Hair Myth Debunked
-
Monthly Product Launch List
11 New Game-Changing Hair Launches To Add To Your Arsenal
-
Copper
What Is The "Cowboy Copper" Hair Trend? Here's What It Really Means...
-
Frizz
Straighten & Smooth 2A, Fine-Medium Density Hair
-
Copper
Muted Bronze
-
Haircuts
SHAG 101: The Dos And Don'ts
-
BTC Hair Trend Report
WWYD: How Hairstylists Are Navigating Inflation

