
Braided Chignon by Stephanie Brinkerhoff
Braided Chignon by Stephanie Brinkerhoff
Products Used
HOW-TO STEPS 
-

 1
1 -
 2
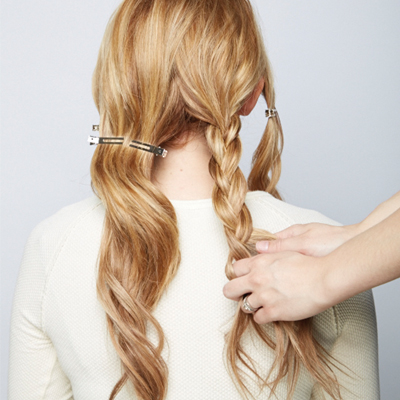
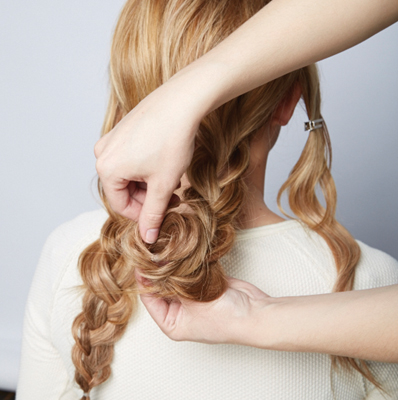
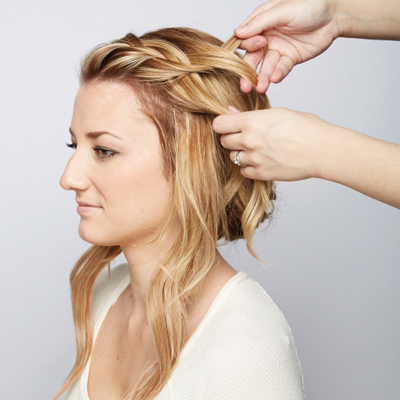
2Divide the hair into four sections—one on each side and two in back.
-
 3
3 -
 4
4 -
 5
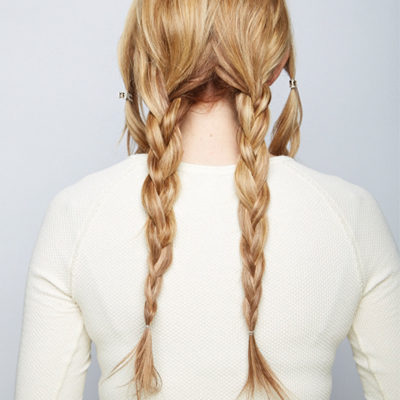
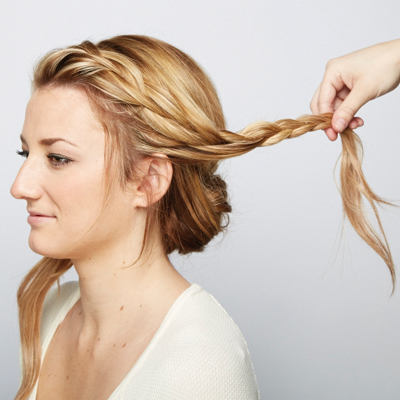
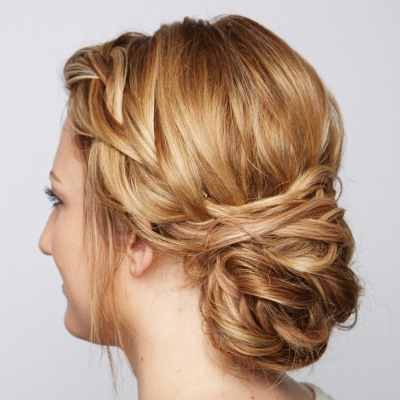
5Braid both of the back sections and secure each braid with an elastic.
-
 6
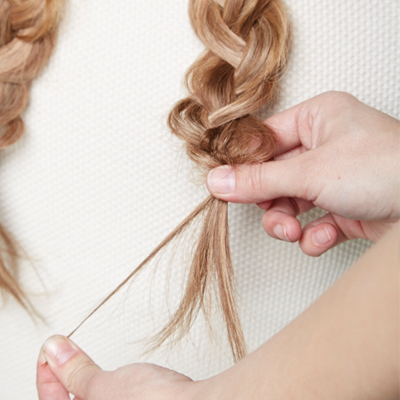
6Loosen the braid by pulling a small piece on the bottom as you push the rest of the braid upward with your fingers.
-
6
-
 7
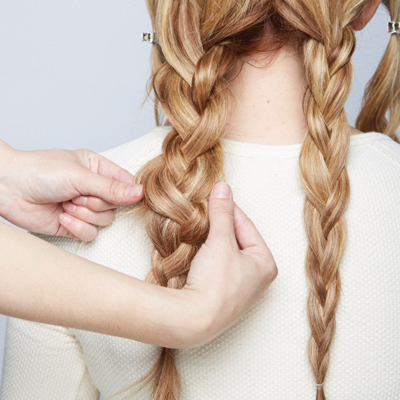
7You can also pull gently at the sides of the braid to further loosen the shape.
-
 8
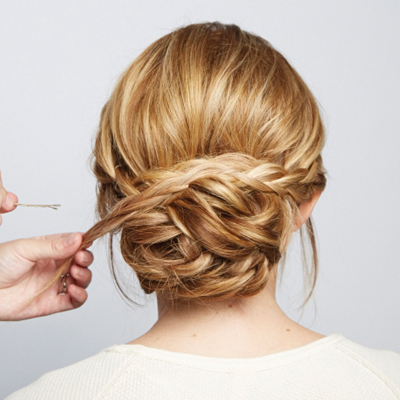
8Tuck the end of one of the braids and roll it up until it reaches the nape.
-
 9
9 -
 10
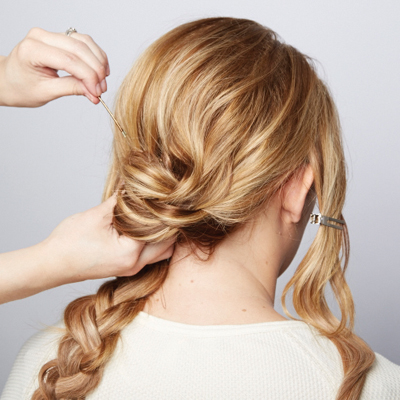
10Secure the rolled braid with bobby pins.
-
 11
11Repeat on the other side, rolling and pinning the second braid.
-
 12
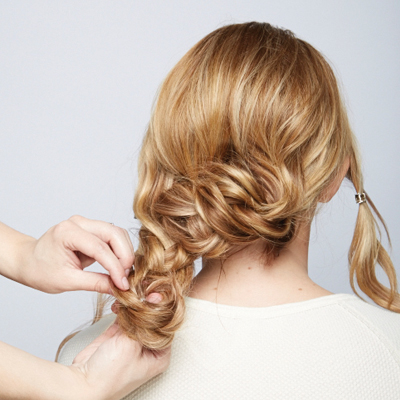
12Release one of the side secctions. Create a loose French braid that incorporates the fringe.
-
 13
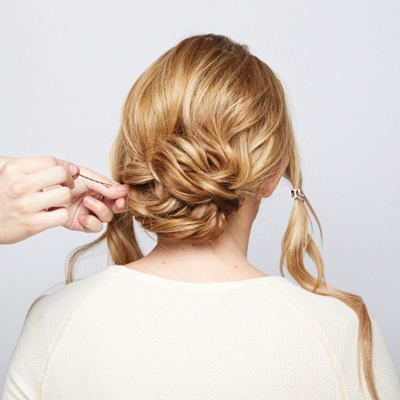
13Direct this braid across the top of the previously secured braids. Tuck in the ends and seccure with bobby pins.
-
 14
14 -
 15
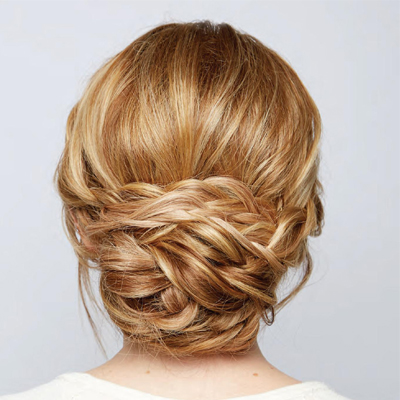
15Finished look.
-
 16
16Finished look.
-
 17
17Finished look.

More from
Stephanie Brinkerhoff
-
Bridal
4 Bridal Styling Mistakes & How To Solve Them
-
BTC University
Bridal Client Struggles? How To Book, Schedule and Handle Brides
-
Beachwaves
Boho Bridal Crown Braid
-
Bridal
8 Bridal Styles You Can Learn Right Now
-
Bridal
Bridal Stylists: 5 Tips For Working During A Pandemic
-
Beachwaves
7 Articles That’ll Take Your Styling Game To The Next Level In 2019
-
Bridal
5 Photography Tips That’ll Elevate Your Bridal Styles
-
Bridal
7 Tips For Perfectly Imperfect Bridal Styles
-
Bridal
Bridal Stylists: This Chart Will Make Consultations So Much Easier
-
Braids
@hairandmakeupbysteph’s Crown Braid
-
#thebtcshow Austin 2017
Want To Keep Your Blondes Blonde and Your Upstyles Solid? Read This…
-
#thebtcshow Austin 2017
The Behind The Chair Show 2017: Day 3
-
#thebtcshow Austin 2017
TRUMATCH by Daniel Alain at #thebtcshow
-
#thebtcshow Austin 2017
The Behind The Chair Show 2017: Day 2
-
#thebtcshow Austin 2017
Kenra Professional at #thebtcshow
-
Bridal
3 Bridal Style Issues: Solved
-
Bridal
5 Bridal Styling Tricks You Should Be Using
-
Bridal
Every Upstyle Should Start With This…
-
Braids
Beachy, Five-Strand Braid
-
News
The BTC #Squad Spills It All: Color Melts, Balayage & Going Platinum
-
BTC COLOR, Cut & Style Show
COLOR, Cut & Style 2016
-
Hair Extensions
BTC Exclusive! TRUMATCH Hair Extensions
-
BTC "On Tour"
BTC “On Tour” LA 2017
-
Bridal
How-To: 4 Upstyles For Wedding Season
YOU MIGHT LIKE THIS
-
Hair
Braided Fishtail Chignon
-
Braids
Braided Romance from Stephanie Brinkerhoff
-
Hair
Jennifer Aniston’s Twisted Upbraid
-
Hair
Double Fishtail Wrapped Chignon from Joico
-
Hair
Braided Silk Chignon from Schwarzkopf Professional
TRENDING NOW!
-
BTC Hair Trend Report
The Biggest Haircut Trends of 2024
-
Monthly Product Launch List
11 New Game-Changing Hair Launches To Add To Your Arsenal
-
Copper
What Is The "Cowboy Copper" Hair Trend? Here's What It Really Means...
-
Frizz
Straighten & Smooth 2A, Fine-Medium Density Hair
-
Copper
Muted Bronze
-
Blonde
Conditioner Before Toner: Common Hair Myth Debunked
-
BTC Hair Trend Report
WWYD: How Hairstylists Are Navigating Inflation
-
Haircuts
SHAG 101: The Dos And Don'ts

