
Blazing Low Lights Cut Step-by-Step from Scruples

Advertisement
Advertisement
Blazing Low Lights Cut Step-by-Step from Scruples
HOW-TO STEPS 
-
 1
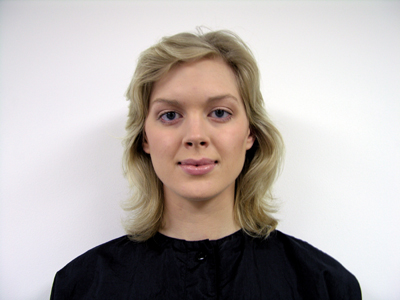
1Sarah first received a trendsetting : progressive haircut from the Scruples Portals Collection.
Head shape: narrow forehead/temple with strong jaw line
Face shape: rectangle
Natural color: Level 6, virgin hair
Products Used
Urban Potions® : cutting edge conditioning foam, thermal styling spray, texturizing pomadeCredit
Lee Storey -
 2
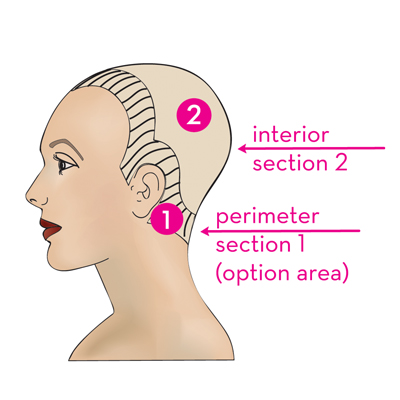
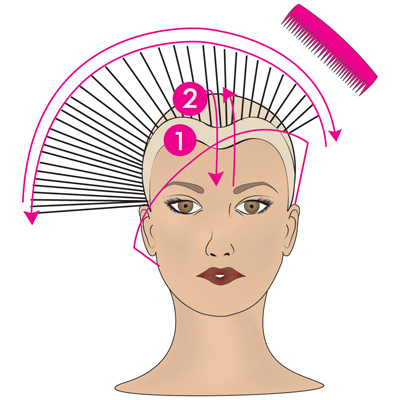
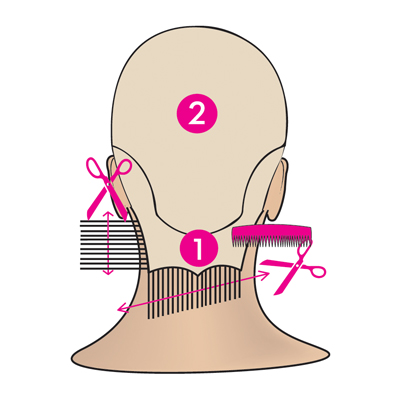
2Begin by parting off a 1 to 3 inch section around the entire perimeter of the head and clip out of the way. This is section 1, an “option area” used with the Self-Tour Discovery Process.
Make section 1 thick enough to allow for creativity. The remaining hair will become section 2. -
 3
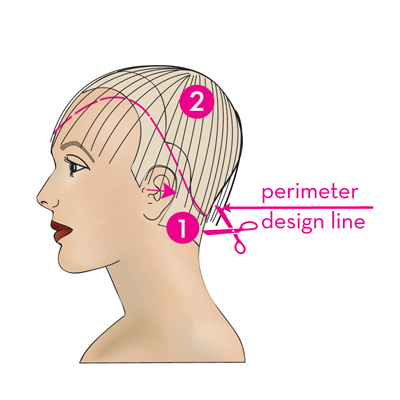
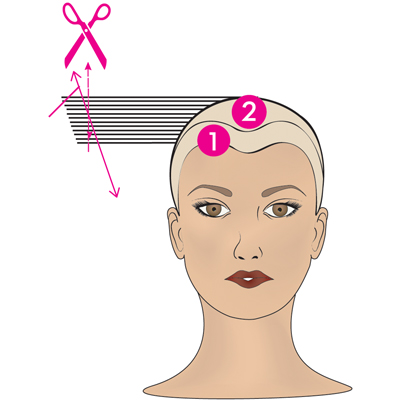
3Predetermine the perimeter design of the low elevation wedge in section 2. This is the interior cut (doesn’t include section 1). Comb all of the hair in section 2 into a natural fall.
-
 4
4Begin at the shortest point of your perimeter design. Comb the hair to a 1 finger elevation and cut the design.
-
 5
5Continue around the head. Do not cut any hair in section 1 at this time.
-
 6
6Check the cut by combing all of the hair in section 2 in every perimeter design line direction so there are no longer pieces.
-
 7
7Comb the hair out from the head in vertical sections and gently soften the top corner with a shear. Do this throughout section 2.
-
 8
8Cut section 1, the option area perimeter line, by combing the hair in section 1 straight down and cutting it at the desired length.
-
 9
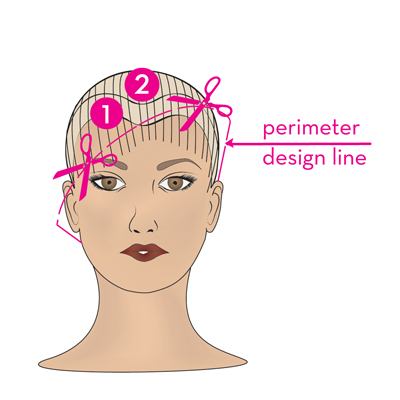
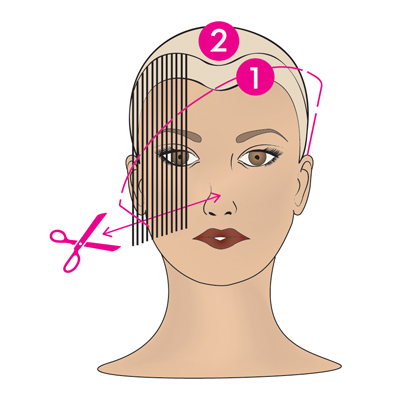
9Personalize the cut by framing the front fringe perimeter in an apposing line to the interior perimeter design line. Soften as desired with a razor.
-
 10
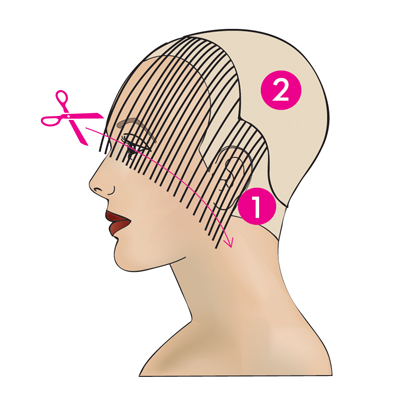
10This cut has a harder edge in the back hairline section to appose the softness in the front. An asymmetrical back was cut using a scissor over comb technique.
-
 11
11
YOU MIGHT LIKE THIS
-
Hair
Long, Layered Golden-Beige from Scruples
-
Hair Color
Blazing Low Lights Color Step-by-Step from Scruples
-
Hair Color
Scruples Haircare Jessie Color How-To
-
Hair Color
Scruples Haircare Roxy Color How-To
-
Hair Color
Scruples ILLUSIONIST Emilee Colour How-To
TRENDING NOW!
-
BTC Hair Trend Report
The Biggest Haircut Trends of 2024
-
Blonde
Conditioner Before Toner: Common Hair Myth Debunked
-
Monthly Product Launch List
11 New Game-Changing Hair Launches To Add To Your Arsenal
-
Copper
What Is The "Cowboy Copper" Hair Trend? Here's What It Really Means...
-
Copper
Muted Bronze
-
Haircuts
SHAG 101: The Dos And Don'ts
-
Frizz
Straighten & Smooth 2A, Fine-Medium Density Hair
-
Business
Don't Fall Victim To Hair Industry Greenwashing—Read This First

