
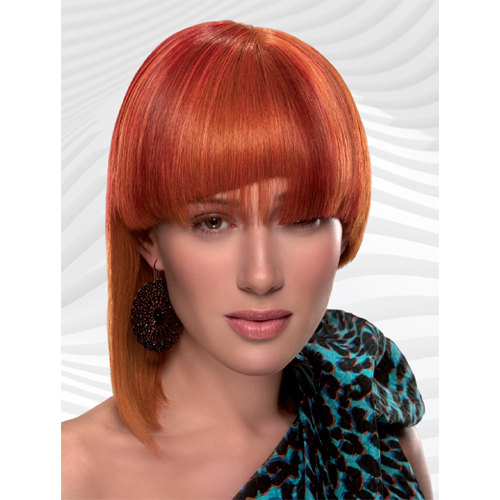
Asymmetrical, Funky Cut from Alfaparf

Advertisement
Advertisement
Asymmetrical, Funky Cut from Alfaparf
HOW-TO STEPS 
-
 1
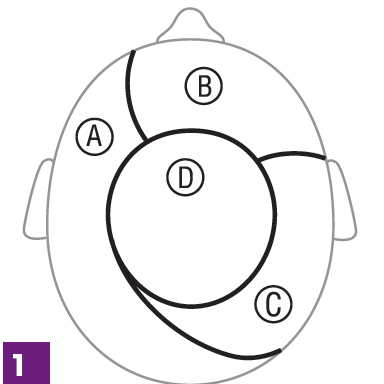
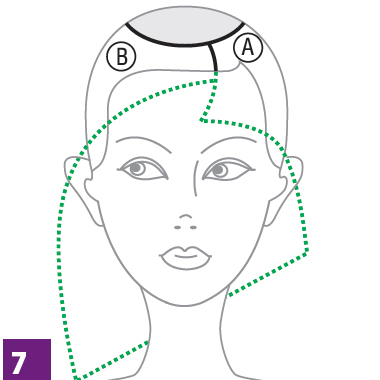
1Divide the hair into panels as shown. See additional views on the following pages.
-
 2
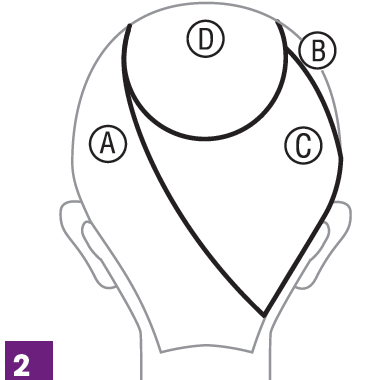
2Divide the hair into panels as shown. See additional views on the following pages.
-
 3
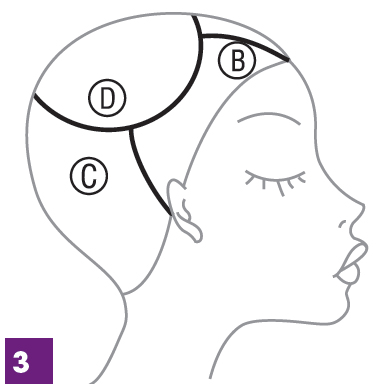
3Divide the hair into panels as shown. See additional views on the following page.
-
 4
4Divide the hair into panels as shown. See additional views on the previous pages.
-
 5
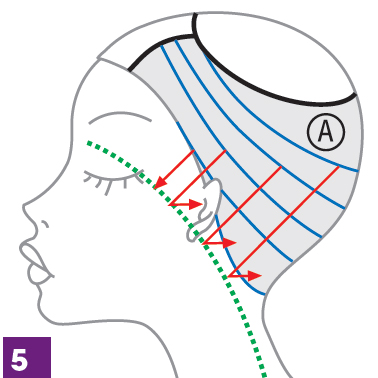
5Divide panel A into diagonal sections following the head shape. The cutting line must be rounded, shorter at the forehead and ending slightly longer at the back of the head. Work around the head, continuing to lift the sections higher and higher to create a soft graduation.
-
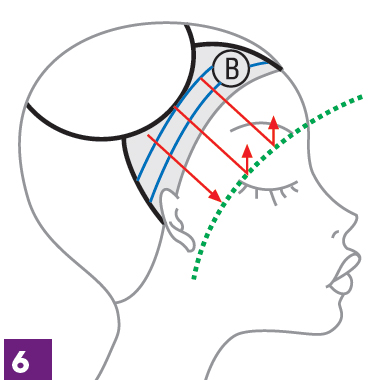 6
6Panel B: Using the same technique, continue with panel A, creating a soft graduation from the
forehead on the other side. Cut a shorter fringe than panel A to create a sharp and visible disconnected perimeter. See an additional view on the next page. -
 7
7Panel B: Using the same technique, continue with panel A, creating a soft graduation from the
forehead on the other side. Cut a shorter fringe than panel A to create a sharp and visible disconnected perimeter. See an additional view on the previous page. -
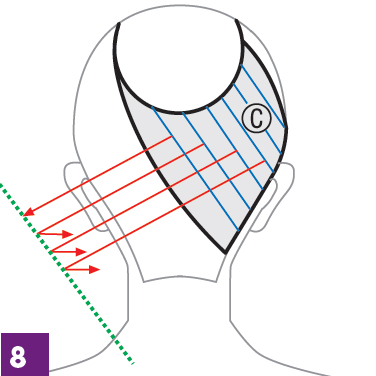 8
8Start from the back of panel C, using section A’s perimeter as a guideline. Cut a diagonal line, moving the sections forward and overlapping them with the hair on the side of the head; in this way the hair will go from short to long toward the forehead.
-
 9
9Panel D: Start at the front, using section A as a guideline. Comb the hair upwards and cut a squared line. Continue overdirecting each section to the previous one.The hair length will create a soft fringe over panel B. See an additional view on the next page.
-
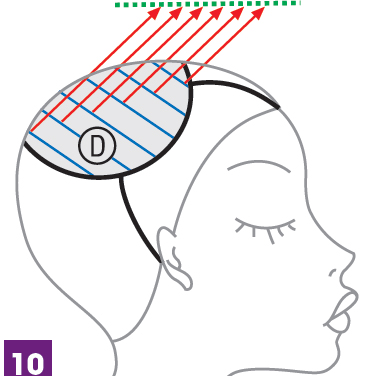 10
10Panel D: Start at the front, using section A as a guideline. Comb the hair upwards and cut a squared line. Continue overdirecting each section to the previous one.The hair length will create a soft fringe over panel B. See an additional view on the previous page.
-
 11
11After blow-drying the hair, softly cut panel C and D’s perimeters to add softness, contrasting with the sharp perimeter of panel A and B.
And you’re done!
See the color how-to!
YOU MIGHT LIKE THIS
-
Blonde
3-D Blonde from Alfaparf
-
Hair
Tramonto Twist from Alfaparf Milano
-
Hair
“Alba” Updo from Alfaparf Milano
-
Hair
Graduated Crop How-To from Alfaparf
-
Hair Color
Tone-on-Tone Brunette from Alfaparf Milano
TRENDING NOW!
-
BTC Hair Trend Report
The Biggest Haircut Trends of 2024
-
Copper
What Is The "Cowboy Copper" Hair Trend? Here's What It Really Means...
-
Curly
Long Layers: 10 Pro Tips + Common Cutting Mistakes
-
Blowouts
Bombshell Blowouts: 4 Ways To Create Lift With Longevity
-
Frizz
Straighten & Smooth 2A, Fine-Medium Density Hair
-
Copper
Muted Bronze
-
Ask A BTC Expert
5 Foil Tips & Tricks From @the.blonde.chronicles
-
Haircuts
SHAG 101: The Dos And Don'ts

