Last updated: February 27, 2018
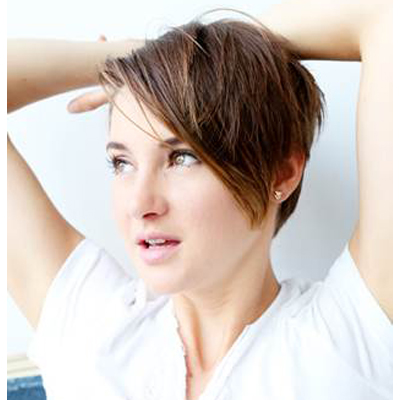
Shailene Woodley’s Chic Cut and Style
Effortlessly striking. That’s what Divergent star Shailene Woodley’s latest look embodies. In just seven steps, you can style an adorable pixie, or even a longer layered ‘do, adding volume, texture and body to create a lived-in look and feel. The pros at 12 Benefits share their simple and stylish how-to, so you pump up your clients limp locks.
Learn more about 12 Benefits Products!
For more information visit, www.12benefits.com.
Manufacturer: 12 Benefits
HOW-TO STEPS 
1
Create a horseshoe parting just above the round of the head to separate the top and bottom sections of the haircut.
2
On the bottom section, create a 90 degree vertical parting just behind the ear and cut to desired length.
3
Repeat step two moving toward the front of the head. The last two vertical partings at the front of the head shape should be overdirected back to the previous parting to maintain some length at the front.
4
Continue step two around the rest of the head shape and repeat step three at the front on the opposite side.
5
Across the top of the head, create a parting from the back of one ear to the other.
6
Create a horizontal parting starting at the back of the ear and cut it to match the guide you established with the bottom section of the haircut.
7
As you move toward the front of the head, drop your guide in the horizontal parting to the desired length in front. (The hair should be getting longer as you move toward the front of the head.)
8
Continue with horizontal partings, using the previous section as your guide, until you cross the center line of the head.
9
Repeat step eight on the opposite side of the head.
10
On top section of the haircut, use Faceted Layers (e.g., the top of a stop sign) on the back and front of the hair shape using horizontal partings.
11
Create 90 degree partings across the top of the head. You will see a point at the top of the section that you can chose to remove or leave. If you remove the point, repeat this step from front to back.
12
Work your way around the perimeter of the haircut and use point cutting to individualize the shape.
13
Finally, work your way through the front and top of the hair shape and add texture and remove bulk with point-cutting, slide-cutting, deep parallel point-cutting, etc., to further individualize the haircut.
14
Dispense 5 pumps of 12 Benefits Love At First Lather shampoo in your hand, gently massaging into the scalp, then thoroughly rinse.
15
Follow with 12 Benefits Conditional Love Hair Moisturizer. Apply for 30 seconds, then rinse.
16
Spritz 12 Benefits Instant Healthy Hair Treatment throughout towel-dried hair and comb through.
17
Blow-dry hair flat, toward the head in the back. Use a round brush to add volume towards the top.
18
Lightly mist 12 Benefits Rapid Blowout Argan Oil Spray through hair. Flat iron just enough to smooth the ends and seal the cuticle.
19
Use ½ pump Pink Addiction instant keratin cream and work through midlengths and ends to polish strands.
20
Finish with your favorite hairspray.