
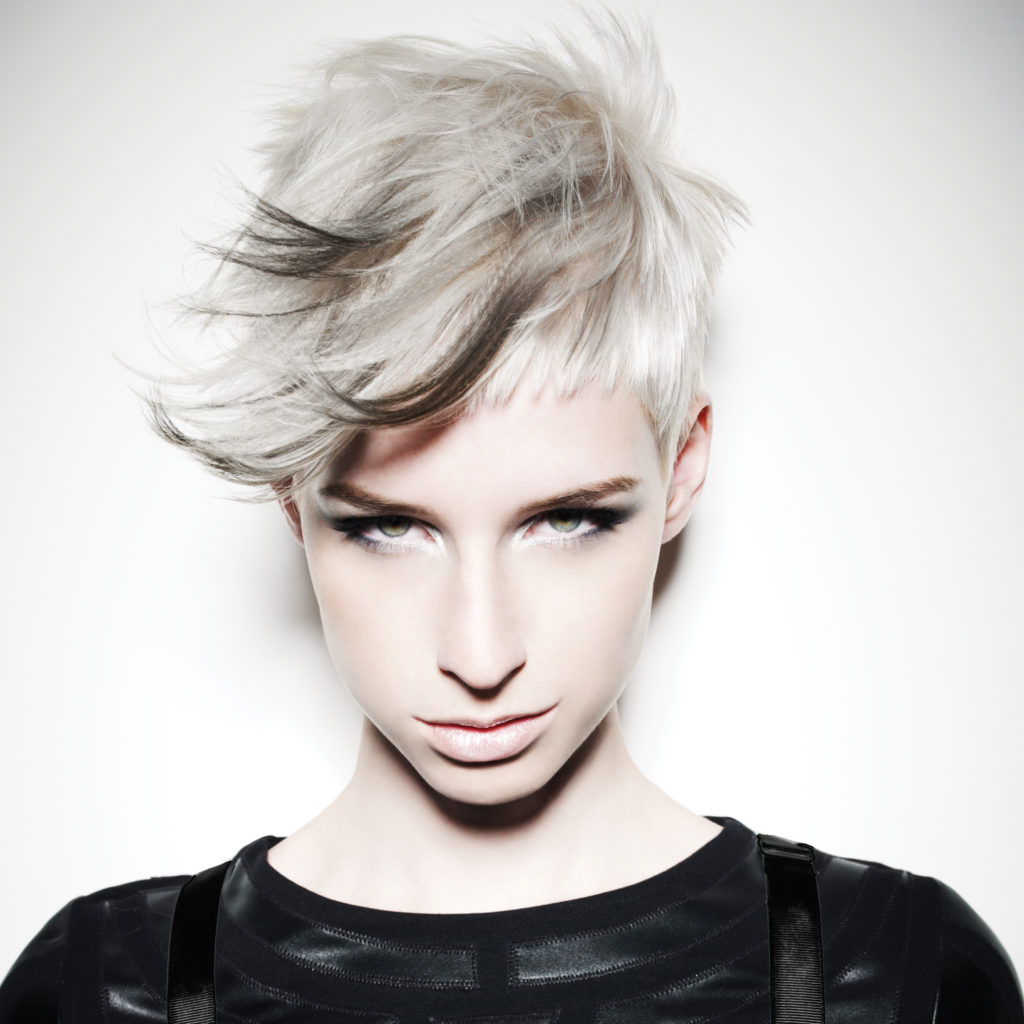
MEMBERS ONLY: Cool Crop with Contrasting Color from L’ANZA

Advertisement
Advertisement
MEMBERS ONLY: Cool Crop with Contrasting Color from L’ANZA
HOW-TO STEPS 
-
 1
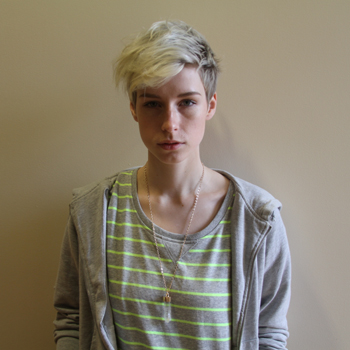
1Before the tomboy transformation.
-
 2
2Gray: Demi permanent formula
10g 8AX + 10g 9A + 40g demi cream developerBlack: Demi permanent formula
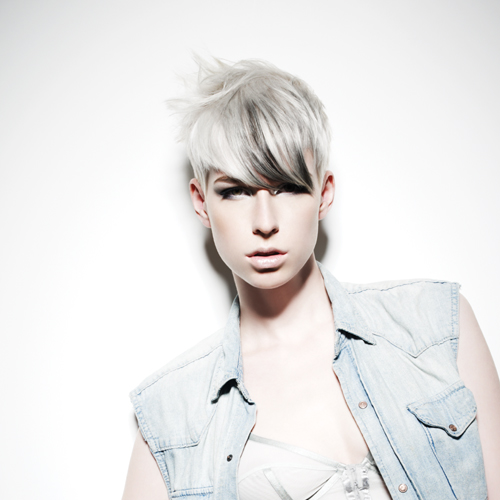
10g 1N + 20g Demi Cream Developer -
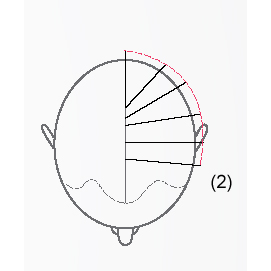
 3
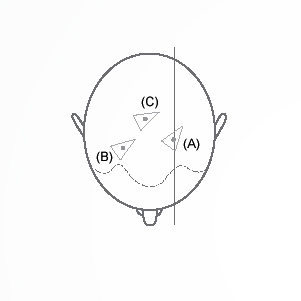
3Create three small triangular partings on the top of the head.
A. The first is above the right eye (on the part line) about 1½” from the hairline.
B. The second is above the left eye (opposite the part) about ½” from the hairline.
C. The third is about 1” behind and between the two previous triangles. -
 4
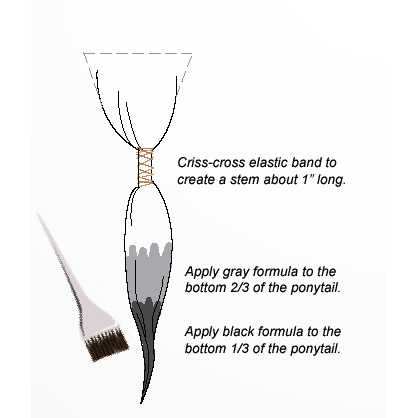
4Tie each of the other three sections into a ponytail, winding the elastic band downward about ½” inch.
Apply the gray formula to the bottom 2/3 of the ponytail, using the edge of your color brush to create a diffused line. As you approach the elastic, do not separate or saturate the hair. This will help diffuse the color into the base color.
Apply the black formula to the bottom 1/3 of the ponytail (over the gray formula), using the edge of your color brush to create a diffused line. Wrap strand in foil.
Repeat for each ponytail.
Process for 5 minutes and rinse each ponytail.
Cut out elastic bands with shears or razor.
-
 5
5Starting at the nape and working through Zones 1 and 2, use scissor-over-comb creating a square shape.
-
 6
6In Zone 3 (above the parietal ridge), direct sections outward to the sides of the head and connect to the hair in Zone 2 (at the squarest part of the head), you establish a weight line.
-
 7
7At the crown, bring your section straight up, with an aggressive carving motion, creating peaks and valleys.
-
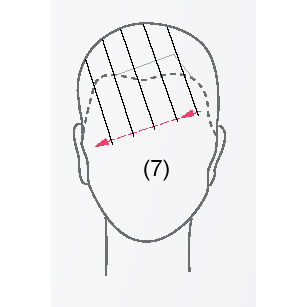
 8
8Over-direct sections at the front toward the high point of the head to maintain length.
-
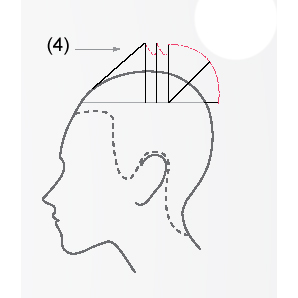
 9
9For the fringe, take a 1” triangular section over the eye (with point at the part). Be sure to check growth pattern to ensure hair will lay in the appropriate direction. Cut your triangular section close to the hairline to open the area above the eye. Use your discretion regarding placement of the line – consider face shape, hairline, etc. Chip into the fringe to create a strong, shattered line.
-
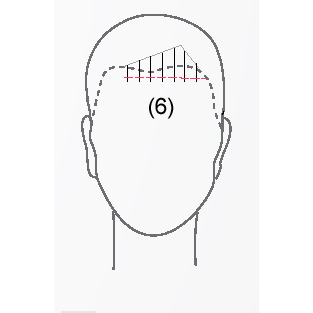
 10
10With the remaining length in the front, over-direct toward the undercut section. Cut to create a teardrop shape from shorter to longer. Carve into the perimeter of the fringe to remove the desired amount of weight.
-
 11
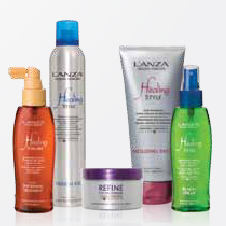
11Mist damp hair with Healing Volume Daily Thickening Treatment. Blow dry with fingers or brush. Mix a small amount of Refine Styling Pomade and Molding Paste together in hands; run hands through dry hair to create separation and direction. For a more dramatic style, blow dry hair as noted above. Mist dry hair with Beach Spray and blow dry up and away from the scamp. Mist with Design F/X to lock style into place.
-
 12
12The final look.
YOU MIGHT LIKE THIS
-
Hair Color

Cool Crafted Crimson
-
Bobs
Cool, Contoured Lob
-
Blonde
SHADES OF SILVER
-
Brunette
How-To: Cool-Toned Brunette
-
Color Melt
How-To: Titanium Ice
TRENDING NOW!
-
BTC Hair Trend Report
The Biggest Haircut Trends of 2024
-
Monthly Product Launch List
11 New Game-Changing Hair Launches To Add To Your Arsenal
-
Copper
What Is The "Cowboy Copper" Hair Trend? Here's What It Really Means...
-
Frizz
Straighten & Smooth 2A, Fine-Medium Density Hair
-
Copper
Muted Bronze
-
Blonde
Conditioner Before Toner: Common Hair Myth Debunked
-
BTC Hair Trend Report
WWYD: How Hairstylists Are Navigating Inflation
-
Haircuts
SHAG 101: The Dos And Don'ts

