
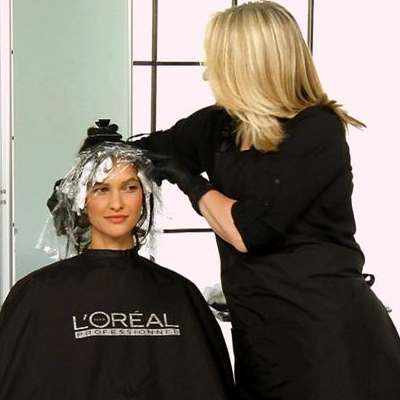
Cinnamon Balayage from L’Oréal Professionnel

Advertisement
Advertisement
Cinnamon Balayage from L’Oréal Professionnel
VIDEO 
HOW-TO STEPS
-
 1
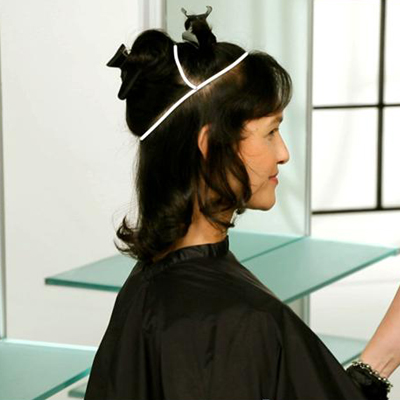
11. Working with the shape of the haircut, create a horseshoe section from the natural parting of the fringe to the top of the occipital bone. Separate the front from the back with a profile parting from the control point to the top of the parietal ridge. Secure both non-working sections with two butterfly clips.
-
 2
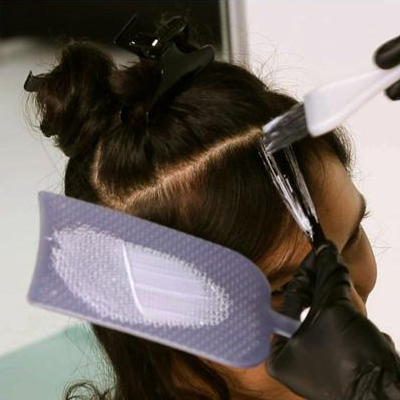
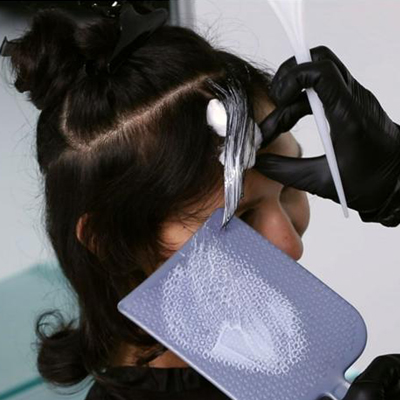
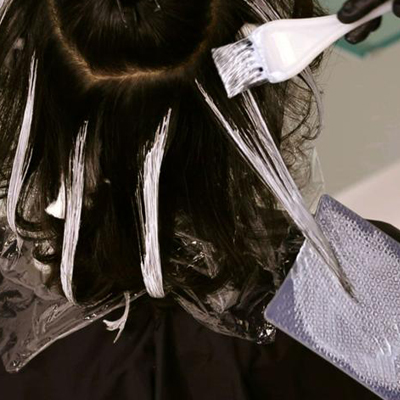
22. Start from the natural parting in the fringe and create a medium size balayage check. Paint the lightening product from Zone Two of your check, feathering to the top of Zone One, on both sides, to create a two-point balayage highlight.
-
 3
33. Place cotton vertically under the highlighted piece to protect the hair underneath. Continue working in the front of the head, taking medium checks, painting two-point pieces, and complete the hairline section.
Tip: Saturate Zone Three on both sides by placing the highlight onto the planchette, into your lightening product, and sweeping lightener through to the ends.
-
 4
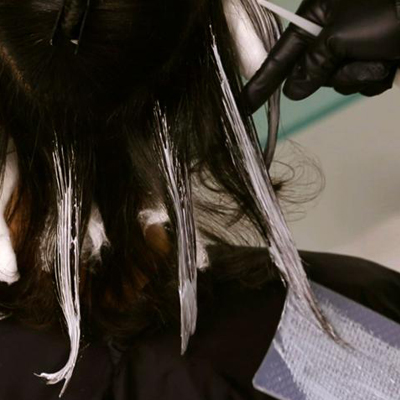
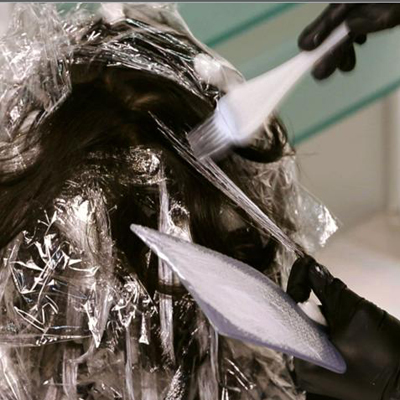
44. In the back of the head, below the occipital bone, pick up large balayage checks. Paint single-point, sweeping highlights, working with the movement of the haircut and natural texture of the hair. Apply the product from Zone Two, feathering up to Zone One, then sweep through to the ends, saturating both sides of the hair in Zone Three. Repeat until complete.
-
 5
55. Place perforated plastic over each completed section.
-
 6
66. Continue working up the head. Create a circular section, working off of the natural parting in the front to the bottom of the control point. Pick up medium-sized balayage checks, using the shape and texture of the haircut as a guide, and paint single-and double-point highlights to create variance in the lightness and movement in the cut.
Tip: Don’t forget to place cotton vertically under each highlighted piece! -
 7
77. Place perforated plastic over the completely highlighted sections. Drop the final section of hair at the top of the crown, and divide into two balayage checks. Highlight two, double-point pieces to complete the application.
-
 8
88. Place perforated plastic over the final highlighted section. Process lightened pieces to desired level of lift; then rinse, shampoo, treat and style!
-

-
YOU MIGHT LIKE THIS
-
Balayage

Shimmering, Strawberry Balayage from L’Oréal Professionnel
-
Balayage
How To Enhance Naturally Curly Hair With Balayage
-
Balayage
Golden Lights from L’Oréal Professionnel
-
Balayage
Icy Blonde Balayage
-
Balayage
Copper Shine Lights
TRENDING NOW!
-
BTC Hair Trend Report
The Biggest Haircut Trends of 2024
-
Blonde
Conditioner Before Toner: Common Hair Myth Debunked
-
Monthly Product Launch List
11 New Game-Changing Hair Launches To Add To Your Arsenal
-
Copper
What Is The "Cowboy Copper" Hair Trend? Here's What It Really Means...
-
Frizz
Straighten & Smooth 2A, Fine-Medium Density Hair
-
Copper
Muted Bronze
-
Haircuts
SHAG 101: The Dos And Don'ts
-
BTC Hair Trend Report
WWYD: How Hairstylists Are Navigating Inflation

