Your Complete Guide To Cutting ’70s Curtain Fringe
’70s Curtain Fringe-Cutting Tips From @joeltorresstyle
Shall we shag now or later? The ’70s shag haircut—think choppy, face-framing layers with texture for days—resurfaced a few years ago and we’ve been feelin’ the fringe frenzy ever since. Whether they create a subtle frame around the face or a dramatic curtain sweeping effect, all the best shags are paired with fringe. That’s why we’re breaking down texture master Joel Torres’ (@joeltorresstyle) best fringe-cutting tips and videos to achieve face-framing, asymmetrical and concave curtain bangs. Get it all below!
1. Fringe Factors: How To Choose The Best Fringe
Here’s how to determine the most flattering, wearable fringe for your client’s hair type:
- Density: This is the biggest factor. “If someone has finer texture around the hairline, I will move farther back with a triangular section,” says Joel. “Or I can change it more into a square or rectangular [section] to incorporate some of the sides to make the illusion of having more hair.” This shape will add fullness.
- Texture: Clients with curly hair? How do they wear it on a daily basis? Cutting a longer or asymmetrical fringe works best if they typically wear it curly. Always avoid cutting curls too short, otherwise they might shrink into a micro bangs situation. For clients with short and small curls, Joel uses a different approach—a freehand technique to embrace natural movement.
2. Cutting Wet Vs. Dry Cutting Techniques
Let’s get technical. The shag is all about texture and personalization BUT also relies on strong lines and precision-cutting. That’s why Joel cuts the hair 70 percent wet (its elasticity makes it easier to control tension), then blows it out the way it’s going to be styles and texturizes on dry hair. Here’s why: “Wet hair is easier to cut,” says Joel. “Dry hair reveals the reality, so you know where to texturize, detail and remove weight.”
When moving between wet- and dry-cutting, it’s important to adjust your product strategy to create the best canvas for each technique. Follow this guide:
- Cutting Lotion: Be consistent. Joel uses the TIGI Professional® Custom Create™ Texturising Sea Salt Spray like a primer because he knows he will use it later to finish and style the haircut. It also adds grip.
- Prep Dry-Cutting: For clients with straight and frizzy hair, apply TIGI Custom Create™ Split End Repair Cream before blow-drying so the hair is conditioned and easier to cut dry.
- Avoid Heat Damage: Applying TIGI Custom Create™ Heat Protection Spray before the blowout will fight breakage and add smoothness for cutting.

3. Face-Framing Curtain Fringe
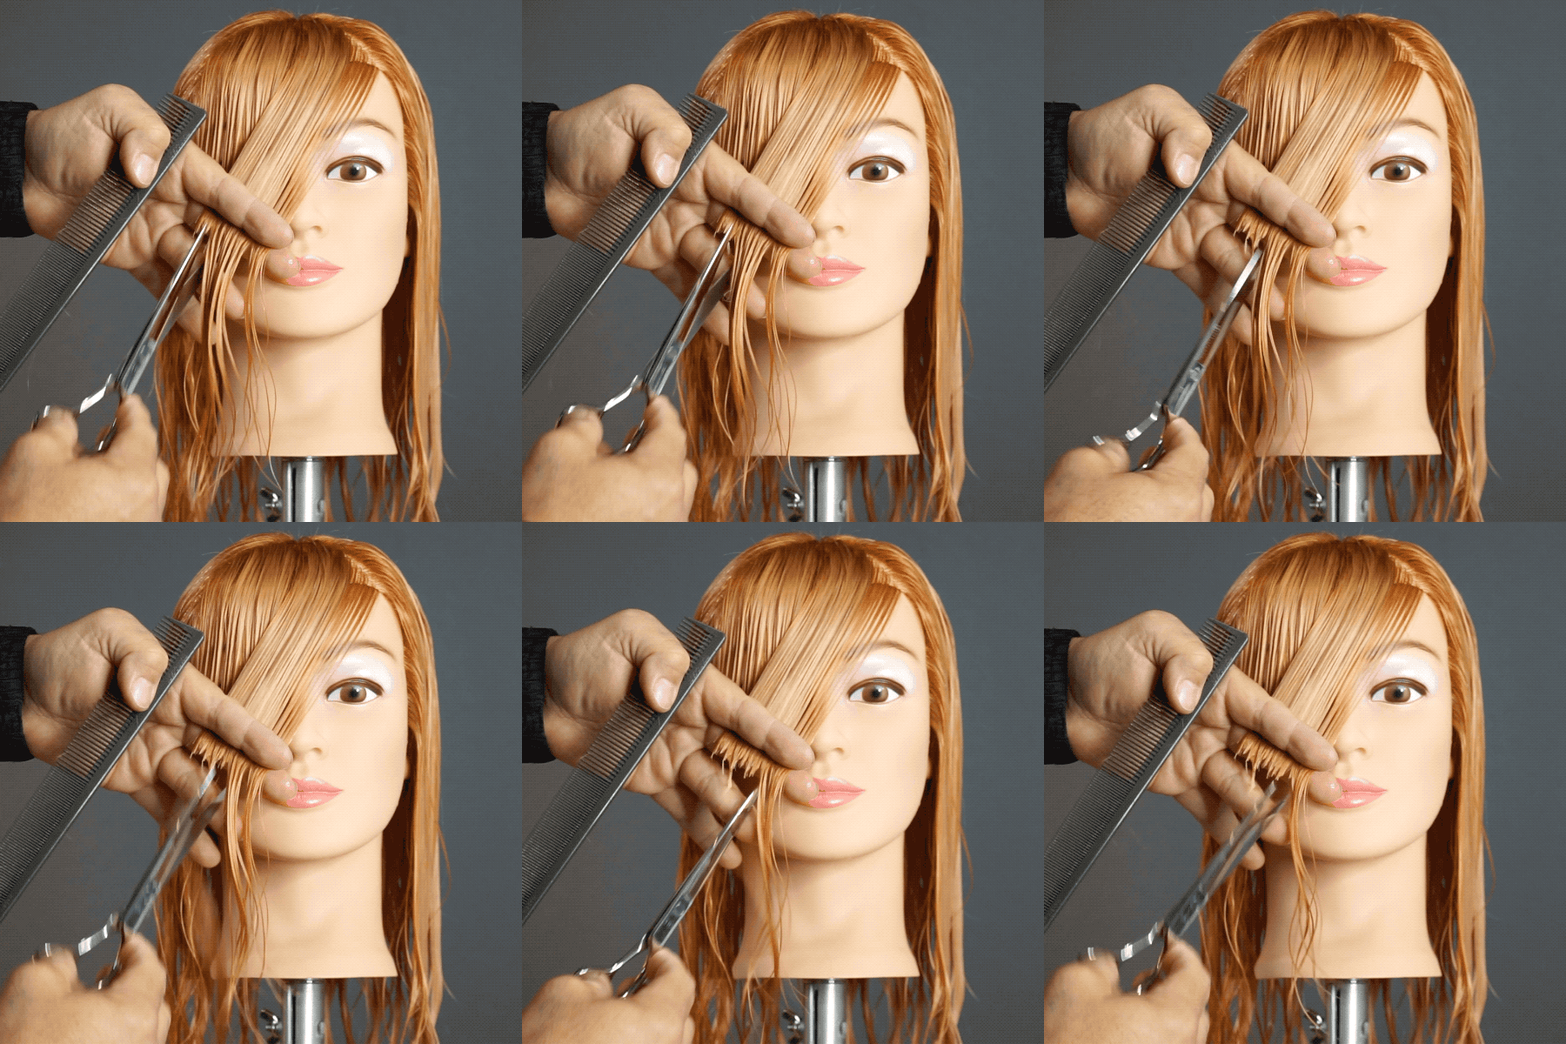
The key to face-framing fringe is getting the hair to split and push away from the face. Here’s how: Working off a triangular section and cutting from short to long will keep the center shorter and the sides slightly longer. You should use the dryer to assist in creating that movement before dry-cutting so the hair is cut the same way it’s styled. (get more face-framing tips here!). Watch Joel’s entire technique below:
View this post on Instagram
4. Concave Curtain Fringe
Use this dryer and comb trick to master concave movement: “Sometimes when you use a blow-dryer and a round brush, the entire section moves away from the face,” says Joel. “The comb allows you to only direct the corner so the hair is straight and then moves to the side and right on top of the eyebrow.” This helps create movement while still maintaining the length—see how it’s done at 0:33 in the IGTV video below.
View this post on Instagram
5. Asymmetrical Curtain Fringe
This technique is similar to the others but instead of working off the center part, take the entire fringe section to just one side—work from the top of the eye to the cheekbone on the opposite side. Watch the video below to see how it’s done!
View this post on Instagram
Products Used
Fringe fever?! Scroll through our shag photo gallery for more inspo!

More from
TIGI® Professional
-
BTC Hair Trend Report
The Biggest Haircut Trends of Fall & Winter 2023
-
BTC Hair Trend Report
Your Complete Guide To Color Blocking
-
Bobs
Retouch Haircuts: 4 Ways To Touch-Up Your Client’s Cut
-
Conditioners
5 Tips For A Personalized, Lived-In Shag
-
Conditioners
Juxta-pose™ Dry Serum
-
Frizz
Contortionist™ Flexible Hairspray
-
Frizz
Wave Rider™ Versatile Styling Cream
-
Conditioners
Base Player™ Protein Spray
-
Beachwaves
3 Hair Cheats For Heatless Styling This Summer
-
Blow Dryers
The Secrets To Long-Lasting Supermodel Blowouts
-
Manufacturer
Anthony Mascolo Discusses Bed Head By TIGI’s 25th Anniversary + A New Pro Exclusive Line
-
Coronavirus
COVID-19: What The Current Closure Means For U.K. Salons
-
Haircare
Bed Head Ego Boost™
-
Styling
Salty Not Sorry™ Salt Spray
-
Haircare
Bed Head Gimme Grip™ Shampoo
-
Hair Color
Ruby Copper
-
Balayage
Want To Paint Faster Face-Framing Blends? Watch This!
-
Blonde
4 Color Placement Tips To Work Smarter, Not Harder
-
Balayage
WATCH: Avoid Splotchy Hand Painting With @wesdoeshair’s Secrets
-
Blonde
’90s Money Piece Bob
-
Haircare
Your Client’s Guide To Summer Hair Damage Repair
-
Facebook Lives
Watch: Men’s Clipper & Razor Cutting Tutorial
-
Coronavirus
Beauty Changes Lives Announces An Additional $70,000 In Grant Money Is Now Available
-
Business
3 TIGI Videos To Motivate You In Quarantine


