
Winter Bronde Melts: 5 Blending Hacks You Need To Know
How To Blend A High-Dimension Bronde Color Melt
‘Tis the season of blondes going darker! When the requests for deep roots and dark tones start pouring in, be prepared to deliver flawless color melts with these tips. Transform your blonde clients into high-dimensional works of art using rich tones and quickie techniques from Sally Lemmo (@clevelandhairboss).
Check out the video above for an in-depth breakdown at the tips listed below. Sally shares her full bronde color melt process using L’ANZA Healing Haircare Demi Gloss Liquid Tones on blonde clients who want a change-up for the winter!
1. Brush Root Tap Through Each Section
The goal of any color melt is to create a seamless transition without a visible beginning or end. To achieve this, Sally recommends using a hairbrush to pull the root color through each section once applied. This creates subtle graduation on a blonde base to help blur lines and break up any excess pigment before adding the second shade.
Pro Tip: Sally always uses this technique when working with gray coverage clients. The brush breaks up heavy lines where color may have collected, eliminating over-developing or splotches on the scalp.
2. Overlap Formulas
Sometimes, it’s hard to tell how much blending is too much blending. Color gradients can quickly turn muddy if enough separation is not left between two formulas. Sally emphasizes the importance of overlapping the root shade with your second shade for a high-dimension root melt.
“Don’t be afraid to take your second shade all the way to the root,” Sally explains. “The darker tone will always reign supreme.” This technique helps to blend the two shades seamlessly without over blending and losing contrast.
Pro Tip: To make your blonde clients still feel like they are blonde, go heavy on the root color. “Blonde clients will only think you turned them brunette if you pull color all the way through the ends,” Sally explains. “Avoid going too low on the midshaft with dark tones instead of skimping out on the roots!”
Pick out your client’s perfect bronde shades! Color match 30+ gloss tones HERE
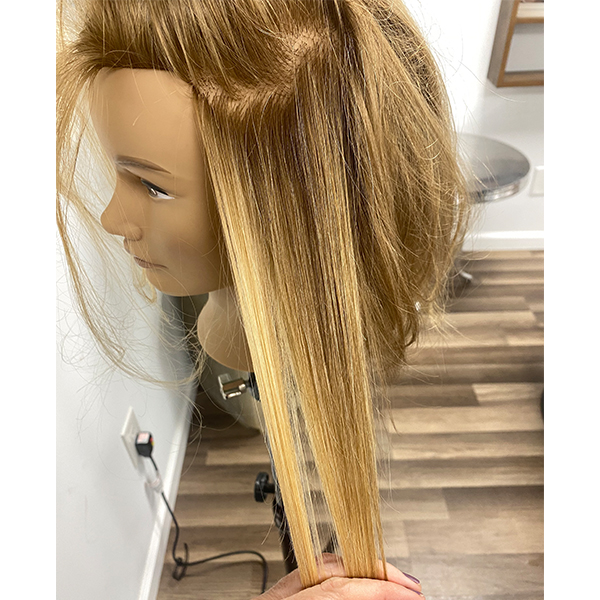
3. Paint On A Diagonal In Triangle Sections
If you want to ensure movement and high-dimensional color, use triangle sections for your color melt. In each section, overdirect the hair back before painting each shade on a diagonal. The triangle sections will create constant movement in the hair while painting on a diagonal emphasis shadows where needed.
Pro Tip: Sally keeps her triangle sections secured in small elastics instead of clips. She says this gives much more control when maneuvering the hair while keeping sections clean without clips getting in the way.
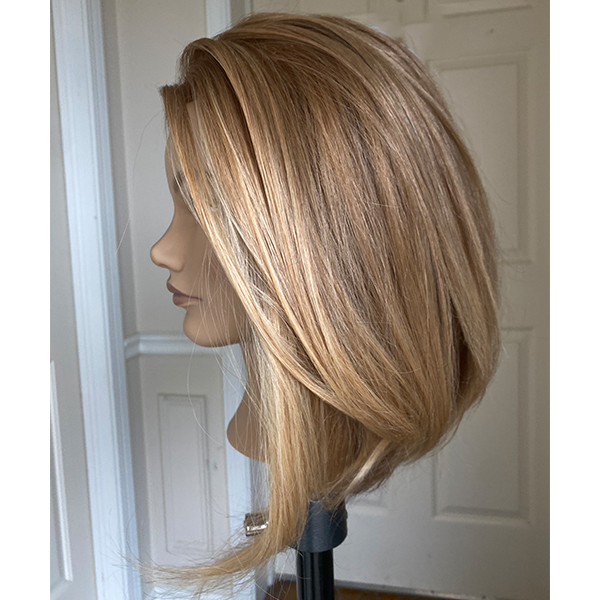
Look at that beautiful gradient!
4. Zig-Zag Part The Hairline
A seamless hairline can make or break a color melt. In areas where clients naturally run their hands through their hair, it’s imperative there are no lines of demarcation.
Zig-zag partings at the hairline will create dimension and add extra detail to the hair framing your client’s face. With the tail of a comb make a deep zig-zag part, creating two sections. For high contrast, apply color slightly farther down the hair shaft in the back section. This will create a deeper base for the front blonde pieces to lay against and pop.
Pro Tip: Keep in mind Sally’s cardinal rule—“Your lightest piece is only as bright as what it lays up against.”
5. Kiss The Ends With Lightener
For the finishing touch on a rich bronde melt, brighten up the ends of the hair with a little lightener. Sally recommends continuing painting on a diagonal line, blending lightener up into the previous colors.
This step will make the light ends pop against the new darker tones, so make sure to not keep lightener on too long. “Keep in mind, we’re not lightening dark hair—the hair is already lightened,” Sally says.

Make sure your client’s blonde base is ready for glossing. Learn the secrets of toning yellow, orange & red hair before bronding:
More from
L'ANZA Healing Haircare
-
BTC Hair Trend Report
Warm, Dimensional Red
-
Balayage
3 Hair Painting Problems + How To Fix Them
-
Gifts
MONTHLY LAUNCH LIST: HOLIDAY 2021
-
New Appointments
L’ANZA Appoints Ludovic Beckers As international Artistic Director
-
Toning 101: Dealing With Yellow, Orange and Red Tones
-
Blonde
5 Foiling Tips To Transition Summer Blondes Into Fall
-
Glossing/ Toning
2 Tips For An Easy Root Smudge Application
-
Blonde
6 Foiling Tips For Bright, Summer Blondes
-
Business
3 CBD Express Add-On Services To Boost Your Ticket
-
Blonde
Watch: Foil Placement Tips For Winter Blondes
-
Blonde
13 ’90s-Inspired Chunky Money Piece Formulas
-
Facebook Lives
Watch: 3 Client-Friendly Styling Tips
-
Mousse
Healing Style Foundation Mousse
-
Conditioners
L’ANZA Wellness CBD REVIVE Shampoo & Conditioner
-
Haircare
L’ANZA Wellness CBD SOOTHING Serum
-
Haircare
Your Client’s Guide To Summer Hair Damage Repair
-
Haircare
Healing Blonde Blonde Rescue
-
Gel
Healing Style Mega Gel
-
BTC Events
BTC “On Tour” New York City 2020
-
Facebook Lives
Video How-To: Shadow Boxing Technique
-
Blonde
Shadow Boxing: Learn This Technique for Rooty Dimension
-
Demi-Permanent Color
LIQUIDS
-
BTC Events
BTC “On Tour” Nashville—Here’s How We Closed Out Our 2019 Tour
-
BTC Events
BTC “On Tour” Nashville

