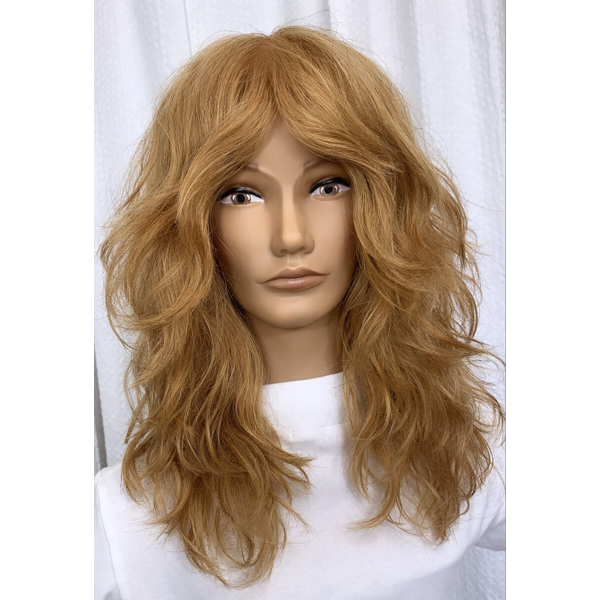
Watch: Razor Cutting & Styling A Shag
Shag 101: Razor Cutting & Styling A Shag
The shag is one of the trendiest haircuts of 2021 worn by celebs and cool girls alike. But, what if you’re not comfortable with the haircut? No worries! SexyHair Visionary Team Artist Antonio Estrada (@antestradahair) and Dawn Atkinson (@hairartistrybydawn) demonstrated cutting and styling a shag haircut that will fit any client!
Keep scrolling for tips on sectioning, cutting the fringe and creating gorgeous volume when styling, then watch the 45-minute video above for the full tutorial. Don’t forget to check out the finished look!
CLICK HERE To Purchase The SexyHair artistrypro Collection At CosmoProf!
Sectioning The Shag
Before beginning the haircut, Dawn sections the hair so she has an easy guide to follow. Pre-sectioning allows you to get familiar with the client’s natural head shape and create a custom cut that fits the client’s face. Here’s how she does it:
- Start by sectioning the bangs. Identify the client’s part, place a comb on the head to determine the apex and then section from the corner of each eye to create the natural fringe.
- Next section off the sides from the top of the head to behind the ears on both sides.
- Create two diagonal back parts forming a deep triangle to section off the crown area, which is where the surface layers will live.
- The rest of the hair going toward the nape will form the interior of the cut.
Pro Tip: If the client has thin or fine hair, section less hair at the crown to avoid taking away too much. But if the client has thick, coarse hair, section deeper into the interior to help remove weight.
Check Out Dawn’s Finished Look!

The Fringe Determines The Cut
Besides being the centerpiece of the haircut, the fringe is also focal point the entire cut revolves around. To get started, Dawn parted her bang section down the middle to create a curtain fringe. She prefers to use a feather razor to add airy texture to the haircut, but if you’re more comfortable with shears you can use those instead. Pull a section laterally at an elevation across the face and cut into the hair letting it fall as you go for a short to long fringe.
The solution to creating soft, airy texture in the curtain fringe is high elevation. The higher the hair is elevated, the more texture and layers you’ll get when the hair falls.
Do This To Create Volume
One of the best things about the shag is that it’s a cut that doesn’t take a lot of maintenance to look good. If the client is missing volume after a few days away from your chair, Antonio recommends you do this to revive their curls.
- First, part the hair following the initial haircut sectioning. This will help create a natural look when styling.
- Mix SexyHair artistrypro Cutting Edge and artistrypro Construct together in your hands and apply to the fringe area to wet and add a light hold. Blow dry the fringe area with a round brush going away from the face. Clip away from the face with flat clips to set.
- At the crown apply SexyHair artistrypro Avant-Guard as a heat protectant. Next, use a 1 ½-inch curling iron to curl the hair away from the face. Place the curled hair in velcro rollers to set, then move on to the next section. Continue until the entire crown and side area is curled.
- Finish off the interior at the nape with soft spirals.
- Once the curls are cool, removed the rollers and let the hair fall into place. Spray artistrypro Avant-Guard to finish.
Pro Tip: You don’t have to use a curling iron exclusively to recreate this look. Antonio recommends using a flat iron and setting the hair in velcro rollers or even using hot rollers to create a bouncy, voluminous end result. Use whatever tool feels more comfortable, but remember the end result!
Check Out Antonio’s Before & After!

Products Used
More from
SexyHair
-
Celebrity
Zendaya’s Waist-Length Braid & Bow Combo
-
Monthly Product Launch List
The Best Hair Launches Of March 2024
-
Blowouts
SMOOTH STUNNER BLOWOUT CRÉME
-
Celebrity
VANESSA HUDGENS’ SLEEK HALF-UP, HALF-DOWN OSCARS LOOK
-
Styling
Ring In 2024 With These It Girl Hairstyling Trends
-
News
How Maui Hairdressers Are Rebuilding Post-Lahaina Fires
-
SexyHair Teams Up With Christina Aguilera For 25th Anniversary Campaign
-
Barbering
How To Style The Biggest Men’s Summer Trends
-
Industry Events
SexyHair® Provides Mental Health Resources For Stylists
-
BTC Hair Trend Report
VANESSA HUDGENS’ BRAIDED SPIKY BUN AT THE 2023 MET GALA
-
Business
15 FREE Classes To Take For Hairstylist Appreciation Week
-
Celebrity
Editor’s Picks: 10 Hair Looks From The 2023 Oscars
-
BTC Hair Trend Report
2023 Hairstyling: 11 Trends You Need To Know
-
Accessories
15 Styling Trends That Will Be Everywhere in Winter 2023
-
Styling
Lizzo’s Sleek & Piecey Emmys Updo
-
Conditioners
Boost Up Shampoo & Conditioner
-
Updos
Vanessa Hudgens’ Twisted Updo
-
Product Launches
Our Editors Picked THESE Must-Try Fall Hair Products
-
New Appointments
Clayton Hawkins Joins SexyHair as Brand Ambassador
-
Celebrity
2022 Met Gala: Your Insider Beauty Recap
-
Product Launches
Monthly Launch List: EARTH MONTH 2022
-
Celebrity
The Best Hair & Beauty Looks From The Oscars 2022
-
Celebrity
Vanessa Hudgens’s Sleek, Braided Bun At The 2022 Oscars
-
Gel
Style SexyHair Hard Up® Hard Holding Gel


