
Rollayage: Balayage With Rollers?

Rollayage: Using Velcro Rollers for Balayage
Wait, WHAT? Using Velcro rollers for balayage? Yep, it’s a balayage cheat busy colorists love, so we’re breaking it down—keep reading to see the when, why and how behind this technique!
What Is Rollayage?
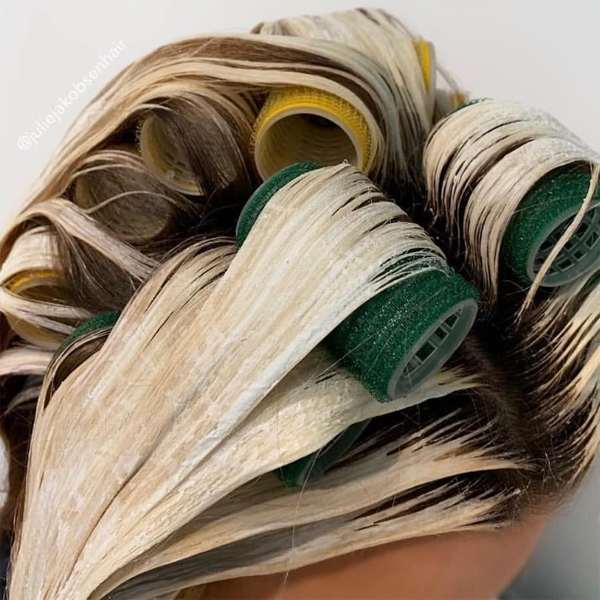
Rollayage is simply using Velcro or self-grip rollers to separate sections of hair during the hair painting process. Why use rollers instead of cotton, meche or other separation materials?
- Cotton has high absorbency, which can prevent clean sectioning, said Leah Freeman (@leahfreeman1), Global Healing Color Director of L’ANZA Healing Haircare. Rollers let you get very close to the scalp.
- A reusable method like rollayage allows you to reduce the amount of single-use items like cotton, foils or plastic films, shared Julie Jakobson (@juliejakobsenhair), a Norway-based hairdresser who loves the technique.
- Specifically for retouch clients, this method can help lift and separate the retouch area from the rest of the hair.

How Does It Work?
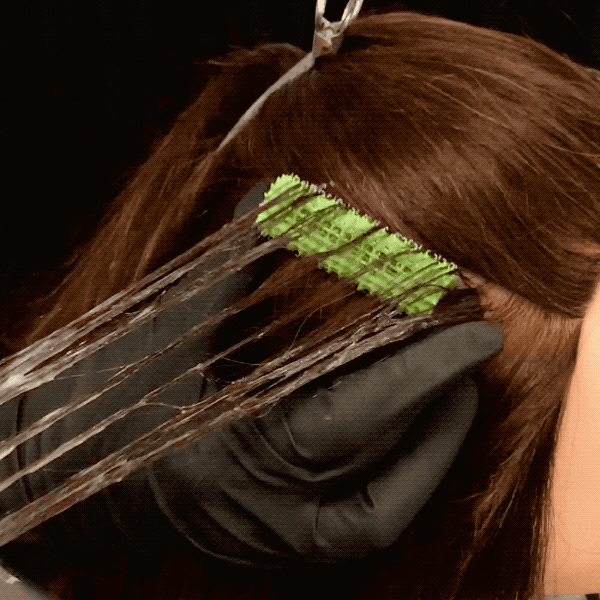
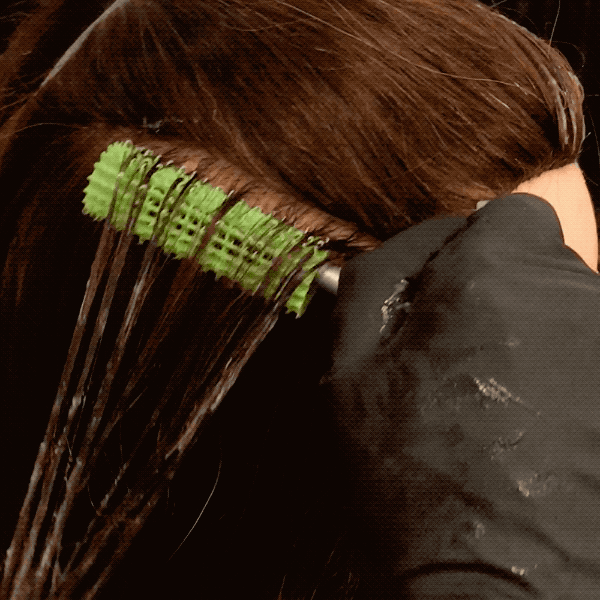
Just bust out those rollers! After a balayage panel is complete, lift the section and place a roller directly under the hair at the base.
Pro Tip: Leah recommends using a larger roller on fine-haired clients!
Scroll through to watch Julie’s technique below!
View this post on Instagram
Use this technique for retouches, too! The roller lets you get super close to the regrowth area. Hold the section with tension, pushing a roller toward the base and directly applying lightener or color to the hair directly on top of the roller. Watch Leah demonstrate below!
Don’t stress about removal. “It was no problem at all to get the rollers out, no stress washing them and I really love the way they separate each balayage piece from each other,” Julie said on Instagram.
Pro Tip: Rinsing the rollers after a service and letting them dry is totally fine. You can also toss them into a lingerie bag and run them through the washing machine, Leah shared!
For a different twist, you can roll the entire section of hair into the roller (separate with a tiny piece of foil), which maintains moisture content for even more lifting power! Watch Leah explain below:
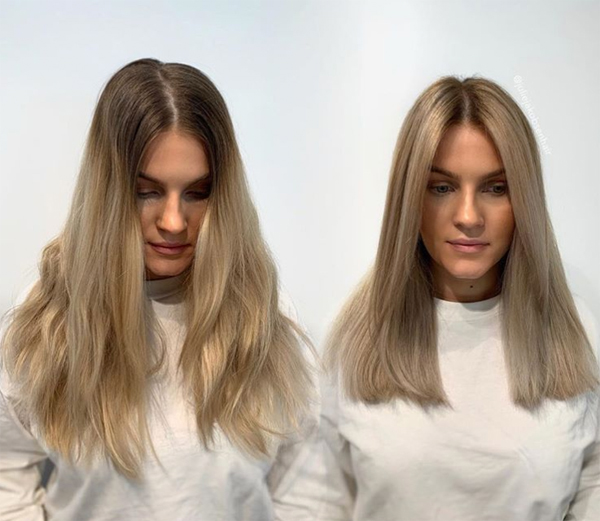
Now check out the results! This is Julie’s client before and after—click the beaker for formulas!

Now Get More Balayage Cheats You Didn’t Know! Click Here!


